6
4 trimmer/edger operation
![]() WARNING: Read and under- stand this owner’s manual before operating trimmer/edger. Make certain you read and understand allSafetyWarningsonpages1and 2 of this manual. Improper use of this trimmer/edger can result in severe injury or death from fire, electric shock, or body contact with moving parts.
WARNING: Read and under- stand this owner’s manual before operating trimmer/edger. Make certain you read and understand allSafetyWarningsonpages1and 2 of this manual. Improper use of this trimmer/edger can result in severe injury or death from fire, electric shock, or body contact with moving parts.
Extension Cords
Use proper extension cord with this tool. Use only a polarized (i.e., one blade is wider than the other), UL listed exten- sion cord marked for outdoor use. The cord must be marked with suffix W or
Use proper sized cord with this tool. Cord must be heavy enough to carry current needed.An undersized cord will cause volt- age drop at trimmer/edger. The trimmer/ edger will lose power and overheat.Follow cord size requirements listed below.
Cord Length | AWG Cord Size |
25 feet | 18 AWG |
50 feet | 16 AWG |
100 feet | 16 AWG |
150 feet | 14 AWG |
Inspect cord often. Replace if damaged.
Connecting Extension Cord
![]() WARNING: Fully seat the ex- tension cord on the inlet plug or power cord of tool. Failure to do so could lead to overheating of trimmer/edger.This could cause a fire that results in personal injury to you or others.
WARNING: Fully seat the ex- tension cord on the inlet plug or power cord of tool. Failure to do so could lead to overheating of trimmer/edger.This could cause a fire that results in personal injury to you or others.
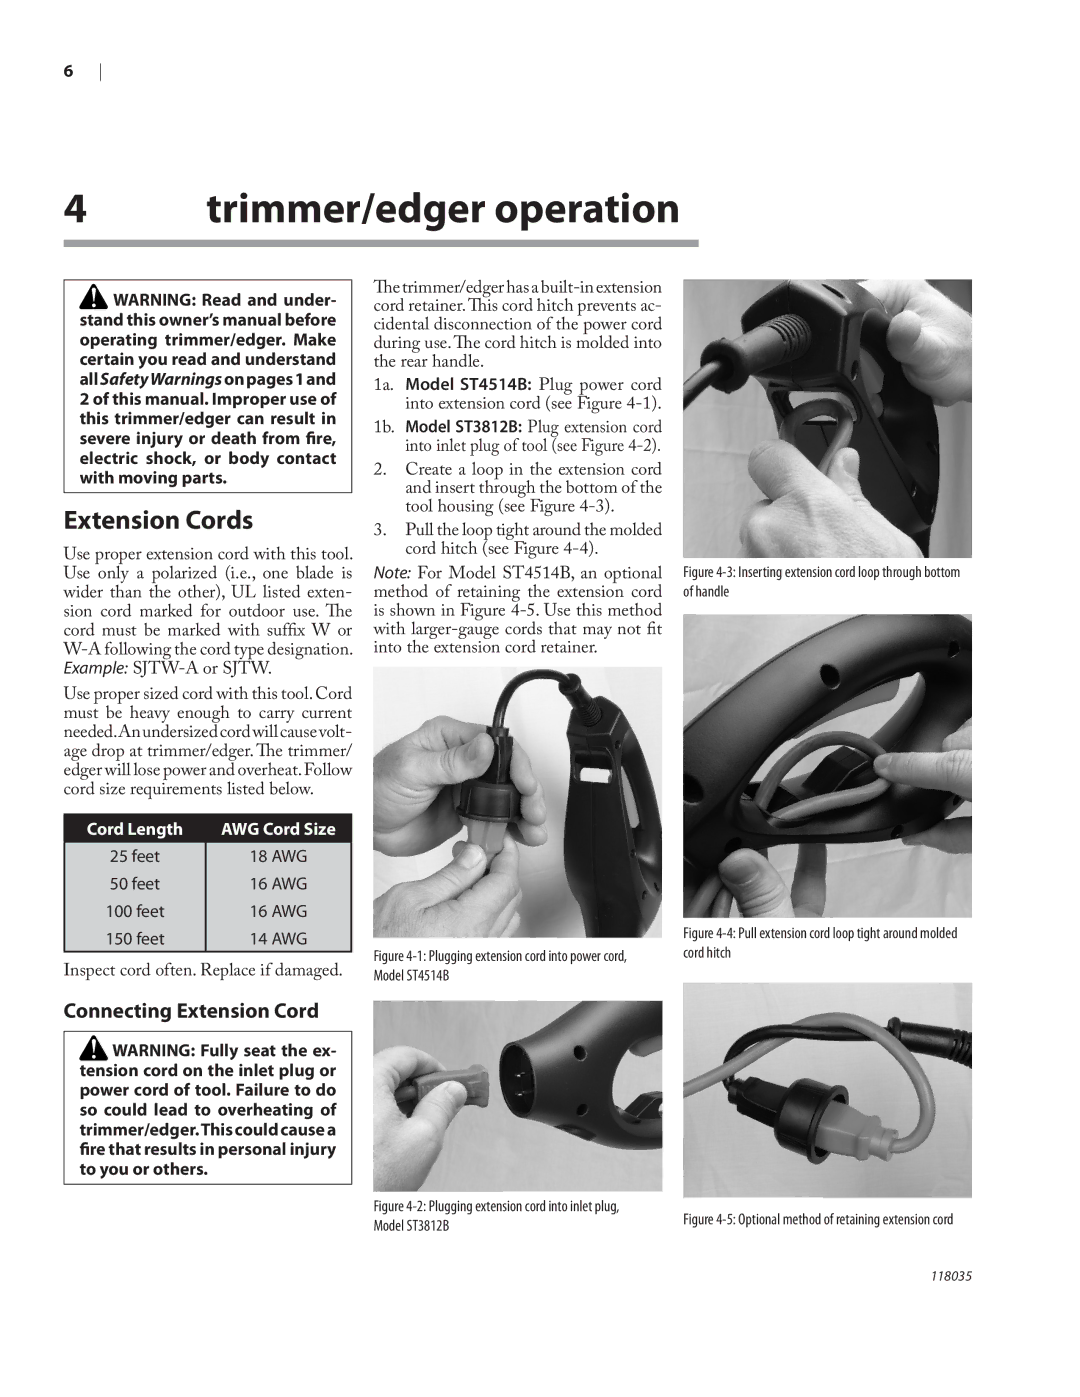
The trimmer/edger has a
1a. Model ST4514B: Plug power cord into extension cord (see Figure
1b. Model ST3812B: Plug extension cord into inlet plug of tool (see Figure
2.Create a loop in the extension cord and insert through the bottom of the tool housing (see Figure
3.Pull the loop tight around the molded cord hitch (see Figure
Note: For Model ST4514B, an optional method of retaining the extension cord is shown in Figure