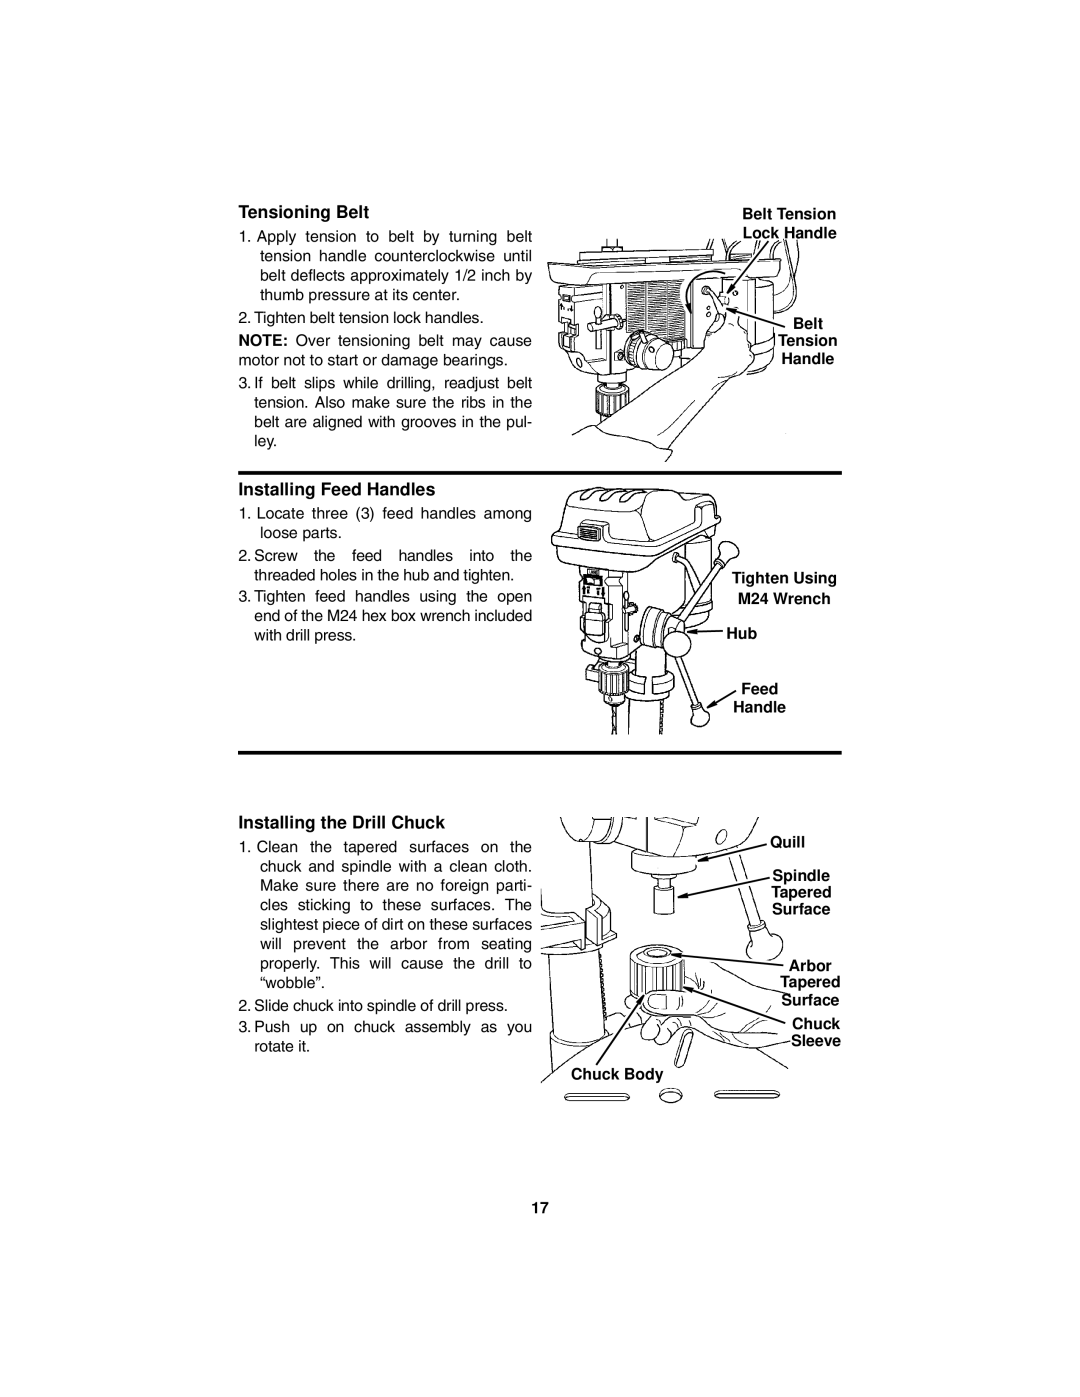
Tensioning Belt
1.Apply tension to belt by turning belt tension handle counterclockwise until belt deflects approximately 1/2 inch by thumb pressure at its center.
2.Tighten belt tension lock handles.
NOTE: Over tensioning belt may cause motor not to start or damage bearings.
3.If belt slips while drilling, readjust belt tension. Also make sure the ribs in the belt are aligned with grooves in the pul- ley.
Belt Tension Lock Handle
![]() Belt
Belt
Tension
Handle
Installing Feed Handles
1.Locate three (3) feed handles among loose parts.
2.Screw the feed handles into the threaded holes in the hub and tighten.
3.Tighten feed handles using the open end of the M24 hex box wrench included with drill press.
Tighten Using
M24 Wrench
![]() Hub
Hub
Feed
Handle
Installing the Drill Chuck
1.Clean the tapered surfaces on the chuck and spindle with a clean cloth. Make sure there are no foreign parti- cles sticking to these surfaces. The slightest piece of dirt on these surfaces will prevent the arbor from seating properly. This will cause the drill to “wobble”.
2.Slide chuck into spindle of drill press.
3.Push up on chuck assembly as you rotate it.
![]() Quill
Quill
![]() Spindle
Spindle
![]()
![]() Tapered
Tapered
Surface
![]() Arbor
Arbor
Tapered
Surface
![]() Chuck
Chuck
Sleeve
Chuck Body
17
