WD14500 specifications
The RIDGID WD14500 is a high-performance wet/dry vacuum designed for heavy-duty cleaning tasks around the home, workshop, or construction site. With an impressive 14-gallon capacity, this vacuum provides ample space for debris collection, making it an excellent choice for both residential and commercial applications.One of the standout features of the WD14500 is its powerful 6.0 peak horsepower motor. This robust engine enables the vacuum to effectively handle a wide range of materials, from fine dust to larger debris. The high suction power ensures efficient cleaning, allowing users to tackle even the most challenging clean-up tasks with ease.
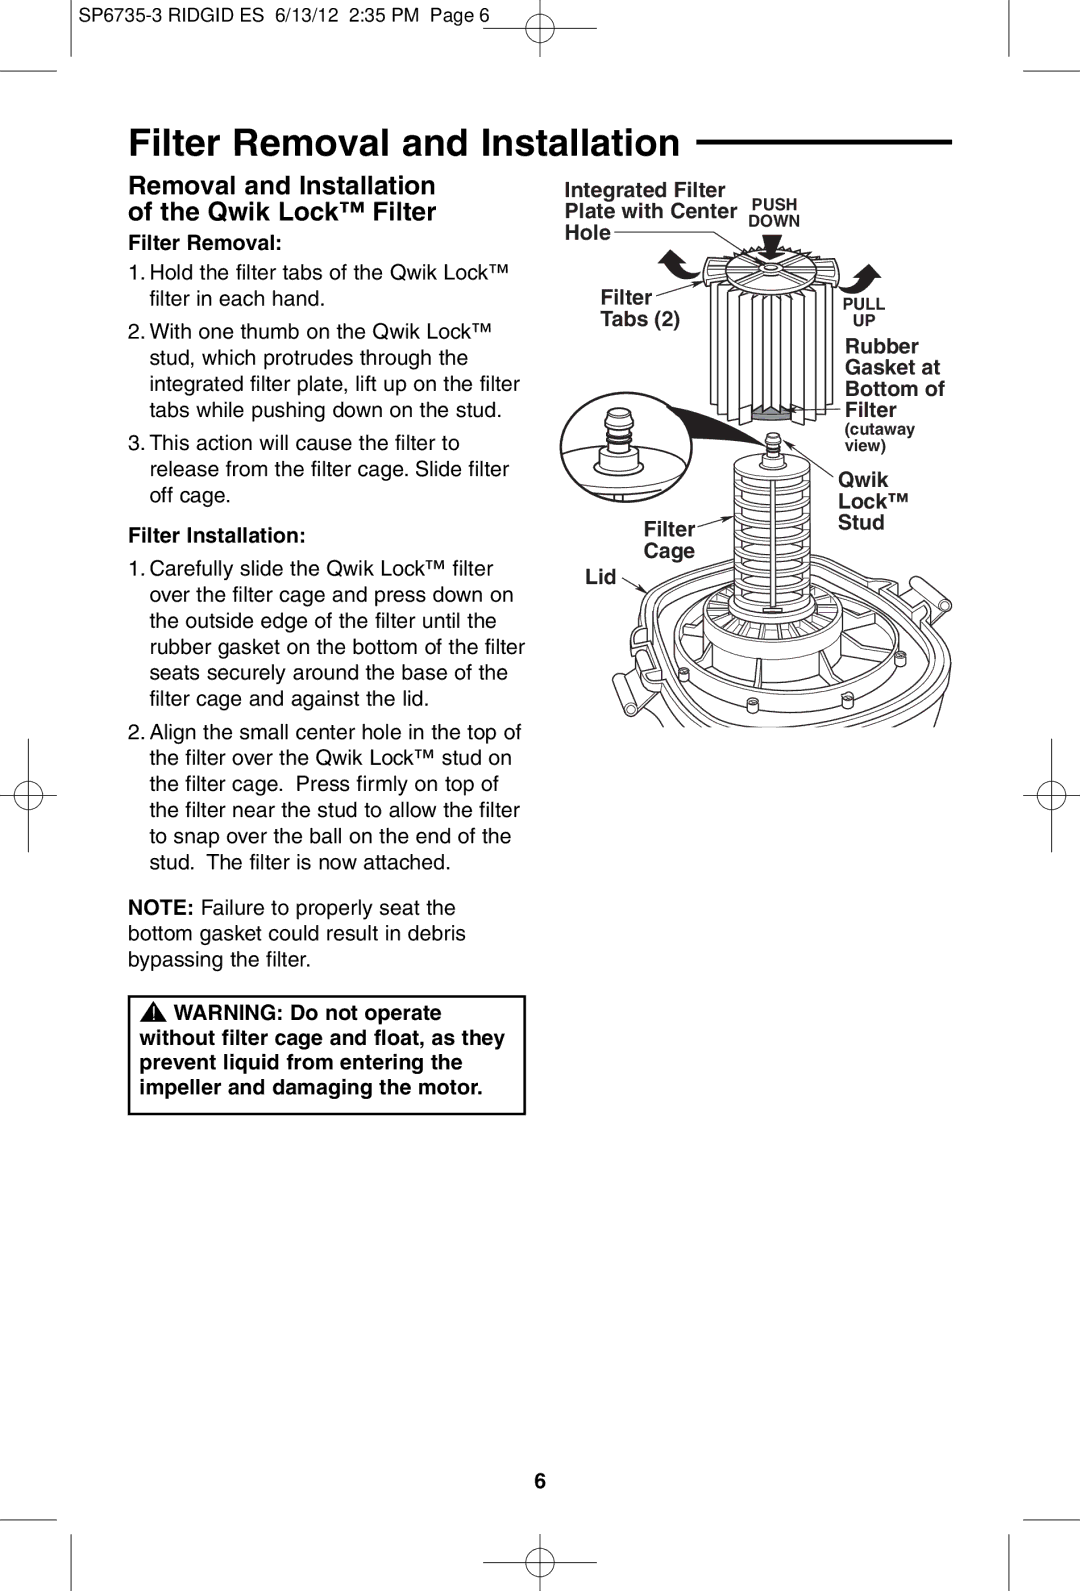
Another key characteristic of the RIDGID WD14500 is its versatile filtration system. The vacuum comes equipped with a fine dust filter that captures small particles and allergens, enhancing indoor air quality. This feature is particularly beneficial for allergy sufferers, as it prevents dust and other irritants from being released back into the air. Additionally, the vacuum has the capability to accommodate RIDGID's HEPA-filter for those needing even higher filtration standards, making it a truly adaptable cleaning solution.
The WD14500 also boasts an ergonomic design. Its large rear wheels and front casters provide stable maneuverability, allowing users to transport the vacuum effortlessly across different surfaces. The additional handle on the top is thoughtfully integrated for easy lifting and carrying, promoting a user-friendly experience.
Moreover, the vacuum features a wide range of accessories that enhance its functionality. It comes with a variety of nozzles, including a carpet nozzle and a crevice tool, making it adept for various cleaning scenarios. The onboard storage for these accessories ensures they are always within reach, reducing clutter and streamlining the cleaning process.
Finally, the RIDGID WD14500 is designed with durability in mind. Constructed from high-quality materials, it can withstand the rigors of regular use in demanding environments. The robust build quality, combined with RIDGID’s emphasis on delivering reliable tools, guarantees that this vacuum will serve users well for years to come.
In conclusion, the RIDGID WD14500 wet/dry vacuum stands out due to its powerful motor, effective filtration system, ergonomic design, and comprehensive range of accessories. It's an ideal solution for anyone looking to invest in a reliable and versatile cleaning tool for heavy-duty applications.