RZ 2610001563 07-09:RZ 2610001563 07-09 7/24/09 10:13 AM Page 19
INSTALLING AND REMOVING THE JIGSAW HANDLE ATTACHMENT
1.Remove depth guide from the tool.
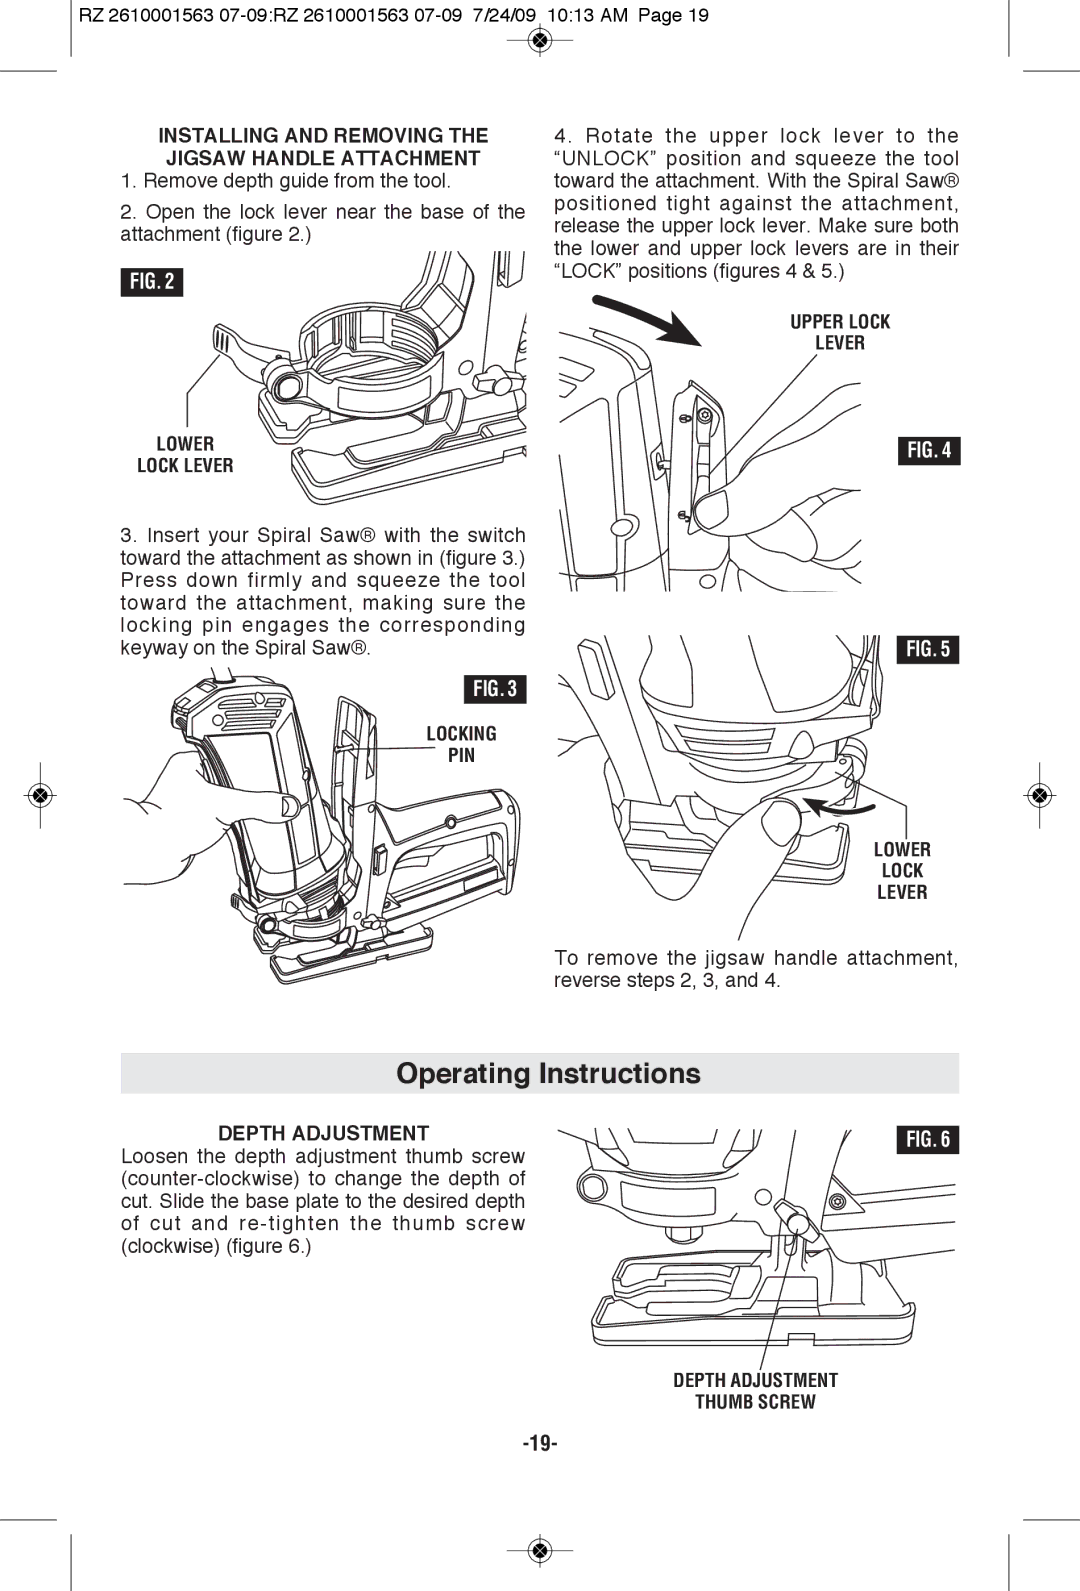
2.Open the lock lever near the base of the attachment (figure 2.)
FIG. 2
LOWER
LOCK LEVER
3.Insert your Spiral Saw® with the switch toward the attachment as shown in (figure 3.) Press down firmly and squeeze the tool toward the attachment, making sure the locking pin engages the corresponding keyway on the Spiral Saw®.
FIG. 3
LOCKING
PIN
4. Rotate the upper lock lever to the “UNLOCK” position and squeeze the tool toward the attachment. With the Spiral Saw® positioned tight against the attachment, release the upper lock lever. Make sure both the lower and upper lock levers are in their “LOCK” positions (figures 4 & 5.)
UPPER LOCK
LEVER
FIG. 4
FIG. 5
LOWER
LOCK
LEVER
To remove the jigsaw handle attachment, reverse steps 2, 3, and 4.
Operating Instructions
DEPTH ADJUSTMENT | FIG. 6 |
Loosen the depth adjustment thumb screw