RZ 2610001563 07-09:RZ 2610001563 07-09 7/24/09 10:13 AM Page 9
Assembly
!WARNING Disconnect the plug from the power source before
making any assembly, adjustments or changing accessories. Such preventive safety measures reduce the risk of starting the tool accidentally. Make certain that the collet nut is securely tightened before turning the tool on.
REMOVING AND INSTALLING THE
DEPTH GUIDE ASSEMBLy
The depth guide assembly consists of the depth guide, locking screw and bracket.
In order to remove the depth guide from the tool, release the locking lever and pull the entire assembly straight off of the tool. To reattach the assembly, fully replace the guide onto the tool collar and lock the clamp lever (Fig. 1).
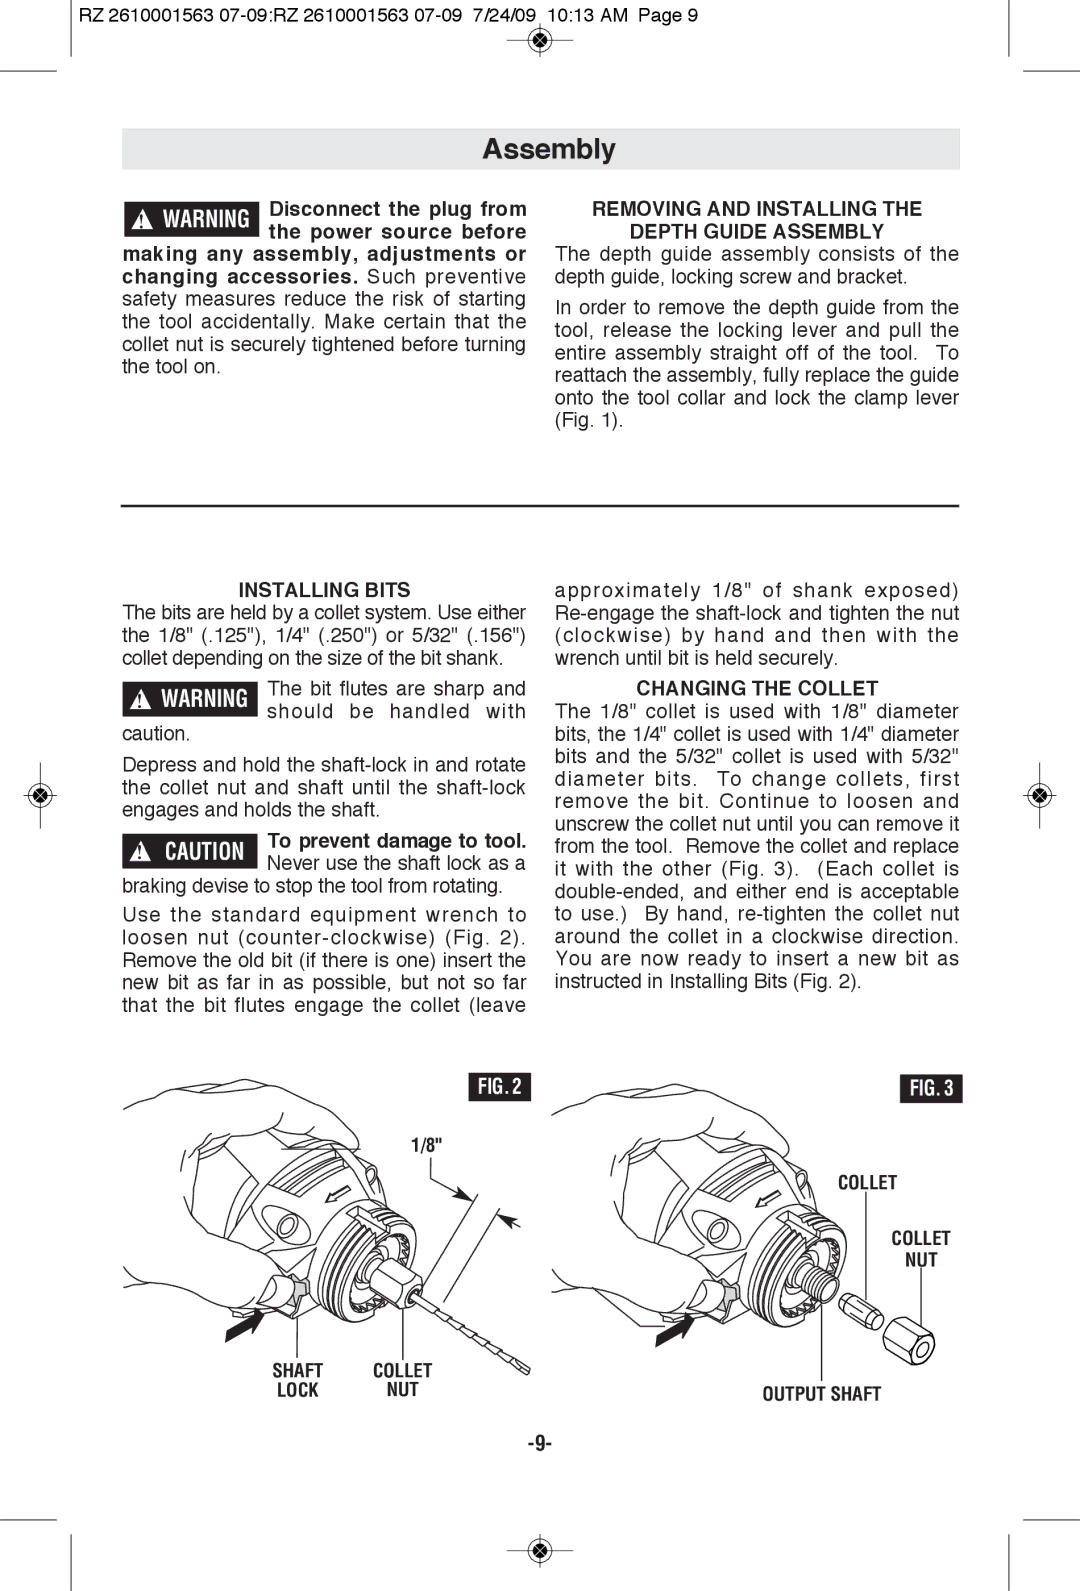
INSTALLING BITS
The bits are held by a collet system. Use either the 1/8" (.125"), 1/4" (.250") or 5/32" (.156") collet depending on the size of the bit shank.
!WARNING The bit flutes are sharp and should be handled with
caution.
Depress and hold the
To prevent damage to tool. Never use the shaft lock as a
braking devise to stop the tool from rotating.
Use the standard equipment wrench to loosen nut
approximately 1/8" of shank exposed)
CHANGING THE COLLET
The 1/8" collet is used with 1/8" diameter bits, the 1/4" collet is used with 1/4" diameter bits and the 5/32" collet is used with 5/32" diameter bits. To change collets, first remove the bit. Continue to loosen and unscrew the collet nut until you can remove it from the tool. Remove the collet and replace it with the other (Fig. 3). (Each collet is
FIG. 2 | FIG. 3 |
1/8"
COLLET
COLLET
NUT
SHAFT | COLLET |
|
LOCK | NUT | OUTPUT SHAFT |