RZ 2610001563
Step 1: Be certain that the box or fixture is firmly mounted and all wires or other obstructions around the opening are pushed back out of the way. The bit uses the outer edge of the box or fixture as a guide, so it is important that there is nothing in the way which can prevent it from guiding completely around the opening. For the purposes of this instruction manual, the procedure discussed will be to make a
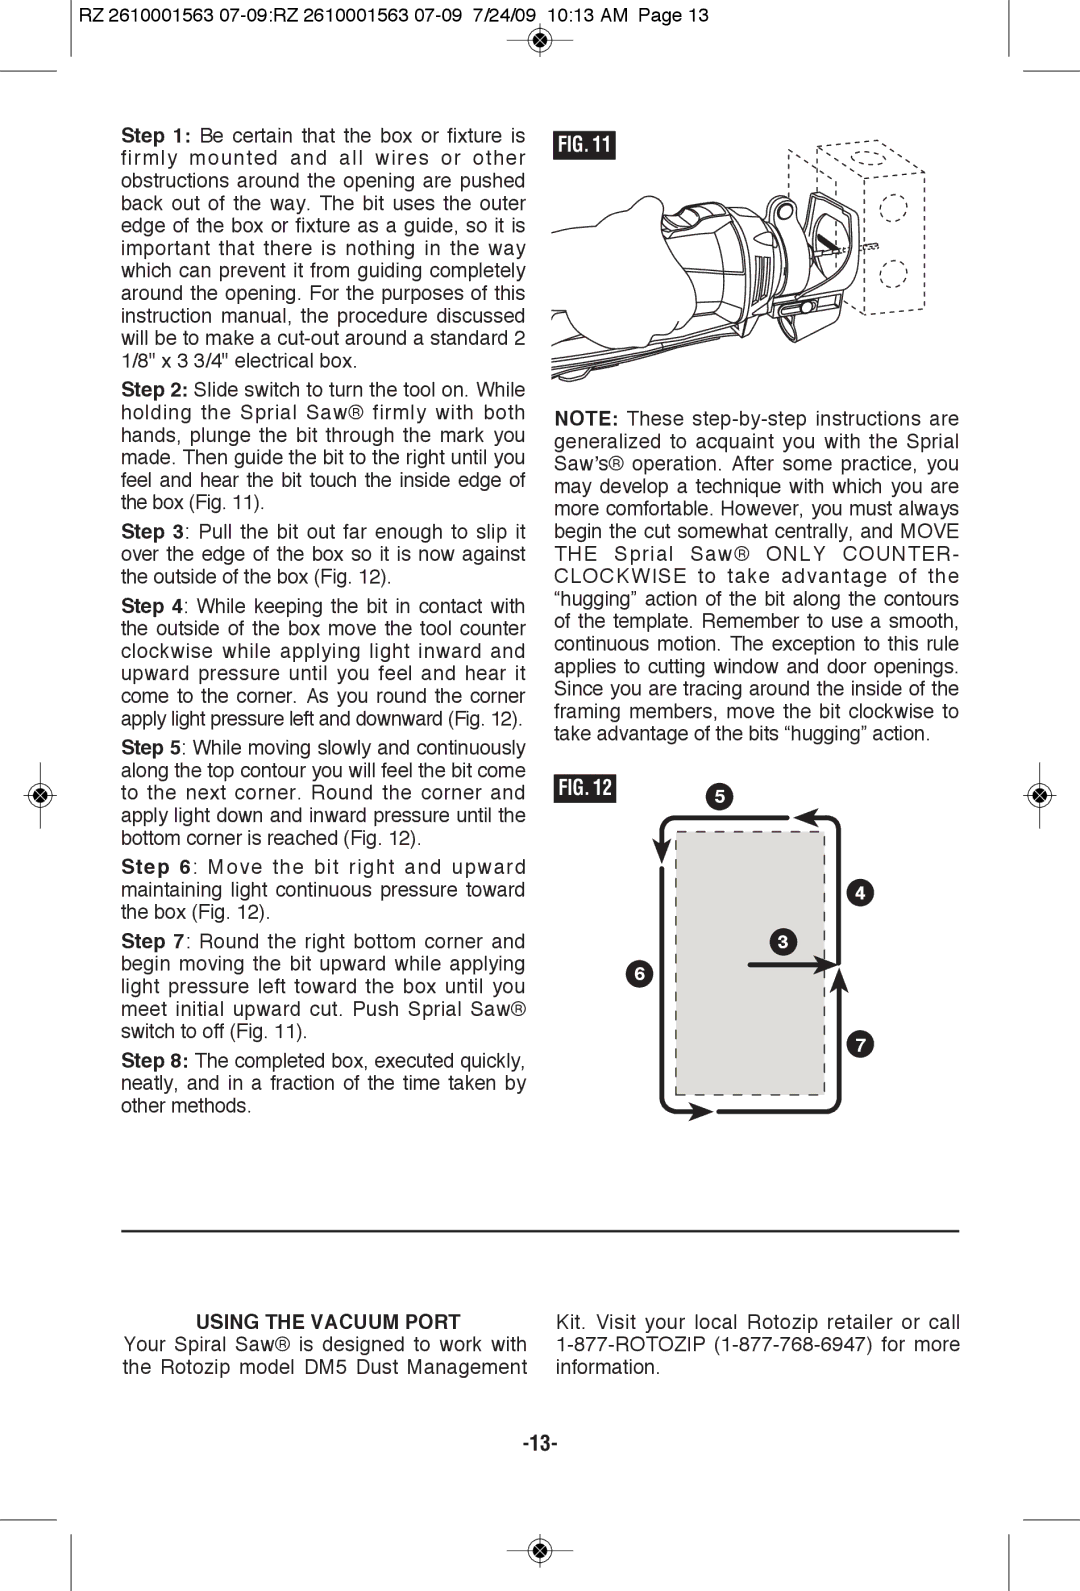
Step 2: Slide switch to turn the tool on. While holding the Sprial Saw® firmly with both hands, plunge the bit through the mark you made. Then guide the bit to the right until you feel and hear the bit touch the inside edge of the box (Fig. 11).
Step 3: Pull the bit out far enough to slip it over the edge of the box so it is now against the outside of the box (Fig. 12).
Step 4: While keeping the bit in contact with the outside of the box move the tool counter clockwise while applying light inward and upward pressure until you feel and hear it come to the corner. As you round the corner apply light pressure left and downward (Fig. 12).
Step 5: While moving slowly and continuously along the top contour you will feel the bit come to the next corner. Round the corner and apply light down and inward pressure until the bottom corner is reached (Fig. 12).
Step 6: Move the bit right and upward maintaining light continuous pressure toward the box (Fig. 12).
Step 7: Round the right bottom corner and begin moving the bit upward while applying light pressure left toward the box until you meet initial upward cut. Push Sprial Saw® switch to off (Fig. 11).
Step 8: The completed box, executed quickly, neatly, and in a fraction of the time taken by other methods.
FIG. 11
NOTE: These
FIG. 12 | 5 |
|
4
3
6
7
USING THE VACUUM PORT Your Spiral Saw® is designed to work with the Rotozip model DM5 Dust Management
Kit. Visit your local Rotozip retailer or call