5.0 Finishing Installation
a. |
|
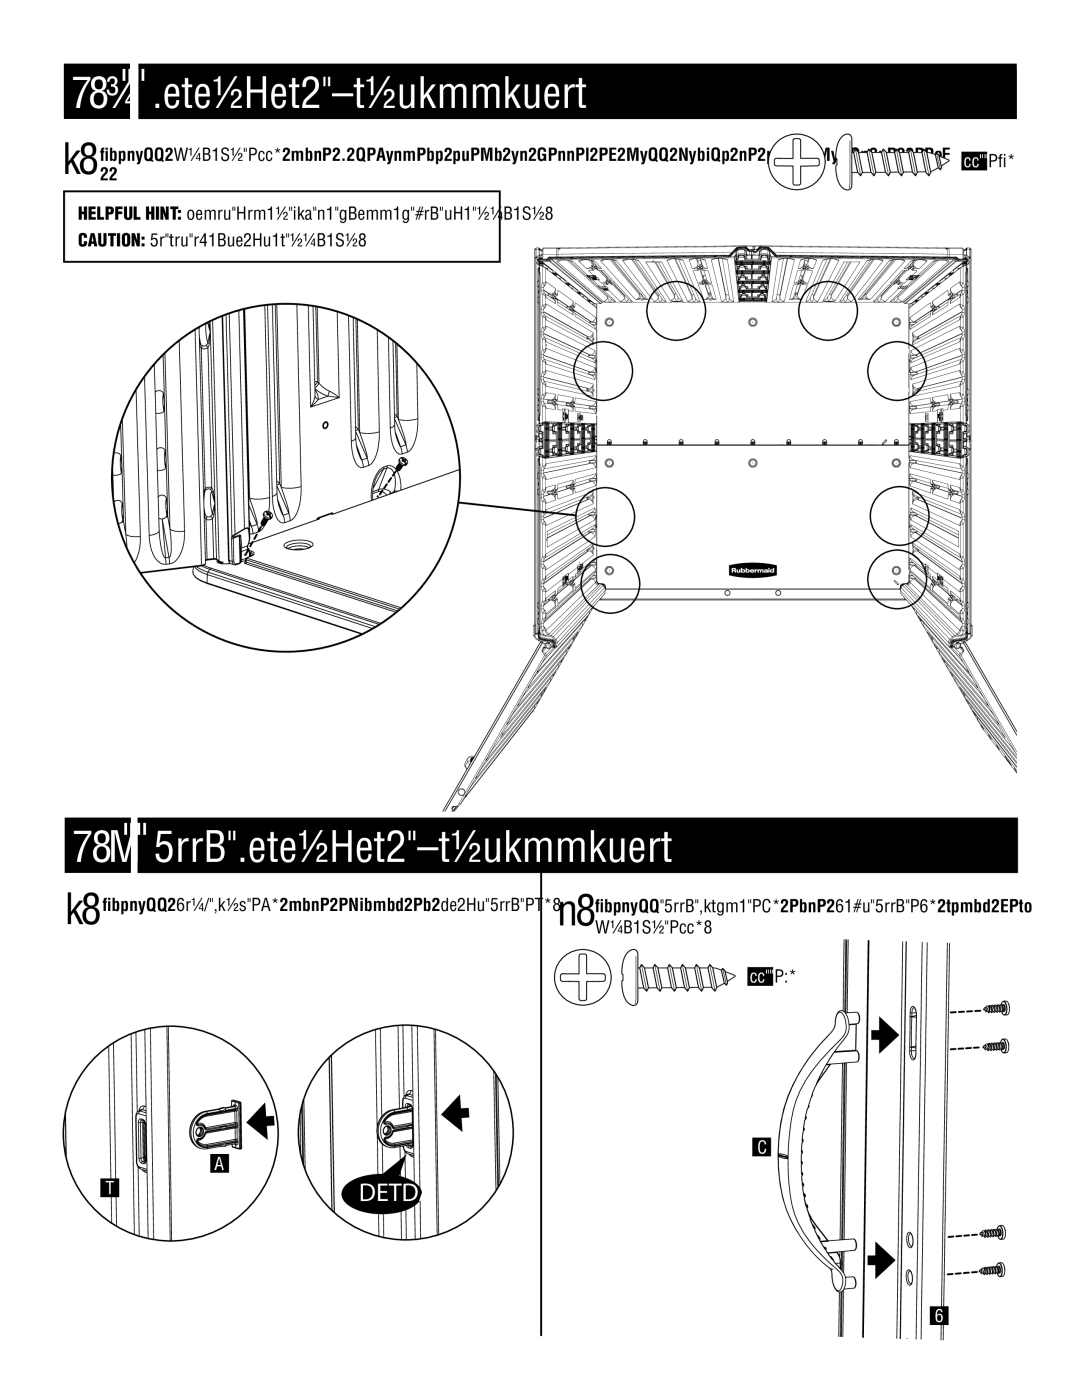
Install Screws (AA) into 8 locations shown at bottom of wall panels to secure walls to floor. | AA (8) |
|
HELPFUL HINT: Pilot holes may be drilled for the screws.
CAUTION: Do not overtighten screws.
5.1 Door Finishing Installation
a. Install Lock Hasp (X) into opening on Right Door (K). b. Install Door Handle (T) onto Left Door (L) using four
Screws (AA).
AA (4)
X
K
click
T
L