Installation
3.2
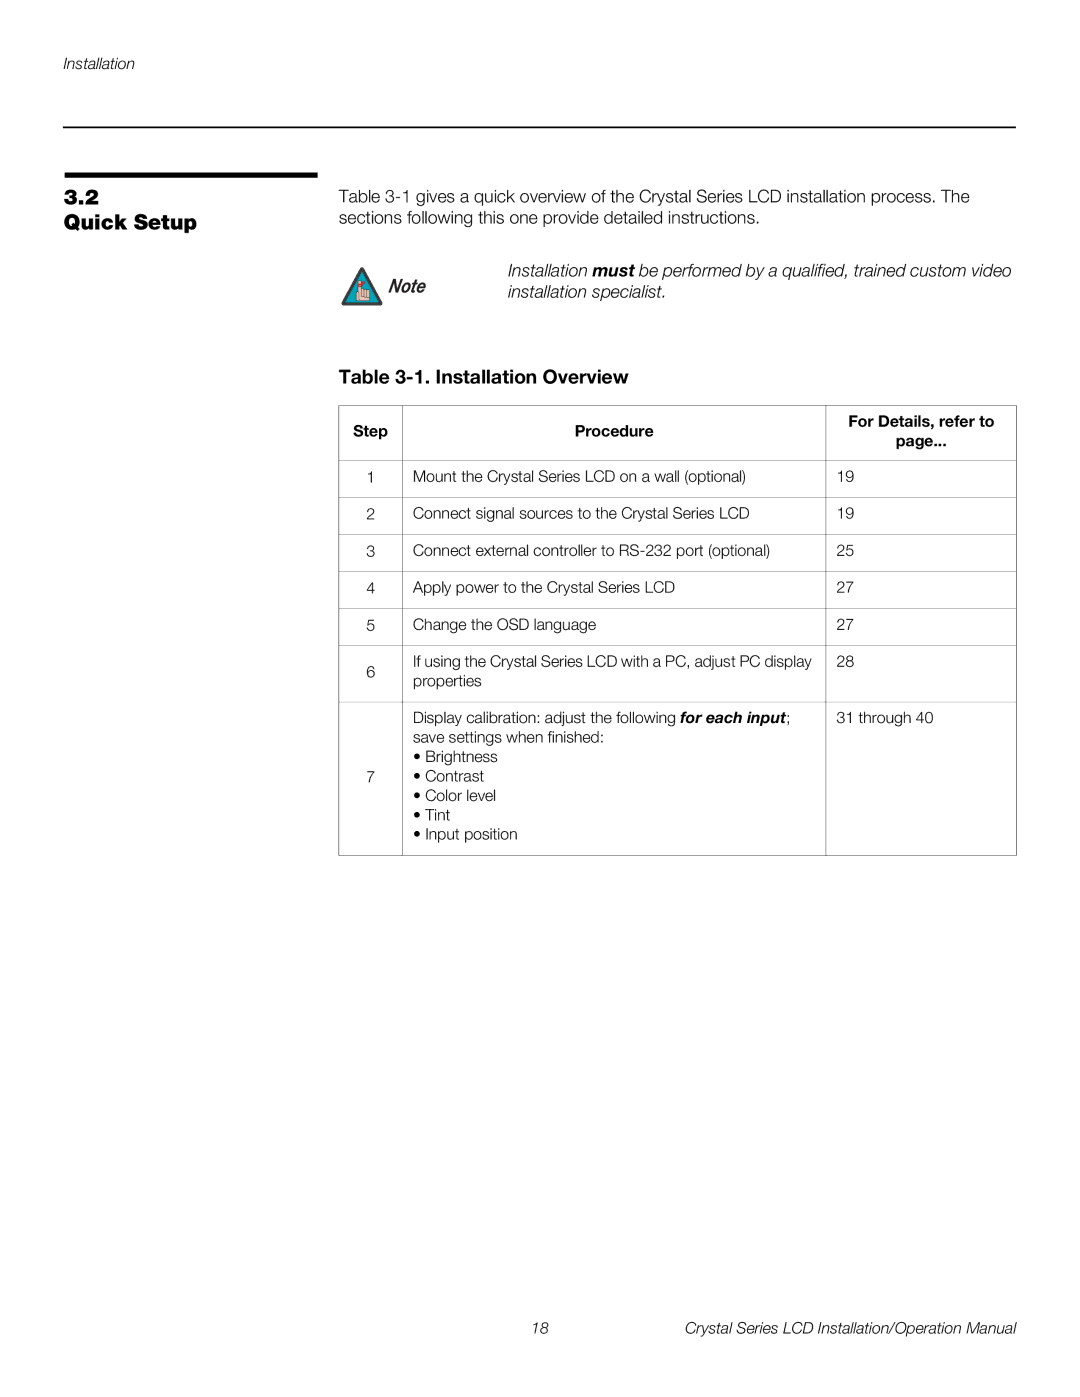
Quick Setup
Table
| Note | Installation must be performed by a qualified, trained custom video | ||
| installation specialist. |
| ||
Table |
| |||
|
|
|
|
|
Step |
|
| Procedure | For Details, refer to |
|
| page... | ||
|
|
|
| |
|
|
|
| |
1 |
| Mount the Crystal Series LCD on a wall (optional) | 19 | |
|
|
|
| |
2 |
| Connect signal sources to the Crystal Series LCD | 19 | |
|
|
|
| |
3 |
| Connect external controller to | 25 | |
|
|
|
| |
4 |
| Apply power to the Crystal Series LCD | 27 | |
|
|
|
| |
5 |
| Change the OSD language | 27 | |
|
|
|
| |
6 |
| If using the Crystal Series LCD with a PC, adjust PC display | 28 | |
| properties |
|
| |
|
|
|
| |
|
|
|
| |
|
| Display calibration: adjust the following for each input; | 31 through 40 | |
|
| save settings when finished: |
| |
|
| • Brightness |
|
|
7 |
| • Contrast |
|
|
|
| • Color level |
|
|
|
| • Tint |
|
|
|
| • Input position |
| |
|
|
|
|
|
18 | Crystal Series LCD Installation/Operation Manual |