ASSEMBLY
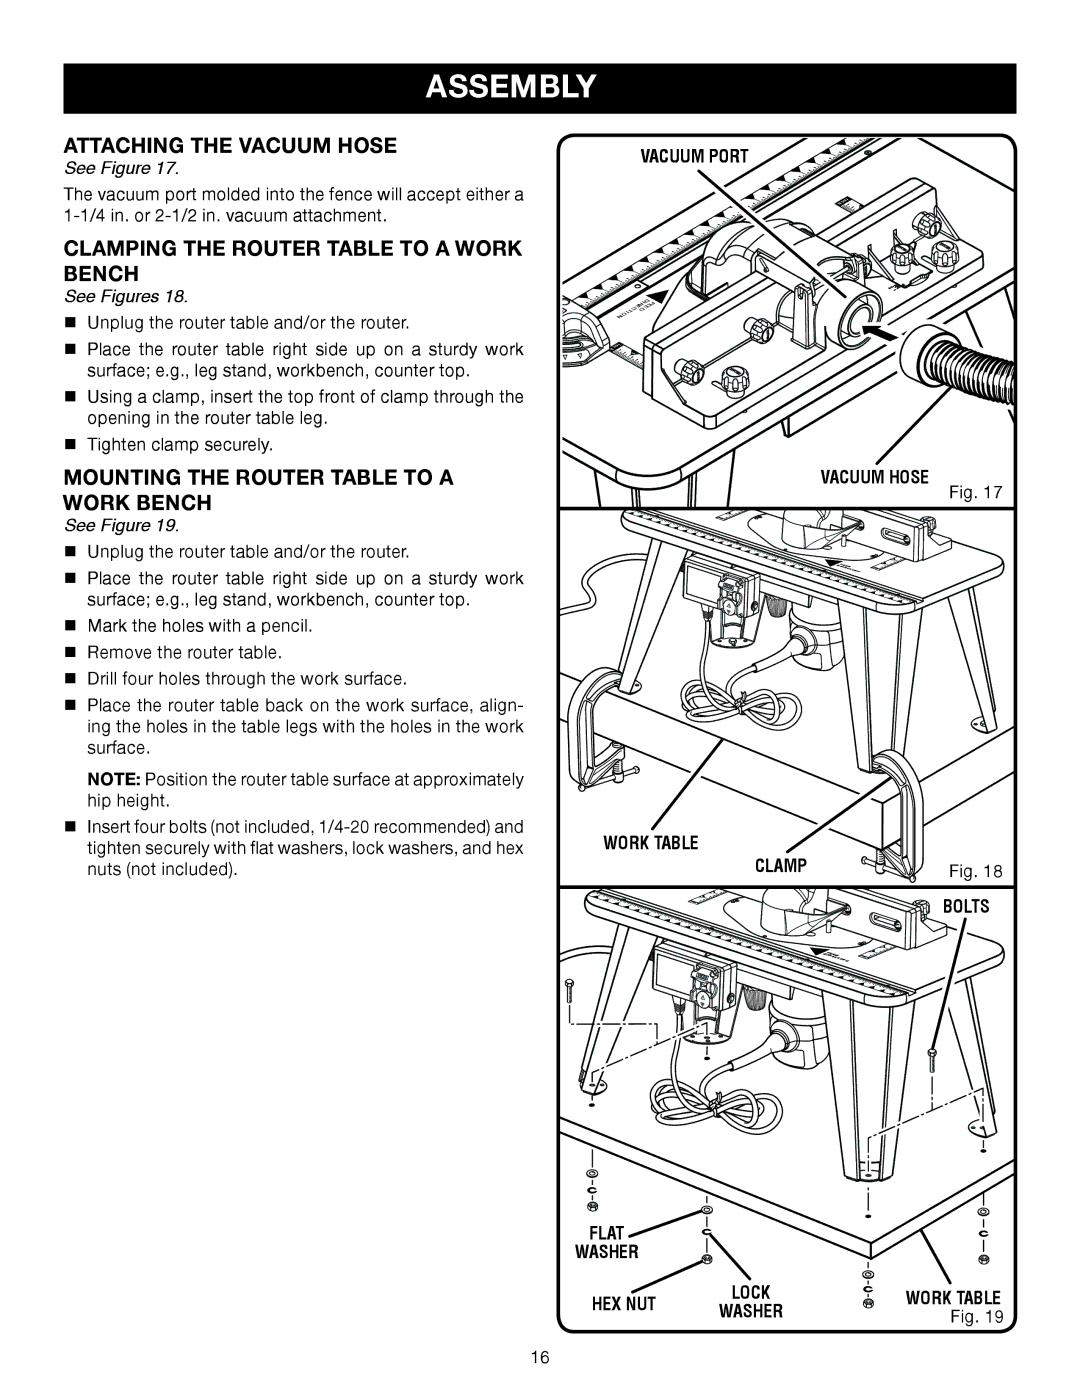
ATTACHING THE VACUUM HOSE
See Figure 17.
The vacuum port molded into the fence will accept either a
CLAMPING THE ROUTER TABLE TO A WORK BENCH
See Figures 18.
Unplug the router table and/or the router.
Place the router table right side up on a sturdy work surface; e.g., leg stand, workbench, counter top.
Using a clamp, insert the top front of clamp through the opening in the router table leg.
Tighten clamp securely.
MOUNTING THE ROUTER TABLE TO A WORK BENCH
See Figure 19.
Unplug the router table and/or the router. |
Place the router table right side up on a sturdy work |
surface; e.g., leg stand, workbench, counter top. |
Mark the holes with a pencil. |
Remove the router table. |
Drill four holes through the work surface. |
Place the router table back on the work surface, align- |
ing the holes in the table legs with the holes in the work |
surface. |
NOTE: Position the router table surface at approximately |
hip height. |
Insert four bolts (not included, |
VACUUM PORT
inch | 1 |
|
| FEED |
DIRECTION | |
inch | 1 |
| |
VACUUM HOSE
0 ![]()
1
Inch
2
0 ![]()
FEED | 1 |
| |
DIRECTION | Inch |
Fig. 17
tighten securely with flat washers, lock washers, and hex |
nuts (not included). |
WORK TABLE
CLAMP
2
0 ![]()
1
Inch
FEED
DIRECTION
Fig. 18
BOLTS
0 ![]()
1
Inch
FLAT ![]()
![]()
WASHER
HEX NUT | LOCK | WORK TABLE | |
WASHER | Fig. 19 | ||
|
16