ADJUSTMENTS
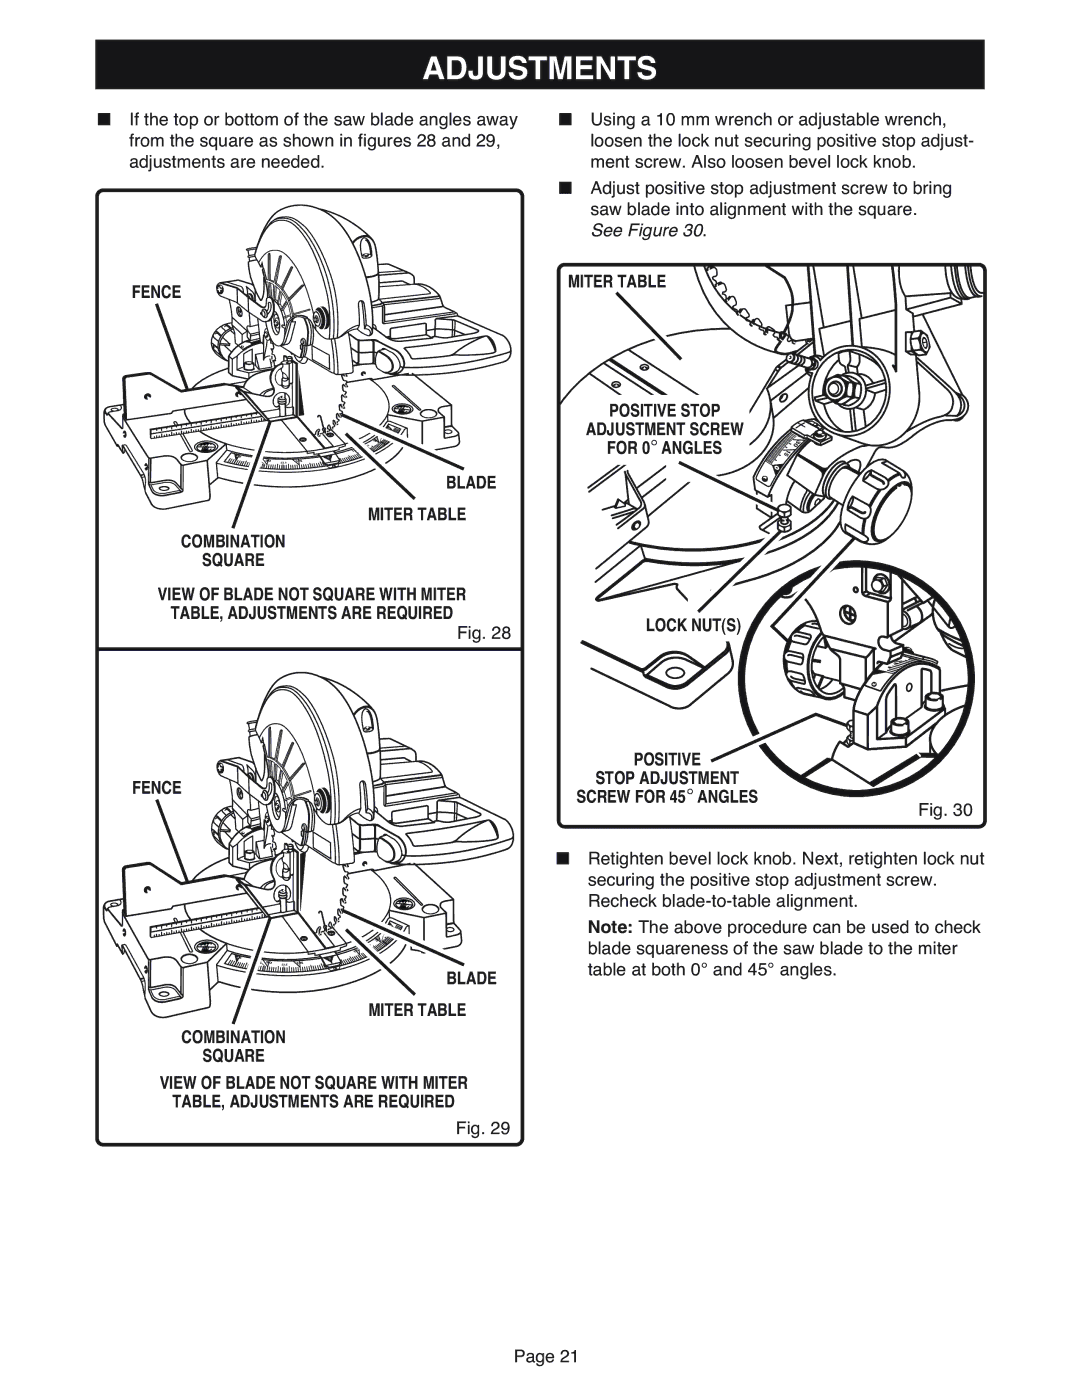
■If the top or bottom of the saw blade angles away from the square as shown in figures 28 and 29, adjustments are needed.
FENCE
■Using a 10 mm wrench or adjustable wrench, loosen the lock nut securing positive stop adjust- ment screw. Also loosen bevel lock knob.
■Adjust positive stop adjustment screw to bring saw blade into alignment with the square. See Figure 30.
MITER TABLE
4 | 5 |
30
15
45 |
|
| 0 |
31.62 | 30 | 22.5 | 15 |
BLADE
MITER TABLE
COMBINATION
SQUARE
VIEW OF BLADE NOT SQUARE WITH MITER TABLE, ADJUSTMENTS ARE REQUIRED
Fig. 28
FENCE
4 | 5 |
30
15
45 |
|
| 0 |
31.62 | 30 | 22.5 | 15 |
BLADE
MITER TABLE
COMBINATION
SQUARE
VIEW OF BLADE NOT SQUARE WITH MITER TABLE, ADJUSTMENTS ARE REQUIRED
Fig. 29
POSITIVE STOP |
|
|
ADJUSTMENT SCREW |
|
|
FOR 0° ANGLES | 15 | 3 |
| 0 |
|
LOCK NUT(S)
POSITIVE
STOP ADJUSTMENT
SCREW FOR 45° ANGLES
Fig. 30
■Retighten bevel lock knob. Next, retighten lock nut securing the positive stop adjustment screw. Recheck
Note: The above procedure can be used to check blade squareness of the saw blade to the miter table at both 0° and 45° angles.
Page 21