ADJUSTMENTS
FENCE
4 | 5 |
30
15
45 |
|
| 0 |
31.62 | 30 | 22.5 | 15 |
BLADE
MITER TABLE | FRAMING SQUARE |
VIEW OF BLADE NOT SQUARE WITH
FENCE, ADJUSTMENTS ARE REQUIRED
Fig. 25
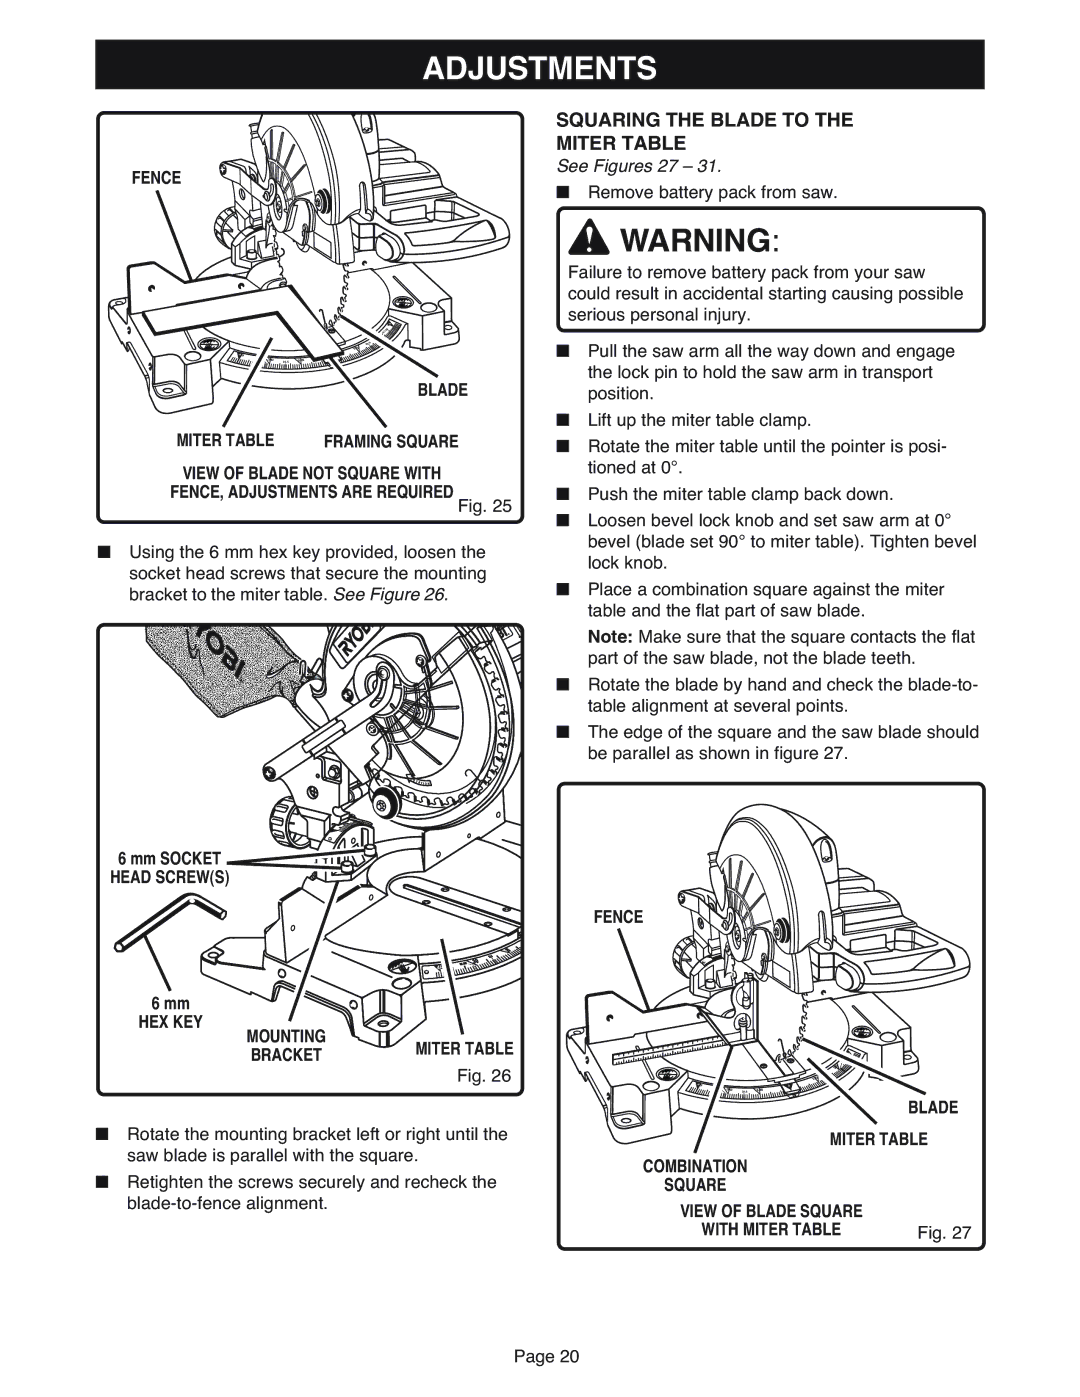
■Using the 6 mm hex key provided, loosen the socket head screws that secure the mounting bracket to the miter table. See Figure 26.
R O T A T I O N
SQUARING THE BLADE TO THE
MITER TABLE
See Figures 27 – 31.
■Remove battery pack from saw.
![]() WARNING:
WARNING:
Failure to remove battery pack from your saw could result in accidental starting causing possible serious personal injury.
■Pull the saw arm all the way down and engage the lock pin to hold the saw arm in transport position.
■Lift up the miter table clamp.
■Rotate the miter table until the pointer is posi- tioned at 0°.
■Push the miter table clamp back down.
■Loosen bevel lock knob and set saw arm at 0° bevel (blade set 90° to miter table). Tighten bevel lock knob.
■Place a combination square against the miter table and the flat part of saw blade.
Note: Make sure that the square contacts the flat part of the saw blade, not the blade teeth.
■Rotate the blade by hand and check the
■The edge of the square and the saw blade should be parallel as shown in figure 27.
6 mm SOCKET |
HEAD SCREW(S) |
FENCE
6 mm
HEX KEY MOUNTING
BRACKET
15
.5 22
31.62 | 0 |
3 | |
45 |
|
MITER TABLE
Fig. 26
4 | 5 |
30
15
45 |
|
| 0 |
31.62 | 30 | 22.5 | 15 |
BLADE
■Rotate the mounting bracket left or right until the saw blade is parallel with the square.
■Retighten the screws securely and recheck the
MITER TABLE
COMBINATION
SQUARE
VIEW OF BLADE SQUARE |
|
WITH MITER TABLE | Fig. 27 |
Page 20