Installing and connecting the assembly pipe of the indoor unit
Connect indoor and outdoor units with
There are 2 refrigerant pipes of different diameters:
•The smaller one is for the liquid refrigerant
•The larger one is for the gas refrigerant
A short pipe is already fitted to the air conditioner. You may |
|
|
need to extend the pipe using the assembly pipe (optional). |
|
|
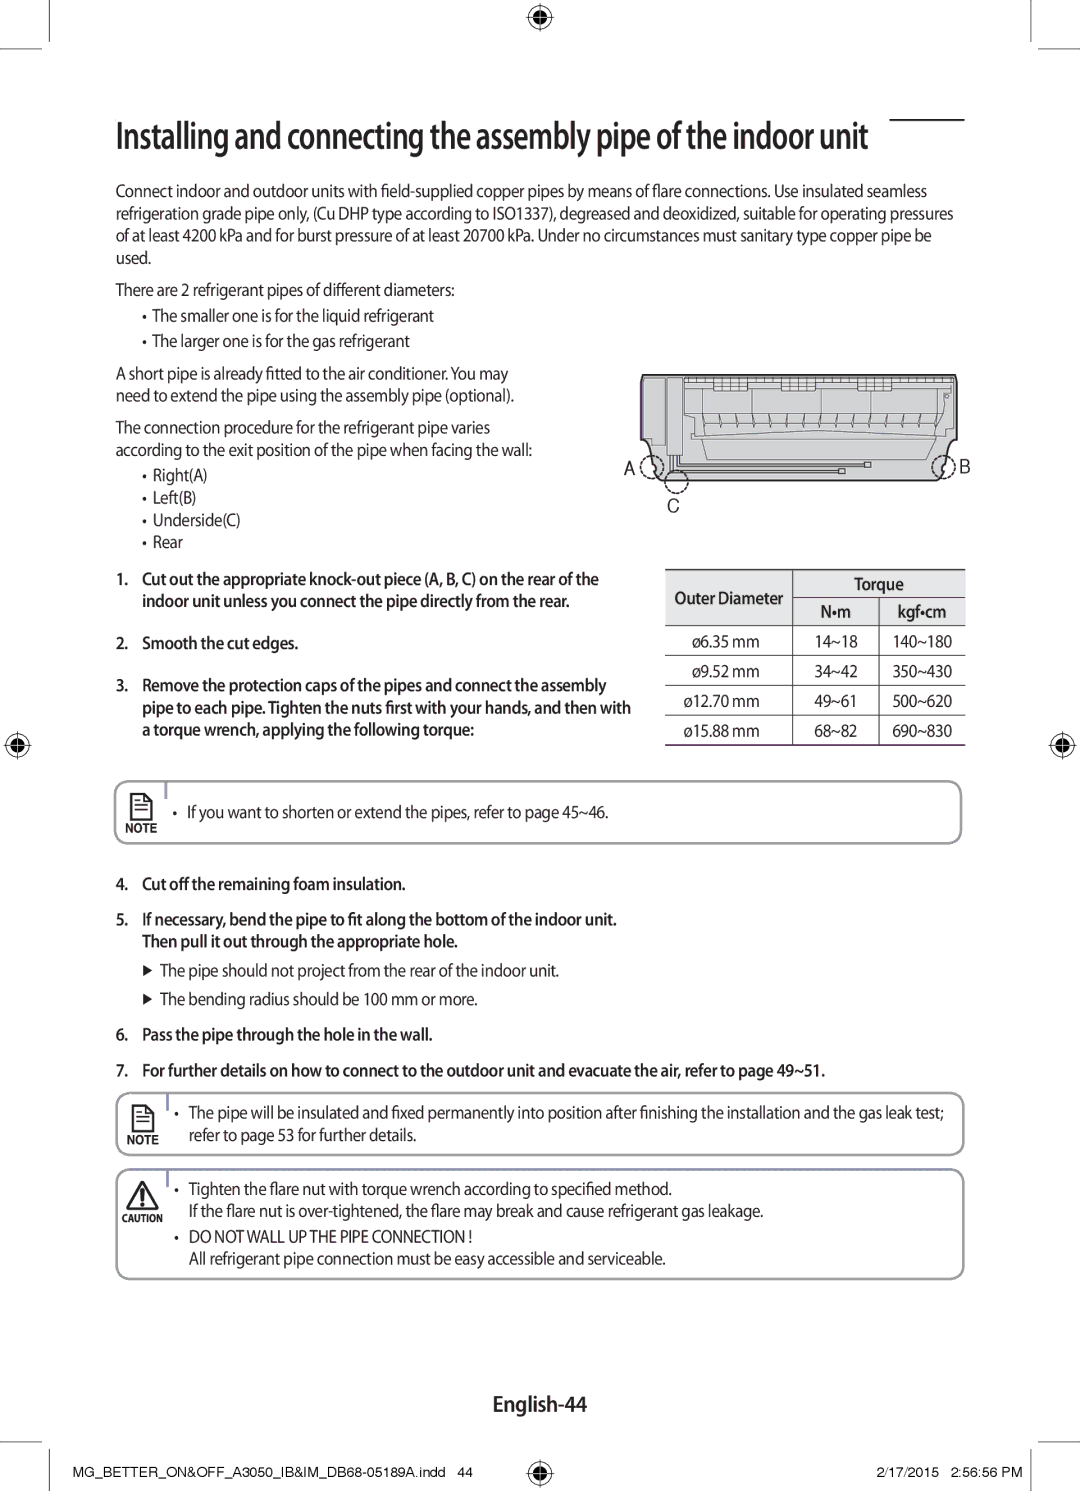
The connection procedure for the refrigerant pipe varies |
|
|
according to the exit position of the pipe when facing the wall: | A | B |
• Right(A) | ||
• Left(B) |
| C |
• Underside(C) |
| |
|
| |
• Rear |
|
|
1.Cut out the appropriate
2.Smooth the cut edges.
3.Remove the protection caps of the pipes and connect the assembly
pipe to each pipe. Tighten the nuts first with your hands, and then with a torque wrench, applying the following torque:
• If you want to shorten or extend the pipes, refer to page 45~46.
4.Cut off the remaining foam insulation.
5.If necessary, bend the pipe to fit along the bottom of the indoor unit. Then pull it out through the appropriate hole.
The pipe should not project from the rear of the indoor unit.
The bending radius should be 100 mm or more.
Outer Diameter | Torque | ||
|
| ||
N•m | kgf•cm | ||
| |||
|
|
| |
ø6.35 mm | 14~18 | 140~180 | |
|
|
| |
ø9.52 mm | 34~42 | 350~430 | |
|
|
| |
ø12.70 mm | 49~61 | 500~620 | |
|
|
| |
ø15.88 mm | 68~82 | 690~830 | |
|
|
| |
6.Pass the pipe through the hole in the wall.
7.For further details on how to connect to the outdoor unit and evacuate the air, refer to page 49~51.
• The pipe will be insulated and fixed permanently into position after finishing the installation and the gas leak test;
refer to page 53 for further details.
• Tighten the flare nut with torque wrench according to specified method.
If the flare nut is
•DO NOT WALL UP THE PIPE CONNECTION !
All refrigerant pipe connection must be easy accessible and serviceable.
English-44
2/17/2015 2:56:56 PM ![]()