DVD-VR335
FCC Note for U.S.A
Important Safety Instructions
Precaution
Maintenance of Cabinet
Handling Cautions
Disc Storage
Disc Specifications
This is not a malfunction of the unit
An audio disc on which 44.1kHz PCM Audio is recorded
Not all brands of discs will be compatible with this unit
Protection
This product
Contents
Special Recording Features
Using the Bookmarks Using the Markers
Playing back an MP3 Disc
To Program Tracks Playing a Picture Disc
General Features
Recorder & VCR
Before Reading User’s Manual
Step
Front Panel
Description
Using an Hdmi cable
Accessories
Check for the supplied accessories below
Fan always revolves when the power is on
TV Power Button 22. TV/VCR Button Marker Button
Power Button Number Button 100+ Button
Cancel Button
Timer REC Button
Quick Overview
Connecting & Setting Up
Antenna + DVD Recorder & VCR + TV No Cable box
Connecting the Antenna Cable
If you have two separate antennas one VHF
Other UHF, use a UHF/VHF combiner
Connections
Connections
Connecting to a Video input jack
Connecting the Video Cable
You will enjoy regular quality images
See pages 21 ~
See pages 21 ~ Video and Component video output are
Connecting to an S-Video input jack
Connecting to Component video input jacks Y,PB,PR
Connecting to your TV
Connecting the Audio Cable
Select one of the Audio connections on the following pages
This connection will use your TV’s speakers
Connecting to a stereo amplifier with analog input jacks
AV amplifier
Connecting to an AV amplifier with a digital input jack
To audio on your TV when using HDMI, set the digi
Connecting to a TV with Hdmi Jack
To change Hdmi output resolution, see
Connecting to a TV with DVI Jack
Hdmi connection description Why does Samsung use HDMI?
What is the HDCP?
You can record from connected equipment VCR, STB or DVD
Connecting External Devices
You can also use the AV 2 in jacks on
Must choose AV 1 Composite or S-video. See
If the AV 2 In input source is not selected
Connecting a Camcorder to the AV 2 in jacks
Input SEL. button to select proper input
Connecting a Camcorder to the DV in jack
If the input is not selected automatically, use
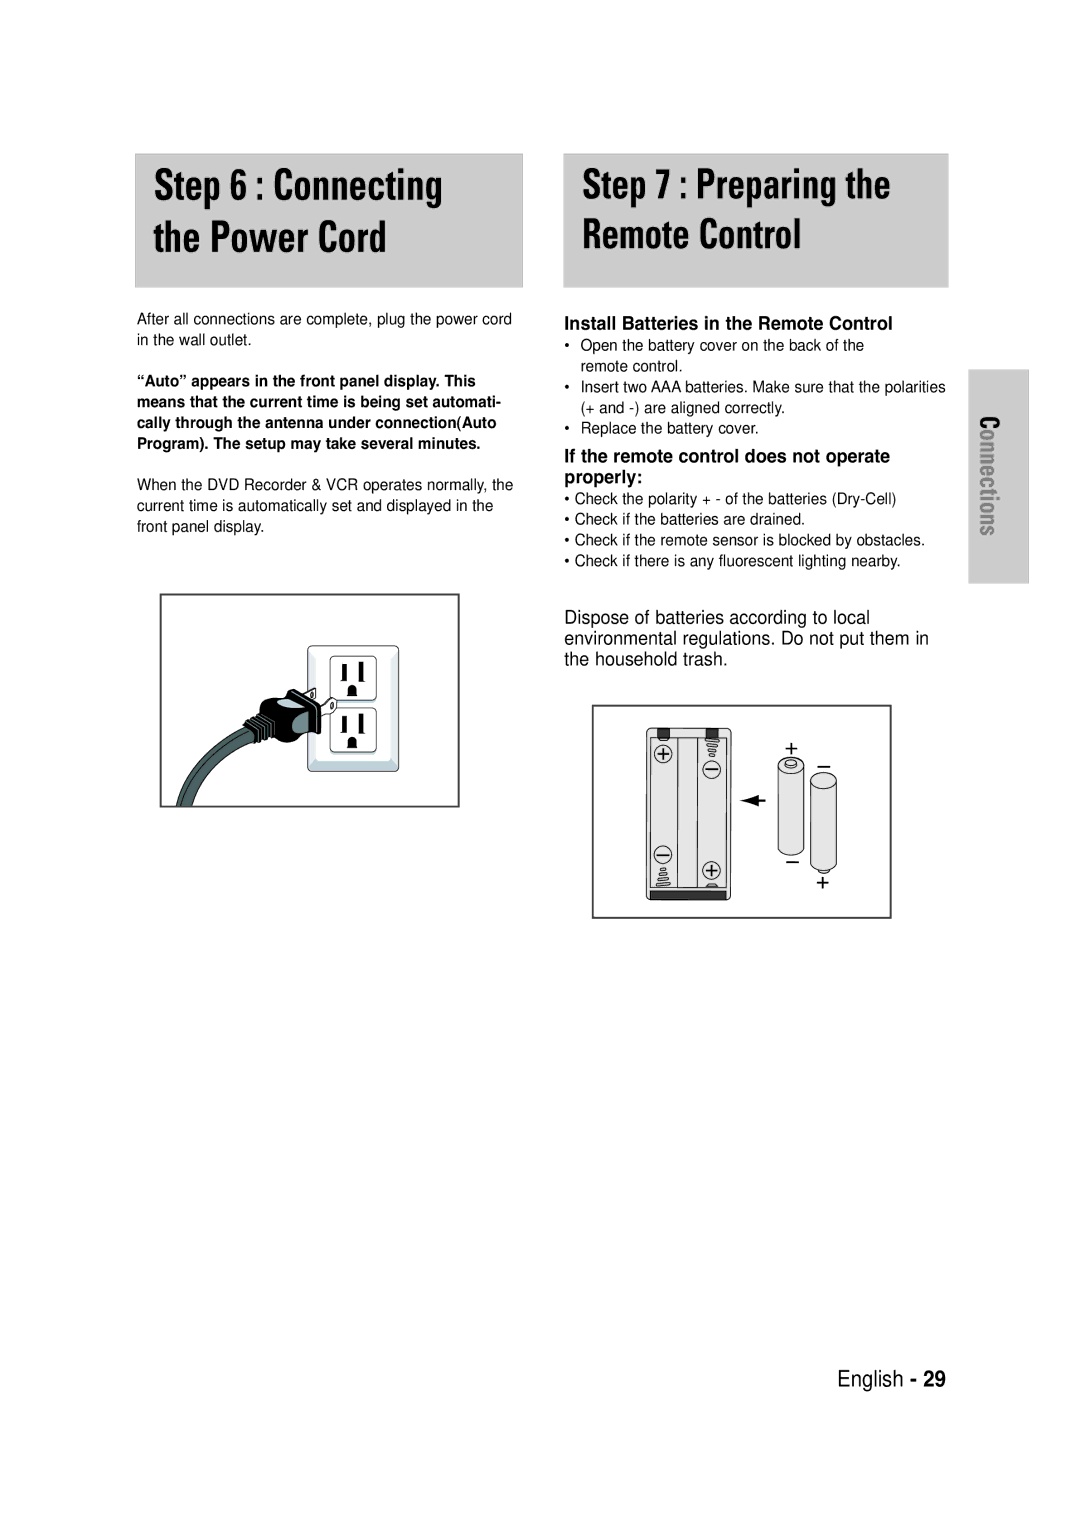
If the remote control does not operate properly
Install Batteries in the Remote Control
Open the battery cover on the back of the remote control
Replace the battery cover
Brand Codes
Setting the Remote Control
…/†,œ /√ Buttons
On-Screen Menu Navigation
Enter Button
Return Button
Time Zone
Auto Clock Set
Clock Data CH
Daylight Saving
Manual Clock Set
Yes or No, then
…† buttons to select
Auto Channel Memory
Channel Set
Press …† buttons to select
Press …† buttons to select Channel Set
RF Output Channel
Channel Add/Delete
Channel
Channel screen. Then, press
…† buttons to select RF Output
Setting Up Language Options
Language , then
Press …† buttons to select the desired
Dynamic Compression
Setting Up the Audio Options
Digital Output
Input Level
TV Aspect
Black Level
3D Noise Reduction
HDMI/DVI Resolution
Setting Up the Parental Control
…† buttons to select Setup, then press Enter or √ button
DivXR Registration
‘Confirm the password’ message will be displayed
About the Change Password
Press the …† buttons to select
Rating Level
Tape Length
VCR Setting
Auto Play
Auto Repeat
…† buttons to select Video Input , then
Video Input
…† buttons to select AV 1 or
Press the …† buttons to select
System , then
Automatic Chapter Creator
…† buttons to select On, then press Enter or √ button
Menu button to exit the menu
System, then press Enter or √ button
Quick Recording
Quick Recording
On, then press Enter or √ button
Region code DVD-Video only
Before Playing
Disc types that can be played
Read the following information before playing a disc
Discs that cannot be played
Playing a Disc
For DVD-VIDEO disc
Using the Search & Skip Functions
For DVD-RAM/DVD±RW/DVD±R disc
Skipping Chapters or Tracks
About Anykey
Moving to a scene directly using the Anykey
Slow Motion Play Step Motion Play
Slow Motion Play DVD-VIDEO / DVD-RAM / DVD±RW / DVD±R
Playing RepeatedlyRepeat Playback
Repeat Playback
To return to normal playback
…† buttons to select Repeat
Selecting the Audio language
Using the Anykey button
Selecting the Subtitle language
Angle
Using the Angle button
Changing the Camera
Clearing a Bookmark
Playing back a Bookmark
Clearing a Marker
Using the Markers
Playing back a Marker
Playing an Audio CD CD-DA
Buttons on the Remote Control used for CD playback
Playing back an MP3 Disc
Audio/MP3 Disc
When Intro Play is completed, Normal Play is per- formed
During playback, press
Play option will be highlighted
Anykey button
To Program Tracks
Playlist, then
To select Disc Navigation
√ll
Returns to the Album screen Unit enters slide show mode
Slide show Rotation or
Insert a MPEG4 Disc into the disc tray
Tracking
Playing the VCR
Frame Advance
VHS Playback
Fps/Review
Skip
Scan or Reverse Intro Scan, then press
Forward Intro
Recordable discs
Before Recording
DVD-RAM/-RWVR mode
Recording Mode
Recording Formats
Unrecordable video
Content Protection for Recordable Media Cprm
External Devices DV Input jack
Recording from
Making a One Touch
Timer REC button
Recording OTR
Enter or
Recording mode VCR
Recording mode DVD
If the timer settings overlap
# To make
Edit, then press
Edit the items you want to modify. See the Timer
Recording section for more information on Timer
Maximum Recording Time SP vs. SLP
Basic VCR Recording
Scheduled
Before starting
When the DVD Recorder & VCR is connected
Pausing / Resuming
To Watch a Different Channel from the One being Recorded
Watch a different media during record- ing
To copy from DVD to VCR
Copy to DVD or VCR
Direct copy DVD to VCR
DVD -- VCR
Direct copy VCR to DVD
To copy from VCR to DVD
Press …† buttons
VCR--DVD , then
Using the Menu button
Using the Title List button
Playing the Title List
Play but
Play, Rename, Delete
Free Space Function
Play to play
Anykey button
Press …† buttons to select a title you want to
RenamingLabeling a Title
Or √ button
Rename , then
Status
LockingProtecting a Title
Protection , then
Deleting a Section of a Title
Deleting a Title
Select Delete Then
Edit Title List screen is displayed
Edit Title List Screen Elements
…† buttons to select a title containing a
Editing a Chapter
Chapter Edit
Chapter Edit Screen Elements
Enter button
Follow steps 1 to 3
Press
Delete All,
Divide from the Title List, then press
Dividing a Title
Divide Title , then
Divide Title List screen is displayed
Return , then
Creating a Playlist
New Playlist
Renaming a Playlist Title
Playing Titles in the Playlist
Playlist , then
Edit Playlist
Editing a Scene for the Playlist
Enter the desired characters using
Buttons
Follow these instructions to edit scenes for a playlist
To stop scene play, press
To setup, follow steps 1 to 3
Press …† œ √ buttons to select the scene
Modify, then
Add, then press
…† buttons to select Move, then press
…† buttons to select the title you want
Copying a Playlist Title to the VCR
Select Delete, then
Deleting a Playlist Title from the Playlist
Disc Manager
Editing the Disc Name
Yes, then press
Disc Protection
Disc Protection
Disc Manager
Button
Formatting a Disc
Finalizing a disc
Enter button Disc is finalized
Unfinalizing a disc V/VR mode
Titles from the record list
Player
Delete All Title Lists
Press √ buttons to select Yes, then press Enter button All
Edit Compatible
Lists are deleted
Title Menu button
Reference
Timer recording does
Power turns on
No response Forget the password
Input is displayed
Troubleshooting DVD
Troubleshooting VCR
Please check the disc
Movie
Make sure there are no scratches or dirt on the disc
Disc is PAL format and cannot be played on this unit
Problem Explanation / Solution
General
Specifications
Input
Audio Output
Samsung DVD Recorder & VCR
Contact Samsung World Wide
Samsung Electronics AMERICA, INC