LCD monitor indicator
17 | Image quality |
| p.53 | |
18 | Image size |
| p.52 | |
19 | Number of available shots remaining | 18 | p.16 | |
Remaining time (Movie clip/ Voice recording) | 00:01:30 / 01:00:00 | p.16 | ||
| ||||
20 | Voice memo/ Mic. off |
| p.30/23 | |
21 | Optical/ Digital Zoom bar/ |
| p.27 | |
Digital Zoom rate |
| |||
|
|
|
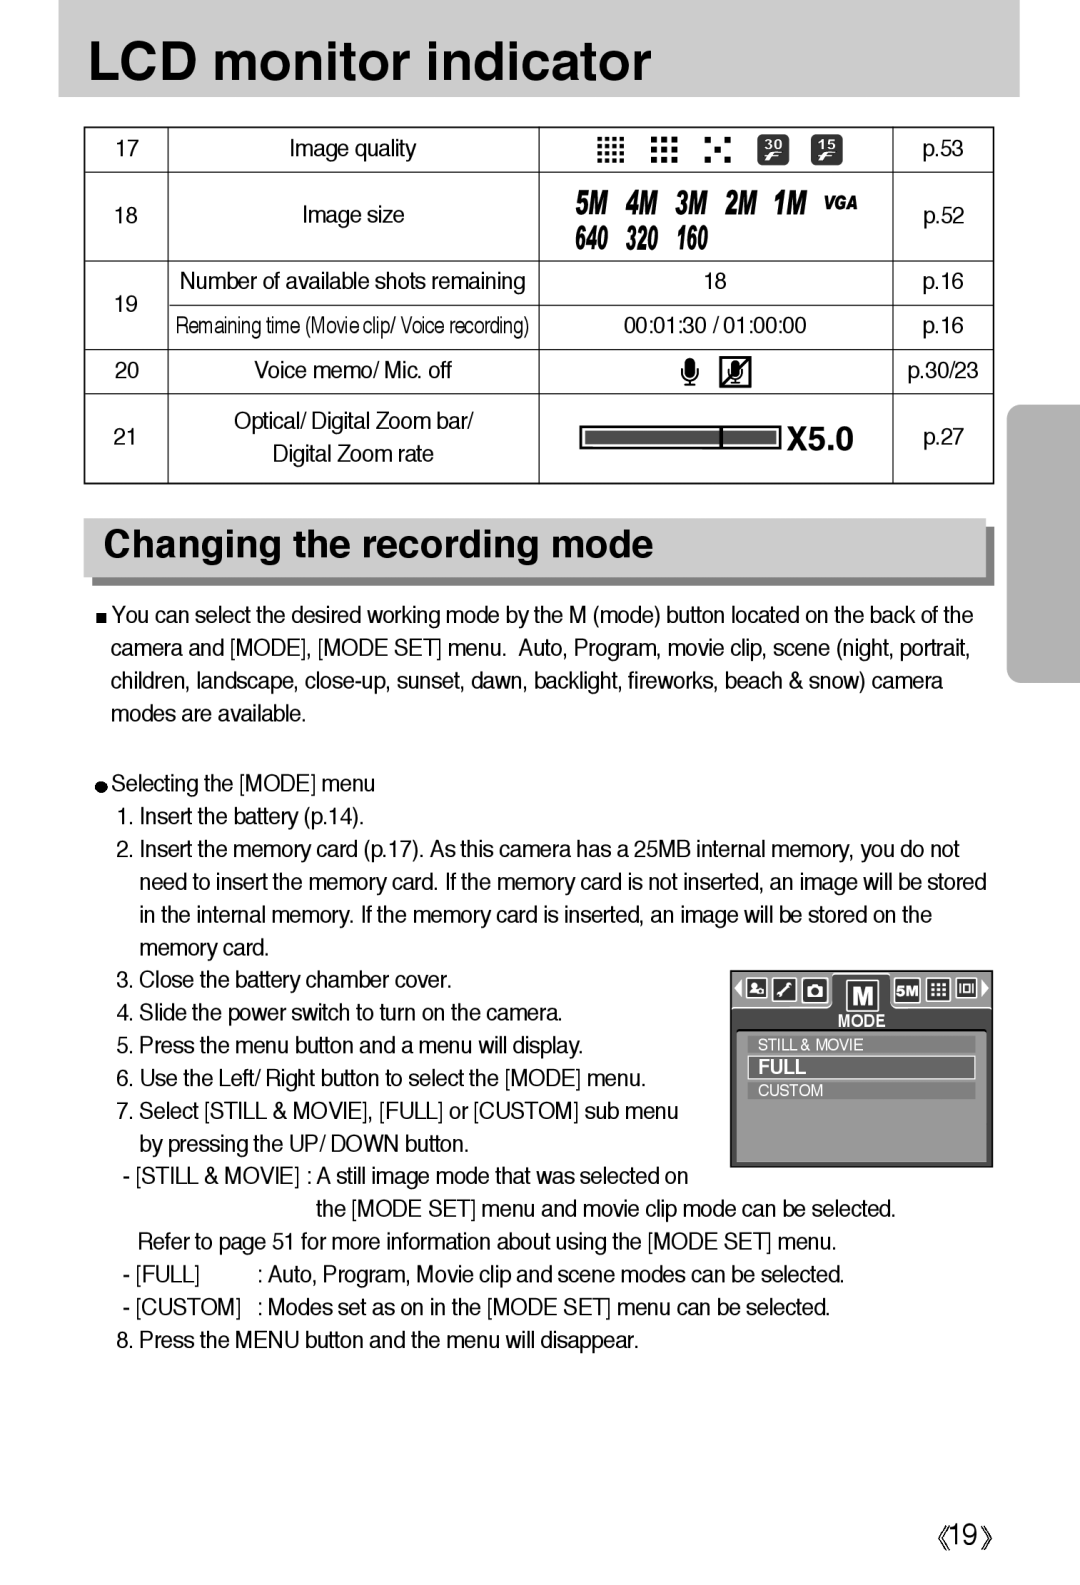
Changing the recording mode
![]() You can select the desired working mode by the M (mode) button located on the back of the camera and [MODE], [MODE SET] menu. Auto, Program, movie clip, scene (night, portrait, children, landscape,
You can select the desired working mode by the M (mode) button located on the back of the camera and [MODE], [MODE SET] menu. Auto, Program, movie clip, scene (night, portrait, children, landscape,
Selecting the [MODE] menu
1.Insert the battery (p.14).
2.Insert the memory card (p.17). As this camera has a 25MB internal memory, you do not need to insert the memory card. If the memory card is not inserted, an image will be stored in the internal memory. If the memory card is inserted, an image will be stored on the memory card.
3. Close the battery chamber cover. |
|
|
|
|
|
|
|
|
|
|
|
|
|
|
|
|
|
|
|
|
|
| |
4. Slide the power switch to turn on the camera. |
|
|
|
|
|
|
|
|
|
|
|
| MODE | ||||||||||
5. Press the menu button and a menu will display. |
| STILL & MOVIE | |||||||||
6. Use the Left/ Right button to select the [MODE] menu. |
| FULL |
| ||||||||
| CUSTOM | ||||||||||
|
| ||||||||||
7.Select [STILL & MOVIE], [FULL] or [CUSTOM] sub menu by pressing the UP/ DOWN button.
- [STILL & MOVIE] : A still image mode that was selected on
| the [MODE SET] menu and movie clip mode can be selected. |
Refer to page 51 for more information about using the [MODE SET] menu. | |
- [FULL] | : Auto, Program, Movie clip and scene modes can be selected. |
-[CUSTOM] : Modes set as on in the [MODE SET] menu can be selected.
8. Press the MENU button and the menu will disappear.
![]() 19
19![]()
