Setting up the Date/ Time/ Date type
![]() You can change the date and time that will be displayed on the captured images and set up the date type.
You can change the date and time that will be displayed on the captured images and set up the date type.
Setting Date/ Time & Selecting Date Format |
|
|
|
|
|
|
|
|
|
|
| |
1. In any mode with the exception of Voice Recording mode, |
|
|
|
|
|
|
|
|
|
|
|
|
|
|
|
|
|
|
|
|
|
|
|
| |
press the MENU button. |
|
|
|
|
|
|
|
|
|
|
| |
|
|
|
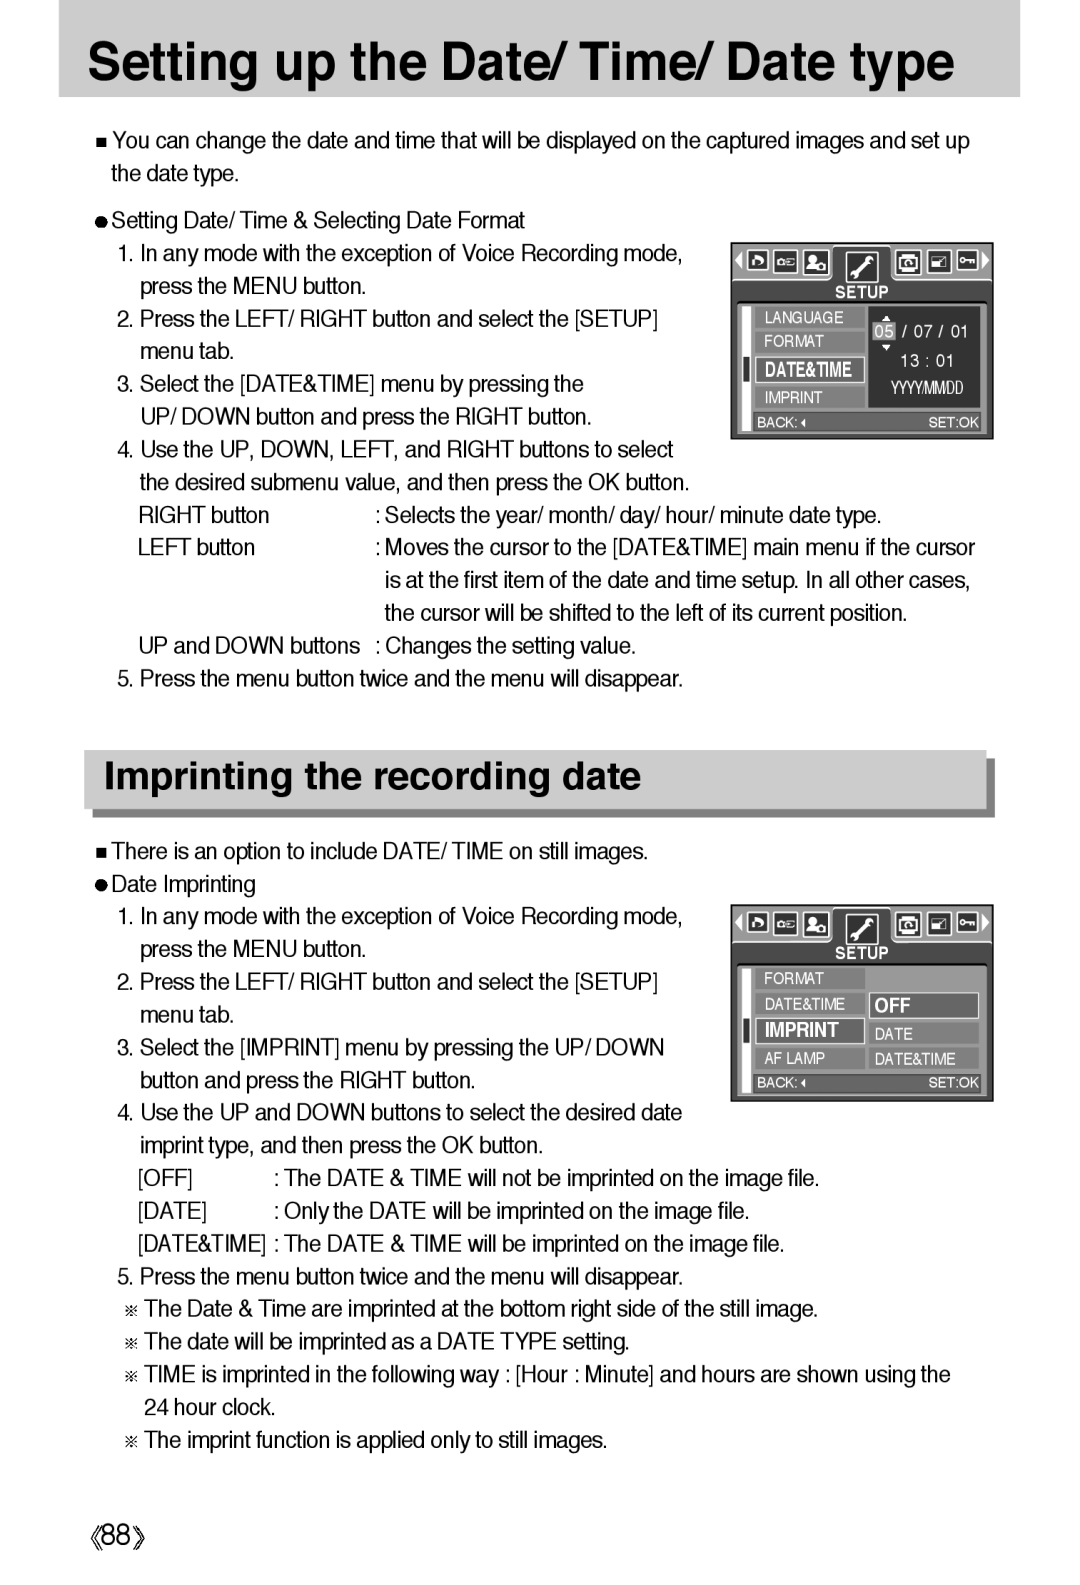
| SETUP | ||||||||
2. Press the LEFT/ RIGHT button and select the [SETUP] |
| LANGUAGE | 05 / 07 / 01 |
| ||||||||
menu tab. |
| FORMAT |
| |||||||||
| 13 : 01 |
|
| |||||||||
3. Select the [DATE&TIME] menu by pressing the |
| DATE&TIME |
|
| ||||||||
| YYYY/MM/DD |
| ||||||||||
| IMPRINT |
| ||||||||||
UP/ DOWN button and press the RIGHT button. |
|
|
|
|
|
| ||||||
| BACK: |
|
| SET:OK |
| |||||||
|
|
|
|
|
|
|
|
|
|
|
|
|
4.Use the UP, DOWN, LEFT, and RIGHT buttons to select the desired submenu value, and then press the OK button.
RIGHT button | : Selects the year/ month/ day/ hour/ minute date type. |
LEFT button | : Moves the cursor to the [DATE&TIME] main menu if the cursor |
| is at the first item of the date and time setup. In all other cases, |
| the cursor will be shifted to the left of its current position. |
UP and DOWN buttons | : Changes the setting value. |
5. Press the menu button twice and the menu will disappear.
Imprinting the recording date
There is an option to include DATE/ TIME on still images. |
|
|
|
|
|
|
|
|
|
|
|
Date Imprinting |
|
|
|
|
|
|
|
|
|
|
|
1. In any mode with the exception of Voice Recording mode, |
|
|
|
|
|
|
|
|
|
|
|
|
|
|
|
|
|
|
|
|
|
| |
press the MENU button. |
|
|
|
|
|
|
|
|
|
|
|
| SETUP | ||||||||||
2. Press the LEFT/ RIGHT button and select the [SETUP] |
| FORMAT | OFF | ||||||||
menu tab. |
| DATE&TIME | |||||||||
| IMPRINT | DATE | |||||||||
3. Select the [IMPRINT] menu by pressing the UP/ DOWN |
| ||||||||||
| AF LAMP | DATE&TIME | |||||||||
button and press the RIGHT button. |
| ||||||||||
| BACK: |
|
|
| SET:OK |
| |||||
|
|
|
|
|
|
|
|
|
|
|
|
4.Use the UP and DOWN buttons to select the desired date imprint type, and then press the OK button.
[OFF] | : The DATE & TIME will not be imprinted on the image file. |
[DATE] | : Only the DATE will be imprinted on the image file. |
[DATE&TIME] : The DATE & TIME will be imprinted on the image file. | |
5. Press the menu button twice and the menu will disappear. | |
![]() The Date & Time are imprinted at the bottom right side of the still image.
The Date & Time are imprinted at the bottom right side of the still image.
![]() The date will be imprinted as a DATE TYPE setting.
The date will be imprinted as a DATE TYPE setting.
![]() TIME is imprinted in the following way : [Hour : Minute] and hours are shown using the 24 hour clock.
TIME is imprinted in the following way : [Hour : Minute] and hours are shown using the 24 hour clock.
![]() The imprint function is applied only to still images.
The imprint function is applied only to still images.
![]() 88
88![]()