Main
Safety Instructions
Warning! Important Safety Instructions
CAUTION
Thank You for Choosing Samsung
Important Safety Information
SAMS
Safety Instructions
SUNG
FCC Information
Table of Contents
Page
Page
Page
List of Features
Checking Parts
Side Panel Buttons : HLM437W/HLM507W/HLM617W
Side Panel Jacks : HLM437W/HLM507W/HLM617W
HLM437W HLM507W HLM617W
Side Panel Buttons : HLM4365W/HLM5065W
Side Panel Jacks HLM4365W/HLM5065W
Front Panel LED Indicators : HLM437W/HLM507W/HLM617W
Indicator Light Key
Front Panel LED Indicators : HLM4365W/HLM5065W
Indicator Light Key
Rear Panel Jacks
Remote Control
Installing Batteries in the Remote Control
2
1
3
Page
Page
Connecting VHF and UHF Antennas
1
Antennas with 300-ohm Flat Twin Leads
2
Antennas with 75-ohm Round Leads
Separate VHF and UHF Antennas
1
2
Connecting Cable TV and VCR
1
Cable without a Cable Box
2
1
Cable with a Cable Box that Descrambles All Channels
Connecting a Cable Converter Box
Connecting a Cable Converter Box and a VCR
Connecting a Camcorder
2
3
Connecting a DVD Player
2
Connecting to Y,Pb,Pr
Connecting to audio and video jacks
Connecting a DTV Set Top Box
Connecting to Y,Pb,Pr
Connecting to DVI (Digital Visual Interface)
Connecting to R,G,B
Page
Page
Turning the TV On and Off
1
Viewing the Menus and Displays
2
Displaying the Menus
Displaying Status Information
1
3
2
1
Selecting the Antenna Input
Channel Memory
1
Selecting the Broadcast Source
3
2
Storing Channels in Memory Automatically
1
2
3
2
1
Adding and Erasing Channels
Changing Channels
Using the Channel Buttons
Using the Number Buttons
Using the Previous Channel
Scanning channels
2
To Store Your Favorite Channels:
4
To View Your Favorite Channels:
Labeling the Channels
1
2
5
4
3
Page
Picture Control
1
Customizing the Picture
4
3
Using Automatic (Standard) Picture Settings
1
2
Guide to Automatic Picture Settings
Sound Control
Adjusting the Volume
Using the Mute Button
Customizing the Sound
3
4
2
1
Using Automatic(Standard) Sound Settings
3
5
4
Setting the Timers
1
Setting the On/Off Timer
4
3
2
5
6
2
1
8
1
Selecting the Signal Source
3
2
Remote Control VCR/DVD Buttons
Page
Page
Setting Up Your Remote Control
Setting Up the Remote to Operate Your VCR
1
3
4
Note on Using Remote Control Modes: VCR
Setting Up the Remote to Operate Your Cable Box
1
3
4
Note on Using Remote Control Modes: Cable Box
Setting Up the Remote to Operate Your DVD
1
3
4
Note on Using Remote Control Modes: DVD
Page
Fine Tuning Channels
1
2
5
4
3
1
3
1
Setting the Film Mode
Page
Changing the Screen Size
Wide
Panorama
Zoom1
Zoom2
Page
Special Audio Options
MTS Settings: Choosing a Soundtrack
4
Guide to MTS Settings
Dolby Virtual
4
Page
Page
Viewing Closed Caption Information
1
Closed Captions
4
3
2
2
Selecting a PIP Screen
3
NOTES
Selecting an External Signal
3
Selecting a Signal Source (Antenna or Cable) for PIP
3
Swapping the Contents of the PIP and Main image
3
Changing the Size of the PIP image
Changing the Picture-in-Picture Channel
Selecting the Sound Source
3
Changing the Location of the PIP image
Using the V-Chip
1
Setting Up Your Personal ID Number (PIN)
3
2
How to Enable/Disable the V-Chip
1
2
1
How to Set up Restrictions Using the TV guidelines
3
4
5
6
2
1
How to Set up Restrictions Using the MPAA Ratings: G, PG, PG-13, R, NC-17, X
3 4
How to Reset the TV after the V-Chip Blocks a Channel (Emergency Escape)
Page
Page
Using Your TV as a Computer (PC) Display
How to Set up Your PC Software (Windows only)
Display Modes
Page
Picture Quality Adjustment
1
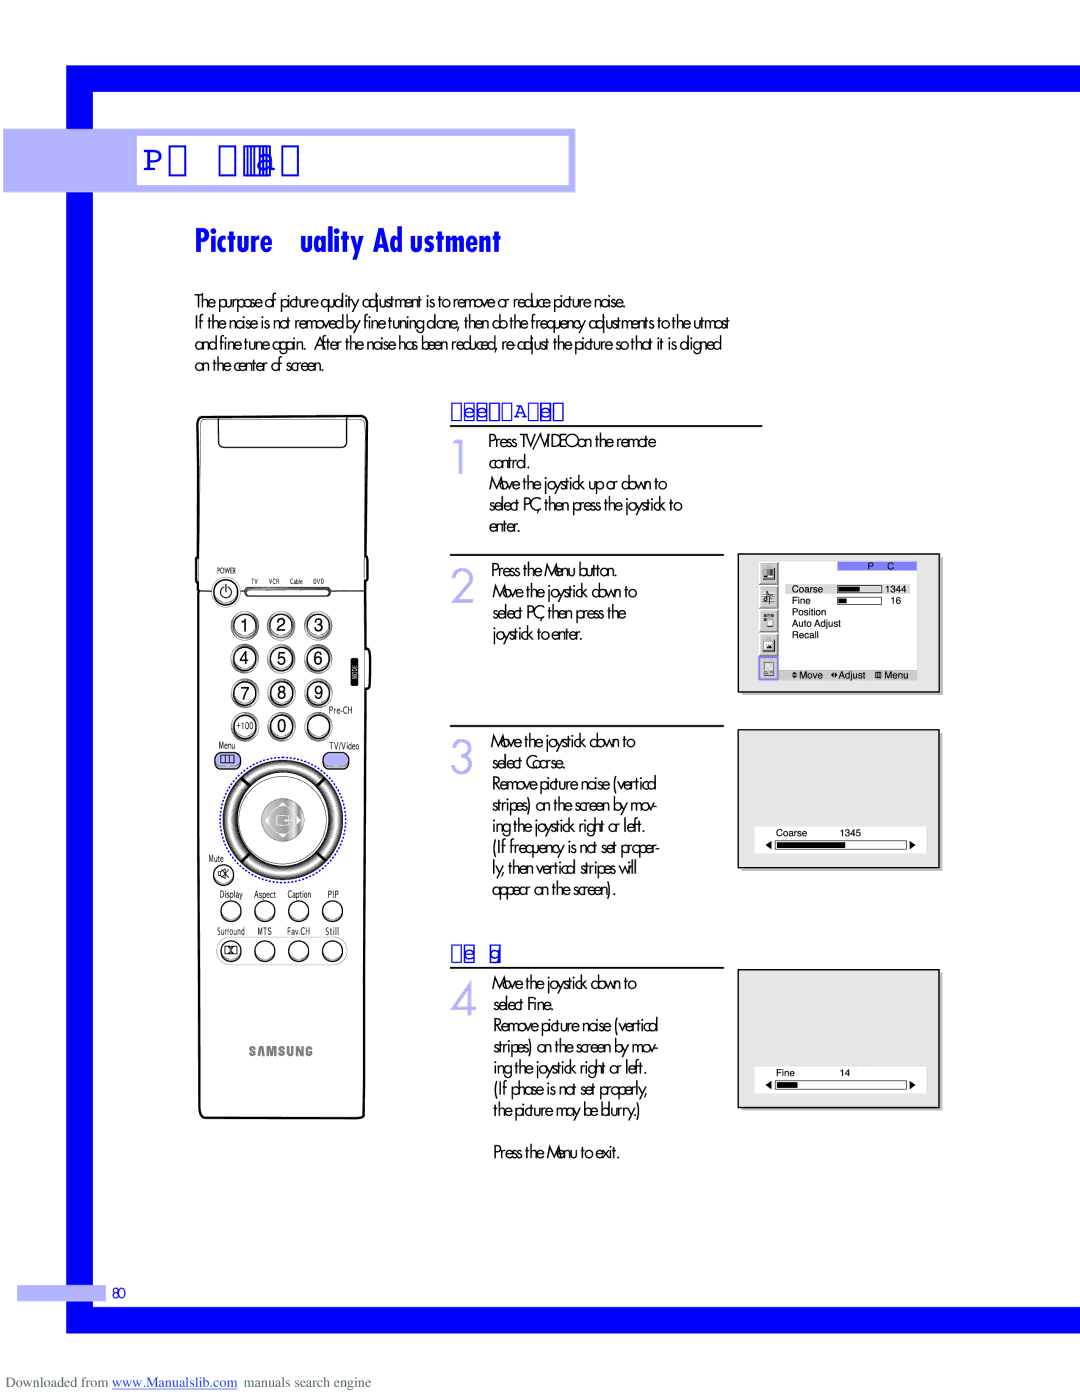
Frequency Adjustment
4
2
Fine tuning
1
2
To Initialize the Screen Position and Picture Quality Adjustment
Changing the Screen Size (PC mode)
Aspect Supported settings
Page
Page
Appendix
Troubleshooting
Problem Possible Solution
Care and Maintenance
Placement
Liquids
Cabinet
Temperature
DLPTV