User’s Manual
Reformat to NTFS
Following describes formatting to NTFS in Windows XP:
-Connect STORY Station Series External Hard Drive to the computer.
-Click “Start” from the lower left corner of your screen.
-
-From the “Computer Management” tool, select “Disk Management.”
-
-Once drive partition has been deleted,
-From Create Partition Wizard, select “Primary Partition” and then enter the desired size of the partition.
-From the “File System” menu, select “NTFS” and format
WARNING – PARTITONING AND FORMATTING YOUR DRIVE WILL PERMANENTLY ERASE ALL THE FILES ON THE DRIVE. DO NOT ATTEMPT TO DO THIS UNLESS ALL OF YOUR FILES HAVE BEEN BACKED UP AND CHECKED FOR RELIABILITY AND READABILITY.
Format in Macintosh
Following describes formatting in Mac OS X:
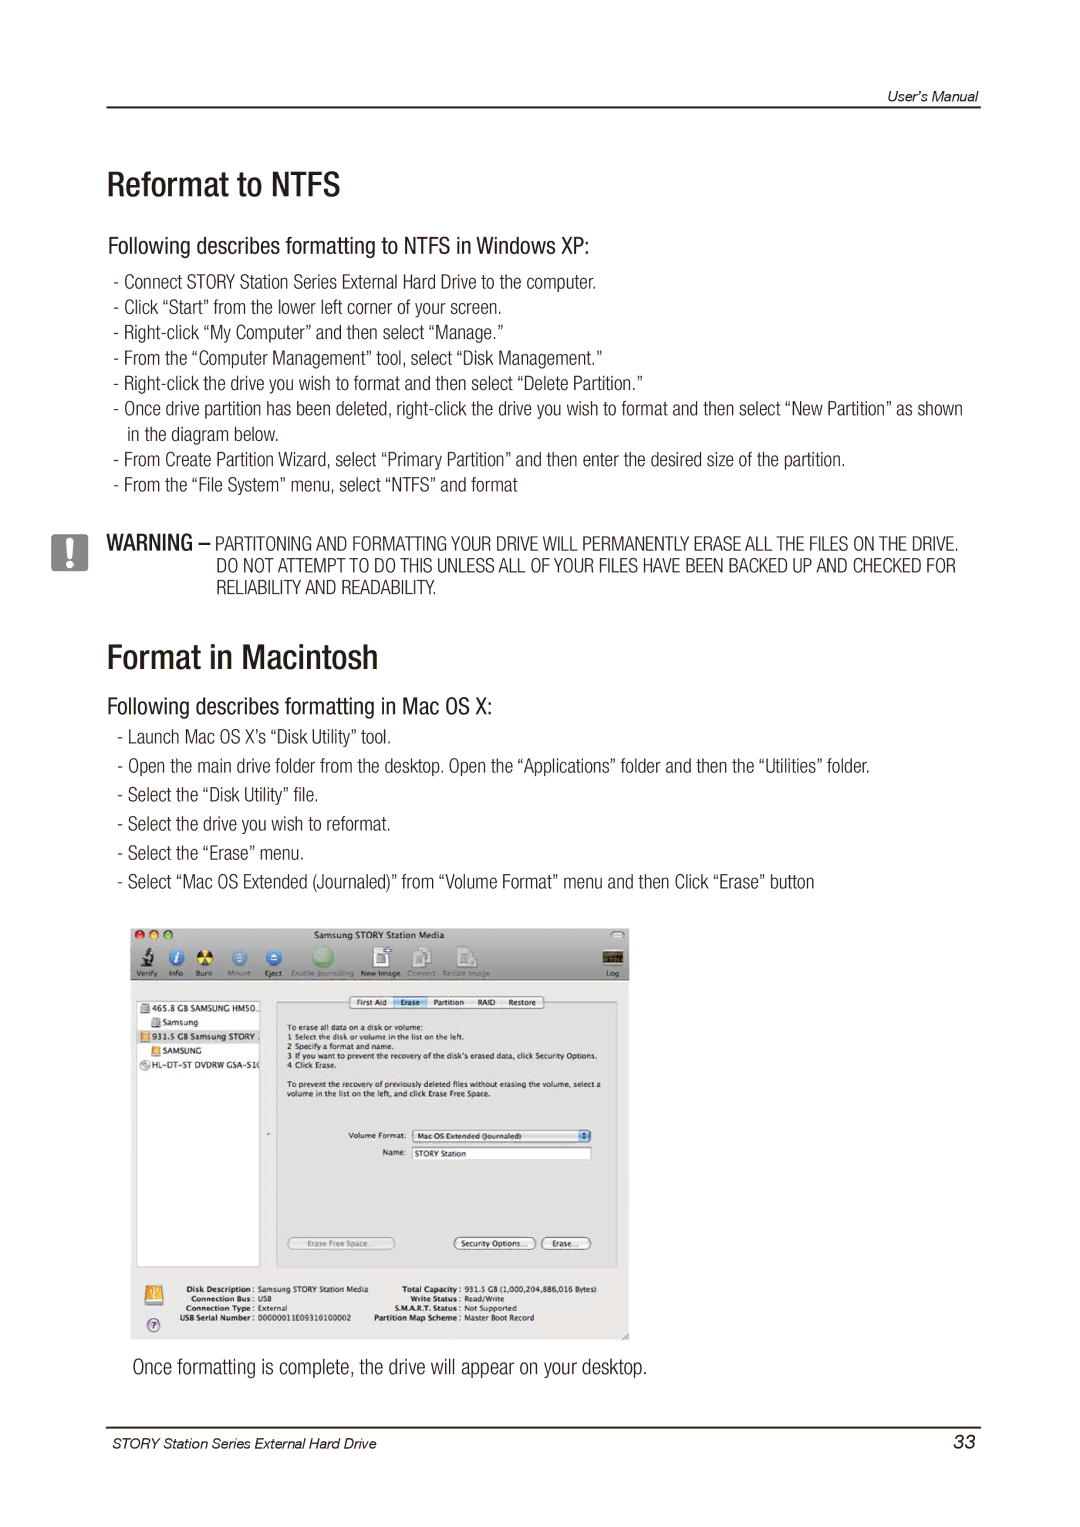
-Launch Mac OS X’s “Disk Utility” tool.
-Open the main drive folder from the desktop. Open the “Applications” folder and then the “Utilities” folder.
-Select the “Disk Utility” file.
-Select the drive you wish to reformat.
-Select the “Erase” menu.
-Select “Mac OS Extended (Journaled)” from “Volume Format” menu and then Click “Erase” button
Once formatting is complete, the drive will appear on your desktop.
STORY Station Series External Hard Drive | 33 |
