11.APPENDIX_EN 2/5/03 12:36 AM Page 2
A P P E N D I X
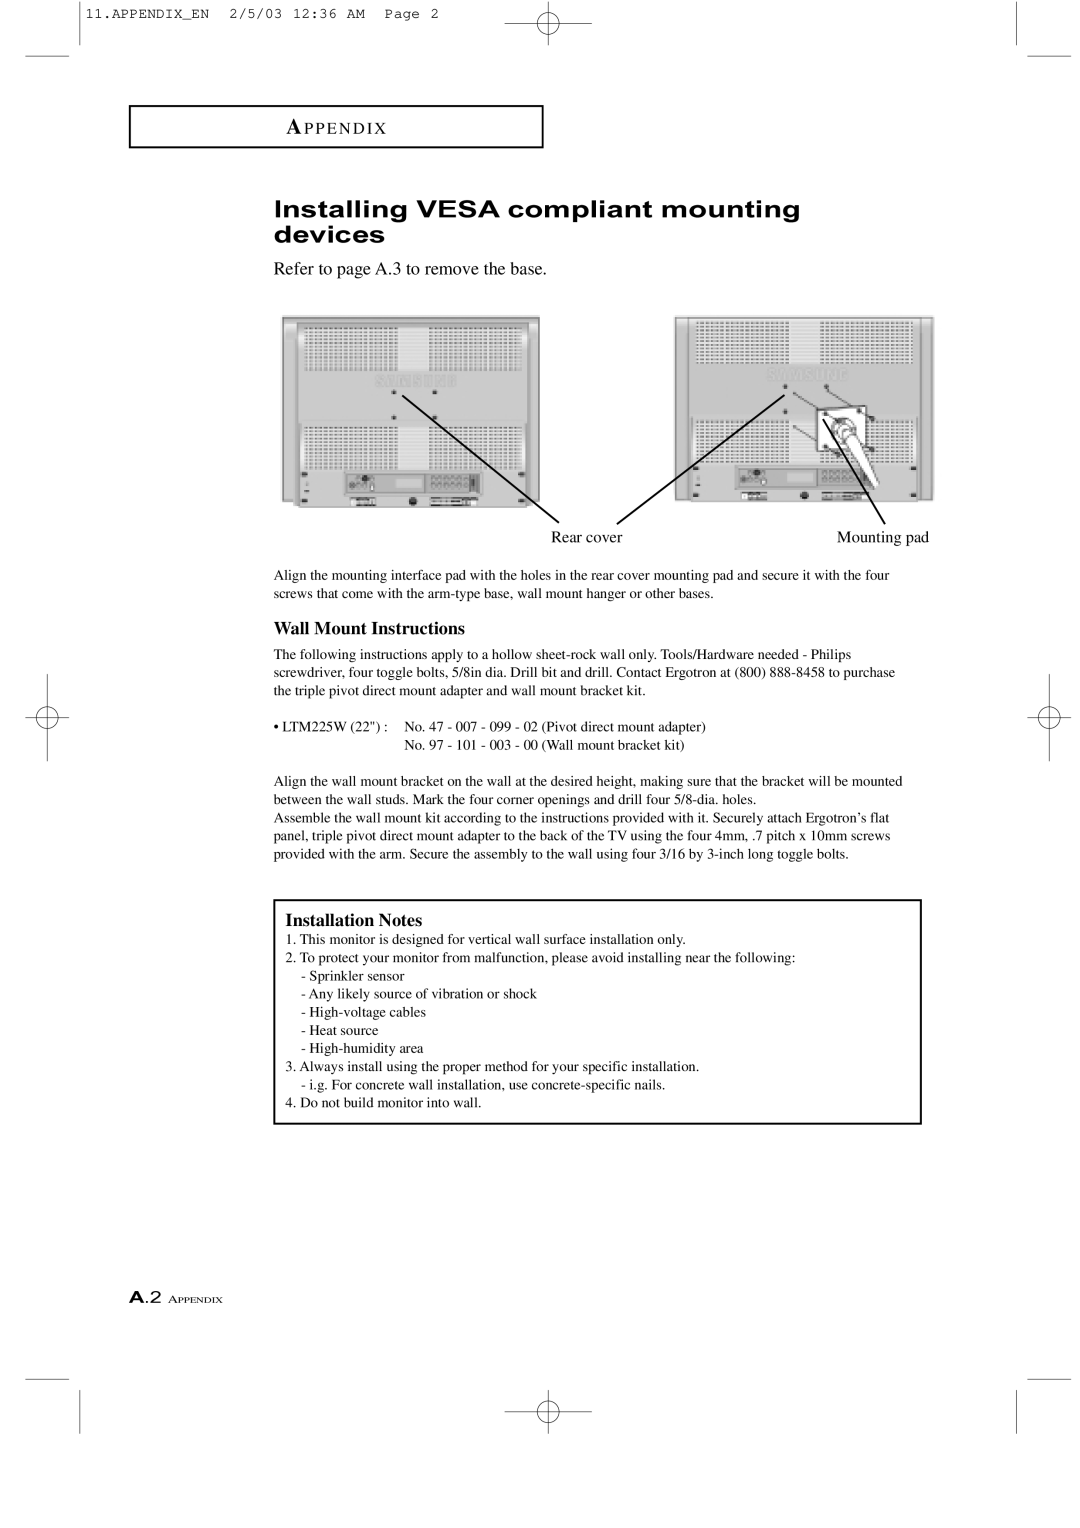
Installing VESA compliant mounting devices
Refer to page A.3 to remove the base.
Rear cover | Mounting pad |
Align the mounting interface pad with the holes in the rear cover mounting pad and secure it with the four screws that come with the
Wall Mount Instructions
The following instructions apply to a hollow
•LTM225W (22") : No. 47 - 007 - 099 - 02 (Pivot direct mount adapter) No. 97 - 101 - 003 - 00 (Wall mount bracket kit)
Align the wall mount bracket on the wall at the desired height, making sure that the bracket will be mounted between the wall studs. Mark the four corner openings and drill four
Assemble the wall mount kit according to the instructions provided with it. Securely attach Ergotron’s flat panel, triple pivot direct mount adapter to the back of the TV using the four 4mm, .7 pitch x 10mm screws provided with the arm. Secure the assembly to the wall using four 3/16 by
Installation Notes
1.This monitor is designed for vertical wall surface installation only.
2.To protect your monitor from malfunction, please avoid installing near the following:
-Sprinkler sensor
-Any likely source of vibration or shock
-
-Heat source
-
3.Always install using the proper method for your specific installation.
-i.g. For concrete wall installation, use
4.Do not build monitor into wall.
A.2 APPENDIX