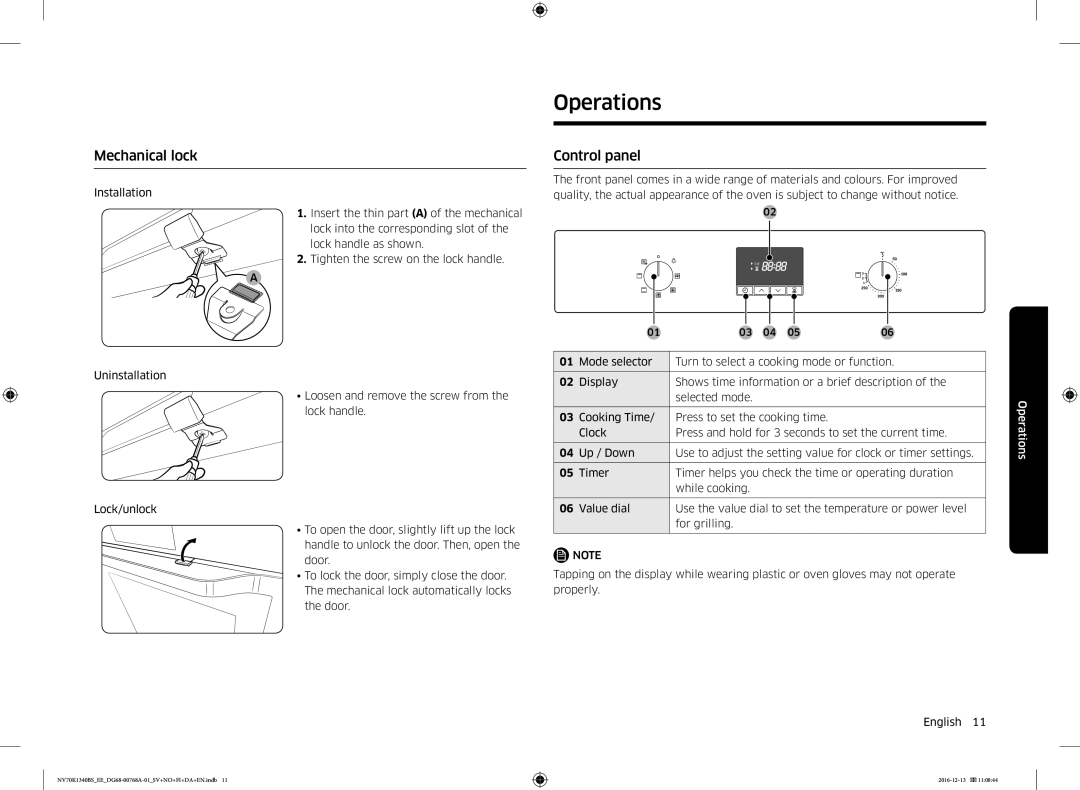
Mechanical lock
Installation
1.Insert the thin part (A) of the mechanical
lock into the corresponding slot of the lock handle as shown.
2. Tighten the screw on the lock handle.
A
Uninstallation
•Loosen and remove the screw from the lock handle.
Lock/unlock
•To open the door, slightly lift up the lock
handle to unlock the door. Then, open the door.
•To lock the door, simply close the door.
The mechanical lock automatically locks the door.
Operations
Control panel
The front panel comes in a wide range of materials and colours. For improved quality, the actual appearance of the oven is subject to change without notice.
02
| 01 | 03 | 04 | 05 | 06 |
|
|
| |||
01 | Mode selector | Turn to select a cooking mode or function. | |||
|
|
| |||
02 | Display | Shows time information or a brief description of the | |||
|
| selected mode. |
|
|
|
|
|
|
| ||
03 | Cooking Time/ | Press to set the cooking time. |
| ||
| Clock | Press and hold for 3 seconds to set the current time. | |||
|
|
| |||
04 | Up / Down | Use to adjust the setting value for clock or timer settings. | |||
|
|
| |||
05 | Timer | Timer helps you check the time or operating duration | |||
|
| while cooking. |
|
|
|
|
|
| |||
06 | Value dial | Use the value dial to set the temperature or power level | |||
|
| for grilling. |
|
|
|
|
|
|
|
|
|
![]() NOTE
NOTE
Tapping on the display while wearing plastic or oven gloves may not operate properly.
English 11
Operations
