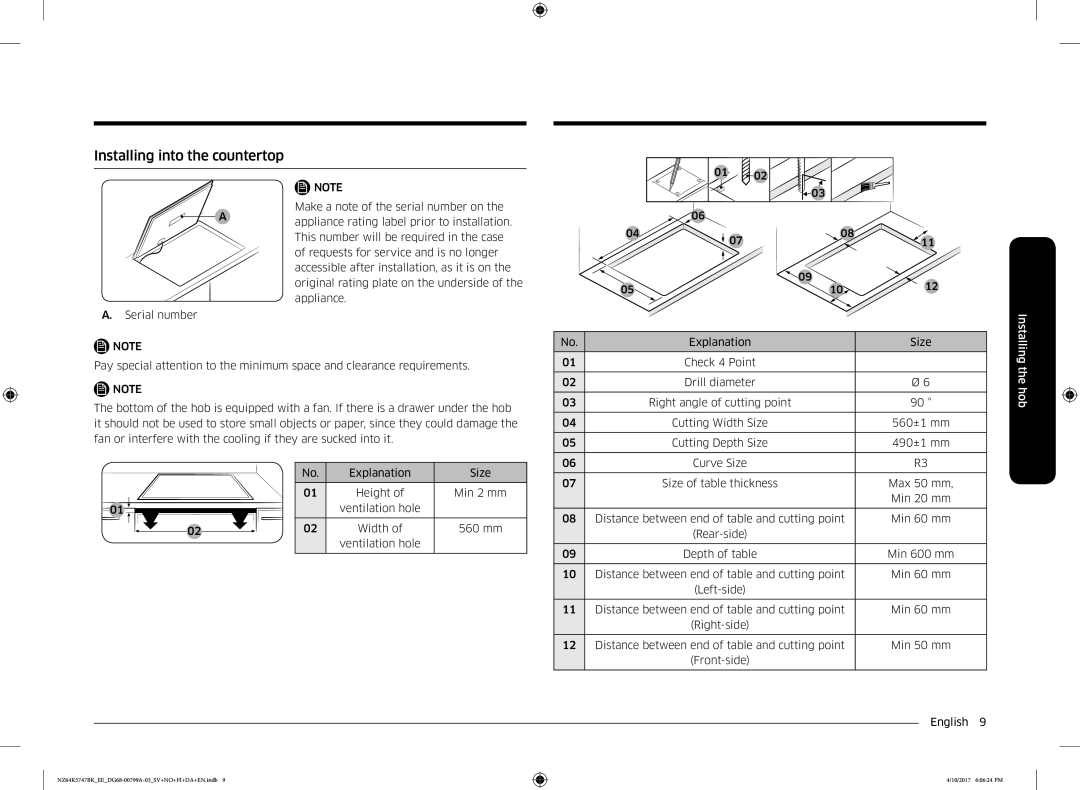
Installing into the countertop
01 ![]() 02
02
A
![]() NOTE
NOTE
Make a note of the serial number on the appliance rating label prior to installation.
06
03 |
This number will be required in the case of requests for service and is no longer accessible after installation, as it is on the original rating plate on the underside of the appliance.
04
05
![]() 07
07
08 | 11 | |
| ||
09 | 12 | |
10 | ||
|
A.Serial number
![]() NOTE
NOTE
No. | Explanation | Size |
|
|
|
|
|
|
|
|
|
|
|
|
|
|
|
|
|
|
|
|
|
|
|
|
|
|
|
|
|
|
|
|
|
|
|
|
|
|
|
Installing
Pay special attention to the minimum space and clearance requirements.
![]() NOTE
NOTE
The bottom of the hob is equipped with a fan. If there is a drawer under the hob it should not be used to store small objects or paper, since they could damage the fan or interfere with the cooling if they are sucked into it.
01 | Check 4 Point |
|
02 | Drill diameter | Ø 6 |
03 | Right angle of cutting point | 90 ° |
04 | Cutting Width Size | 560±1 mm |
05 | Cutting Depth Size | 490±1 mm |
06 | Curve Size | R3 |
the hob
01 ![]()
02
No. | Explanation | Size |
|
|
|
01 | Height of | Min 2 mm |
| ventilation hole |
|
|
|
|
02 | Width of | 560 mm |
| ventilation hole |
|
|
|
|
07 | Size of table thickness | Max 50 mm, |
|
| Min 20 mm |
08 | Distance between end of table and cutting point | Min 60 mm |
|
| |
09 | Depth of table | Min 600 mm |
10 | Distance between end of table and cutting point | Min 60 mm |
|
| |
11 | Distance between end of table and cutting point | Min 60 mm |
|
| |
12 | Distance between end of table and cutting point | Min 50 mm |
|
| |
|
| English 9 |
4/10/2017 6:06:24 PM
