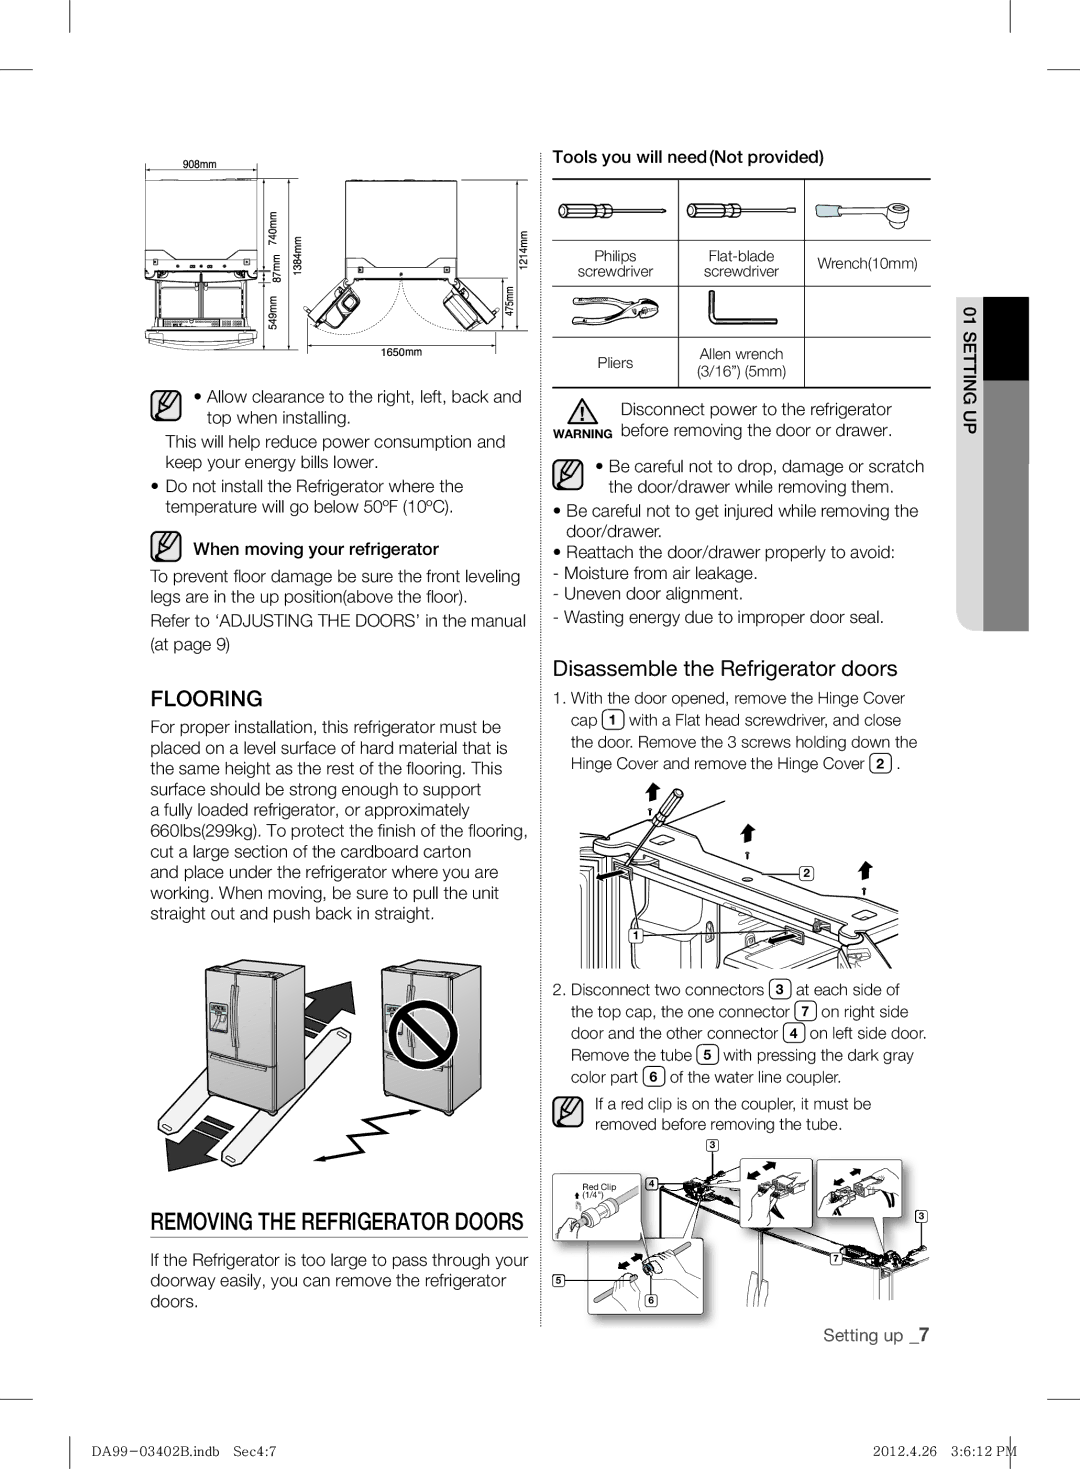
• Allow clearance to the right, left, back and top when installing.
This will help reduce power consumption and keep your energy bills lower.
•Do not install the Refrigerator where the temperature will go below 50ºF (10ºC).
When moving your refrigerator
To prevent fl oor damage be sure the front leveling legs are in the up position(above the fl oor).
Refer to ‘ADJUSTING THE DOORS’ in the manual (at page 9)
FLOORING
For proper installation, this refrigerator must be placed on a level surface of hard material that is the same height as the rest of the fl ooring. This surface should be strong enough to support
a fully loaded refrigerator, or approximately 660lbs(299kg). To protect the fi nish of the fl ooring, cut a large section of the cardboard carton
and place under the refrigerator where you are working. When moving, be sure to pull the unit straight out and push back in straight.
Tools you will need(Not provided)
Philips | Wrench(10mm) |
| ||
screwdriver | screwdriver |
| ||
|
| |||
|
|
| 012 | |
Pliers | Allen wrench |
| SETTINGOPERATINGUP | |
(3/16”) (5mm) |
| |||
|
| |||
Disconnect power to the refrigerator | ||||
WARNING before removing the door or drawer. | ||||
| ||||
• Be careful not to drop, damage or scratch the door/drawer while removing them.
•Be careful not to get injured while removing the door/drawer.
•Reattach the door/drawer properly to avoid:
-Moisture from air leakage.
-Uneven door alignment.
-Wasting energy due to improper door seal.
Disassemble the Refrigerator doors
1.With the door opened, remove the Hinge Cover cap 1 with a Flat head screwdriver, and close
the door. Remove the 3 screws holding down the Hinge Cover and remove the Hinge Cover 2 .
2
1 ![]()
![]()
2.Disconnect two connectors 3 at each side of the top cap, the one connector 7 on right side door and the other connector 4 on left side door. Remove the tube 5 with pressing the dark gray color part 6 of the water line coupler.
If a red clip is on the coupler, it must be removed before removing the tube.
3
REMOVING THE REFRIGERATOR DOORS
If the Refrigerator is too large to pass through your doorway easily, you can remove the refrigerator doors.
Red Clip | 4 |
(1/4") |
|
5 |
6
![]() 3
3
7 |
Setting up _7
2012.4.26 3:6:12 PM |
