User’s Guide
Basic
Introduction
Environmentally friendly
Key benefits
Wide range of functionality and application support
Operating System Windows Mac Linux C41xW
Features by models
Software
Included, Blank Not available
Variety feature
Status LED flashes or remains constantly on
Useful to know
General icons
About this user’s guide
Conventions
Chapter
Safety information
Important safety symbols
Operating environment
Operating method
Installation / Moving
Maintenance / Checking
Supply usage
Safety information
Machine overview
Accessories
Front view
Rear view
Control panel overview
Turning on the machine
Installing the driver locally
Accessories Run
Windows
Reinstalling the driver
Learning the Basic Usage
To print a demo
Printing a demo
To change the size, you need to adjust the paper guide
Media and tray
Tray overview
Loading paper in the tray
Media and tray
Setting the paper size and type on
Manager select Switch to advanced mode Device Settings
Printing on special media
Labels
Preprinted paper
Card stock/ Custom-sized paper
Setting the paper size and type
Printing
Basic printing
Canceling a print job
Opening printing preferences
Click Properties or Preferences
Using a favorite setting
Setting Eco mode on the control panel
Setting eco mode on the driver
Using help
Eco printing
Result simulator
Maintenance
Ordering supplies and accessories
Type Average yield a Part name
Available supplies
Available supplies
Available maintenance parts
Storing the toner cartridge
Handling instructions
Estimated cartridge life
Toner cartridge usage
Redistributing toner
Redistributing toner
Replacing the toner cartridge
Replacing the toner cartridge
To be placed. Otherwise your printer stops printing
Replacing the waste toner container
Replacing the waste toner container
Replacing the imaging unit
Replacing the imaging unit
Cleaning the machine
Cleaning the outside
Cleaning the inside
Cleaning the machine
Tips for moving & storing your machine
Troubleshooting
Tips for avoiding paper jams
Clearing paper jams
Tray
Inside the machine
Exit area
Color of the LED indicates the machines current status
Understanding the status LED
Status LED
Toner / WPS / Power / Eco LED
Status Description
Orange
Appendix
General specifications
Specifications
Specifications
Print media specifications
Pre-printed
Colored
Section Recycled Labels b
Folio, A4, JIS B5, ISO
Print media weight/Capacitya Type Size
Tray Minimum size custom
Maximum size custom
Free HDD space Windows XP
Operating system Requirement recommended
Windows Server
Windows Vista
Operating system Requirements Recommended
Mac
Free HDD space
Mac OS X
Linux
Items Requirements
Operating system
Network environment
Laser safety statement
Ozone safety
Regulatory information
Recycling
Power saver China only
Applicable in countries with separate collection systems
United States of America only
FCC information to the user
Canadian radio interference regulations
Federal communications commission FCC
United states of america
Russia only Germany only
FCC statement for wireless LAN use
Turkey only Thai only Replacing the fitted plug for UK only
Important warning
Green and Yellow Earth
Brown Live
Approvals and Certifications
EC Certification
Declaration of conformity European countries
Regulatory compliance statements
Wireless guidance
EU countries
EEA/EFTA countries No limitations at this time
Israel only
China only
REV.1.01
Copyright
Advanced
Advanced
190
Software installation
After the installation is finished, click Close
Installation for Mac
Click Continue
List
Or Print & Fax
Reinstallation for Mac
Installing the Unified Linux Driver
Installation for Linux
Reinstallation for Linux
Using a network- connected machine
SyncThru Web Admin Service
SyncThru Web Service
SetIP
IPv4 configuration using SetIP Windows
Wired network setup
Printing a network configuration report
Setting IP address
Network manager before proceeding
IPv4 configuration using SetIP Mac
IPv4 configuration using SetIP Linux
Preferences or Administrator
Open /opt /Samsung /mfp /share /utils
Silent installation Mode
Installing driver over the network
Command- line Definition Description
Command-line Parameters
Read the license agreement and click Continue
Mac
Opens Printers
Printers and Faxes folder
Linux
Install the Linux driver and add network printer
Connection Type and click Continue
Click IP and select HP Jetdirect Socket in Protocol
Add a network printer
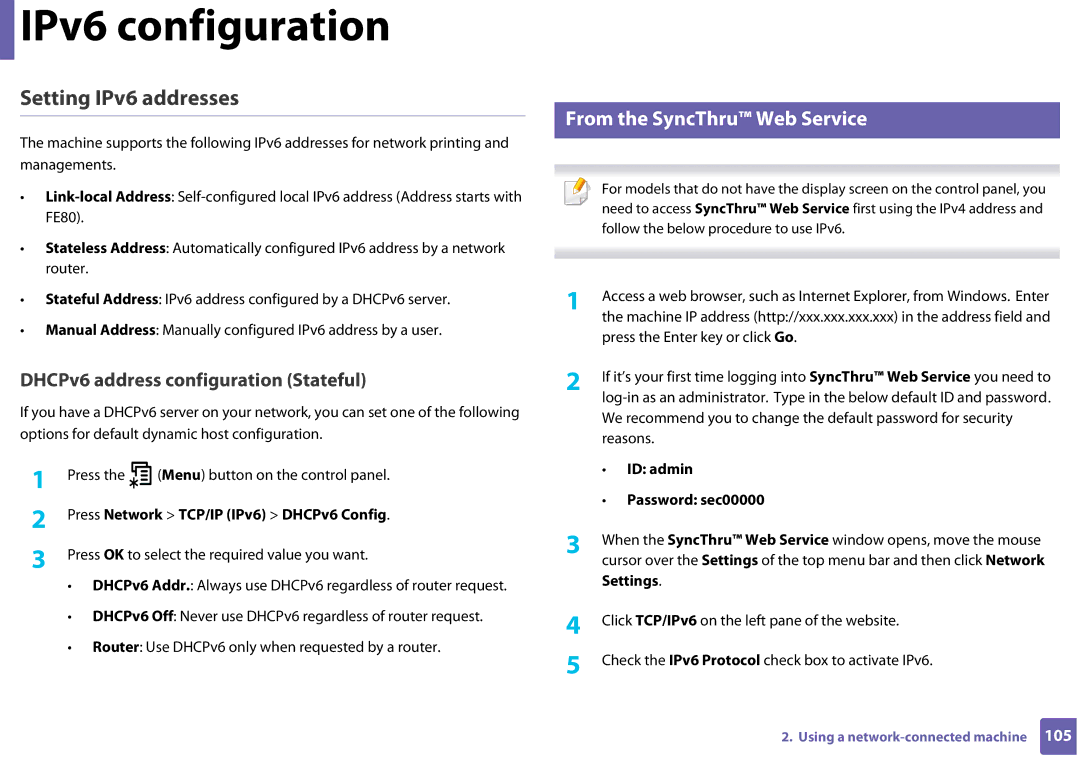
IPv6 configuration
Activating IPv6
From the control panel
Press Network TCP/IP IPv6 DHCPv6 Config
From the SyncThru Web Service
ID admin Password sec00000
Settings
Using SyncThru Web Service
Wireless network name and network password
Wireless network setup
Understanding your network type
Getting started
With Access Point
Introducing wireless set up methods
From the machine’s control
Panel
See Setting up Wi-Fi Direct on
Using the WPS button
Items to prepare
Choosing your type
Machines with a display screen
Wireless OK WPS Setting
Machines without a display screen
Re-connecting to a network
Canceling the connection process
Disconnecting from a network
Using the menu button
Access point via USB cable
Setup using Windows
Press Network Wireless Wlan Settings
Screen. Then, click Next
Operation Mode Select Infrastructure
Access point without a USB cable recommended
Creating the infrastructure network
Wireless network setup
Creating the ad hoc network in Windows
Ad hoc via USB cable
Operation Mode Select ad hoc
Cable between the computer and machine. Click Next
Setup using Mac
For the Dhcp method
For the Static method
Powered on
Make sure that the machine is connected to your computer
Type and click Continue
Next
If the screen does not appear, go to step
WEP Key Index
Access point without a USB cable recommended
Type and click Continue Connection and click Next
Creating the ad hoc network in Mac
Click Continue
For the Dhcp method
Using a network cable
Printing a network configuration report
Machine when configuring the wireless network
Quit
IP setting using SetIP Program Windows
Configuring the machine’s wireless network
Click Wireless Wizard
Turning the Wi-Fi network on/off
Setting the Wi-Fi Direct for mobile printing
Setting up Wi-Fi Direct
Click Wireless Custom
You can also turn the Wi-Fi network on/off
Enable or disable Wi-Fi Direct and set other options
Setting up the mobile device
Select Network Wireless Wi-Fi Direct from the control panel
Enable Wi-Fi Direct
Troubleshooting
Problems during setup or driver installation
How to compare
Click Configure Port.. button
For Windows 7, select Control Panel Devices and Printers
Other problems
Wireless network setup
Supported Mobile OS
Samsung Mobile Print
Supported devices
Android OS 2.1 or higher IOS 4.0 or higher
Using the NFC feature
Requirements
Direct on
Printer starts printing
Registering your Google account to the printer
Google Cloud Print
Click Register
Confirmation pop-up window appears
Printing from an application on mobile device
Printing from the Chrome browser
Printing with Google Cloud Print
Special features
Altitude adjustment
Change the settings on each tab Click OK
Changing the default print settings
For Windows 7, select Control Panel Devices and Printers
Preferences
Setting your machine as a default machine
Using advanced print features
Printing to a file PRN
Check the Print to file box in the Print window
Multiple Pages per Side
Understanding special printer features
Poster Printing Booklet Printinga Description
Using advanced print features
Creating a watermark
Editing a watermark
Deleting a watermark
Overlay a
Overlay
Creating a new
Overlay List box
Using a page overlay
Mac printing
Changing printer settings
Printing a document
Printing multiple pages on one sheet
Printing on both sides of the paper
Printing from applications
Linux printing
Printing files
Lp -d printer name -o option file name
Configuring Printer Properties
Open the Unified Driver Configurator
To remove the machine from the selected class
Useful management tools
Easy Capture Manager
Samsung Easy Color Manager
Samsung AnyWeb Print
How to use
Easy Eco Driver
From the Favorites tab, select Eco Printing Preview
Logging into SyncThru Web Service
Using SyncThru Web Service
Accessing SyncThru Web Service
SyncThru Web Service overview
Maintenance tab
Settings tab
Setting the system administrator’s information
Information tab Security tab
Using SyncThru Web Service
Understanding Samsung Easy Printer Manager
Using Samsung Easy Printer Manager
To open the program
Printer List
Advanced settings user interface overview
Device Settings
Job Accounting
Alert Settings Windows only
Machine status
Samsung Printer Status overview
Preferences, click the Basic tab Printer Status button
These icons appear on the Windows task bar
Using Samsung Printer Status
User’s Guide
Close
Using the Linux Unified Driver Configurator
Opening Unified Driver Configurator
Printers configuration
Printers tab
Switches to Printers configuration
Classes tab
Stop/Start Stops/starts the machine
Switches to Ports configuration
Ports configuration
Troubleshooting
Paper feeding problems
Power and cable connecting problems
Print
Printing problems
Paper source
Machine selects print
Print job is extremely
Slow Half the page is blank
Garbled, or incomplete
Text is wrong
Pages print, but they are
Blank
Printing problems
Condition Suggested Solutions Light or faded print
Printing quality problems
Top half of the paper is
Printed lighter than the rest
Toner specks
Condition
Dropouts
White Spots
Condition Suggested Solutions Vertical lines
Black background
Toner smear
Characters or pictures
Background scatter
Curl or wave
Condition Suggested Solutions Wrinkles or creases
Back of printouts are dirty
Solid color or black pages
Condition Suggested Solutions Loose toner
Character voids
Horizontal stripes
An unknown image
Condition Suggested Solutions Curl
Repetitively appears on a few
Sheets
Common Windows problems
Operating system problems
Condition Suggested solutions
Common Mac problems
Common Linux problems
Condition Suggested solutions Cannot open port device file
Quick Guide for Windows 8 User
Start Screen Desktop Screen
Understanding the screen
System requirements
Operating Requirement recommended Free HDD
Space
From the Desktop Screen
From the Start Screen
Click the window and select Run Setup.exe
Address on
Installing the driver over the network
Installing the driver over the network
Driver is automatically installed from the Windows Update
Installing the driver over the wireless network
Installing the driver over the wireless network
Click Programs and Features
Uninstalling the driver
Using Samsung Printer Experience
Understanding the Samsung Printer Experience
Printer Information
Adding a printer
Adding/Deleting Printers
Select Add Printer
Deleting a printer
Cancelling a print job
Basic printing
Printing from Windows
Opening more settings
Click More settings
Eco settings
Layout settings
Paper settings
Job Accounting
This option allows you to print with the given permission
Select the content you want to print from other application
Scanning from Windows
From the Charms, select Share Samsung Printer Experience
Accessing management tools
From the Charms, select Search Apps
Find Samsung Printers
Installing accessories
Select Device Settings
Search for Devices and Printers
Troubleshooting
Settings
Devices and Printers
Cote D’ Ivoire
Country/Region Customer Care Center WebSite
Cyprus
Hong Kong
Nicaragua
Russia
802.11
Access point
AppleTalk
802.11b/g/n
Coverage
Default
Collation
Control Panel
Duplex
Dot Matrix Printer
Duty Cycle
Emulation
EtherTalk
Ethernet
Fuser Unit
Grayscale
Gateway
Halftone
Ieee
IPM
ITU-T No chart
Modem
MAC address
Originals
NetWare
PostScript
Resolution
Printer Driver
Print Media
Toner Cartridge
Subnet Mask
Watermark
UNC Path
WPA-PSK
Index
Printer Status
WPS the machine does not have a display
Toner cartridge