ANALOG A/V CONNECTIONS
USE THE VIDEO1 JACKS TO CONNECT A VCR OR OTHER ANALOG DEVICE
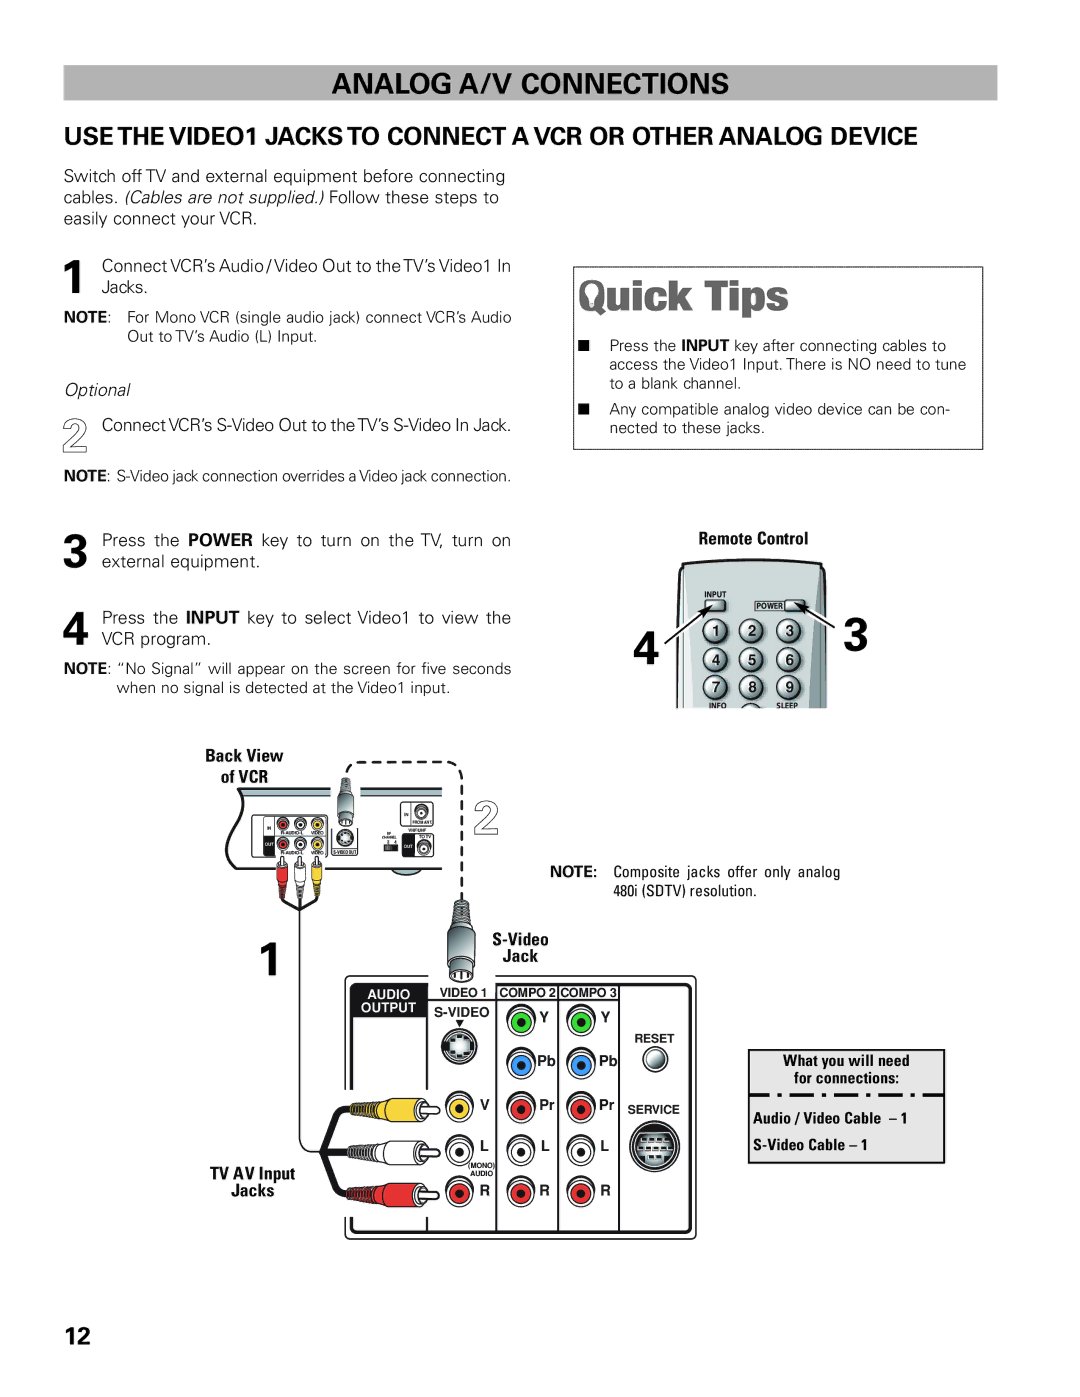
Switch off TV and external equipment before connecting cables. (Cables are not supplied.) Follow these steps to easily connect your VCR.
1 | Connect VCR’s Audio / Video Out to the TV’s Video1 In |
Jacks. |
NOTE: For Mono VCR (single audio jack) connect VCR’s Audio Out to TV’s Audio (L) Input.
Optional
2 Connect VCR’s
NOTE:
3 Press the POWER key to turn on the TV, turn on external equipment.
4 Press the INPUT key to select Video1 to view the VCR program.
NOTE: “No Signal” will appear on the screen for five seconds when no signal is detected at the Video1 input.
■Press the INPUT key after connecting cables to access the Video1 Input. There is NO need to tune to a blank channel.
■Any compatible analog video device can be con- nected to these jacks.
| Remote Control |
| ||
| INPUT |
|
|
|
|
|
| POWER | 3 |
4 | 1 | 2 | 3 | |
4 | 5 | 6 | ||
| 7 | 8 | 9 |
|
| INFO |
| SLEEP |
|
Back View
of VCR
|
|
|
| IN |
|
|
|
| FROM ANT. |
IN |
|
|
| VHF/UHF |
VIDEO | RF |
| TO TV | |
|
| CHANNEL | ||
OUT |
| 3 | 4 | OUT |
|
|
| ||
|
|
|
| |
VIDEO |
|
| ||
![]()
![]() 2
2
NOTE: Composite jacks offer only analog 480i (SDTV) resolution.
1
AUDIO
OUTPUT
![]()
![]()
![]()
![]()
![]() L
L
TV AV Input
Jacks 


 R
R
|
| |
| Jack |
|
VIDEO 1 COMPO 2 COMPO 3 | ||
Y | Y | |
| ||
| Pb | Pb |
V | Pr | Pr |
L | L | L |
(MONO) |
|
|
AUDIO |
|
|
R | R | R |
RESET
SERVICE
What you will need
for connections:
Audio / Video Cable – 1
12
