BEFORE OPERATION
ON-SCREEN MENU
HOW TO OPERATE ON-SCREEN MENU
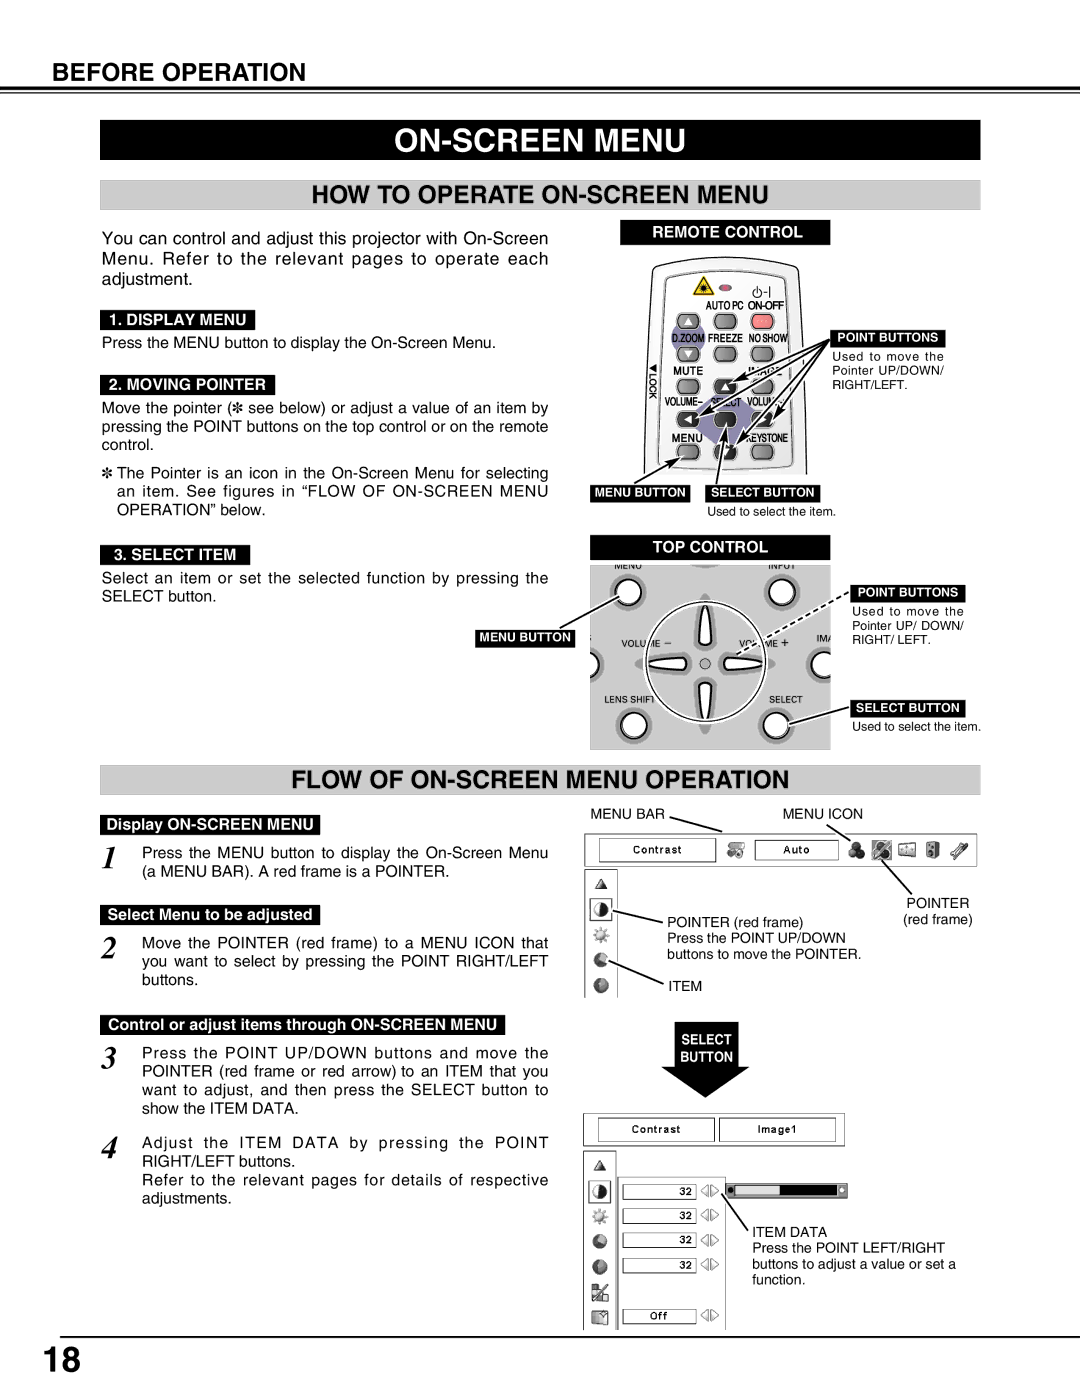
You can control and adjust this projector with
1. DISPLAY MENU
Press the MENU button to display the
2. MOVING POINTER
Move the pointer (✽ see below) or adjust a value of an item by pressing the POINT buttons on the top control or on the remote control.
✽The Pointer is an icon in the
3. SELECT ITEM
Select an item or set the selected function by pressing the SELECT button.
MENU BUTTON
REMOTE CONTROL
POINT BUTTONS
Used to move the
Pointer UP/DOWN/
RIGHT/LEFT.
MENU BUTTON SELECT BUTTON
Used to select the item.
TOP CONTROL
POINT BUTTONS
Used to move the
Pointer UP/ DOWN/
RIGHT/ LEFT.
SELECT BUTTON
Used to select the item.
FLOW OF ON-SCREEN MENU OPERATION
Display
1 | Press the MENU button to display the | ||
| (a MENU BAR). A red frame is a POINTER. | ||
|
|
| |
Select Menu to be adjusted | |||
2 | Move the POINTER (red frame) to a MENU ICON that | ||
| you want to select by pressing the POINT RIGHT/LEFT | ||
| buttons. | ||
|
| ||
Control or adjust items through | |||
3 | Press the POINT UP/DOWN buttons and move the | ||
| POINTER (red frame or red arrow) to an ITEM that you | ||
| want to adjust, and then press the SELECT button to | ||
| show the ITEM DATA. | ||
4 | Adjust the ITEM DATA by pressing the POINT | ||
| RIGHT/LEFT buttons. | ||
Refer to the relevant pages for details of respective adjustments.
MENU BAR | MENU ICON |
POINTER ![]() POINTER (red frame)(red frame)
POINTER (red frame)(red frame)
Press the POINT UP/DOWN buttons to move the POINTER.
ITEM
SELECT
BUTTON
ITEM DATA
Press the POINT LEFT/RIGHT buttons to adjust a value or set a function.
18