Chapter 5 Network Viewer & Capture
[2] Control by the web browser
PC1 | PC2 |
|
|
|
|
|
| Capture |
|
* PC privided with the Network Capture. | Internet | PJ2 | PJ1 | |
|
| |||
PC3 | PC4 |
|
| |
Intranet |
|
| ||
|
| PC5 | Project a screen | |
|
|
| ||
|
|
|
| image of PC1 with |
|
|
|
| PJ2. |
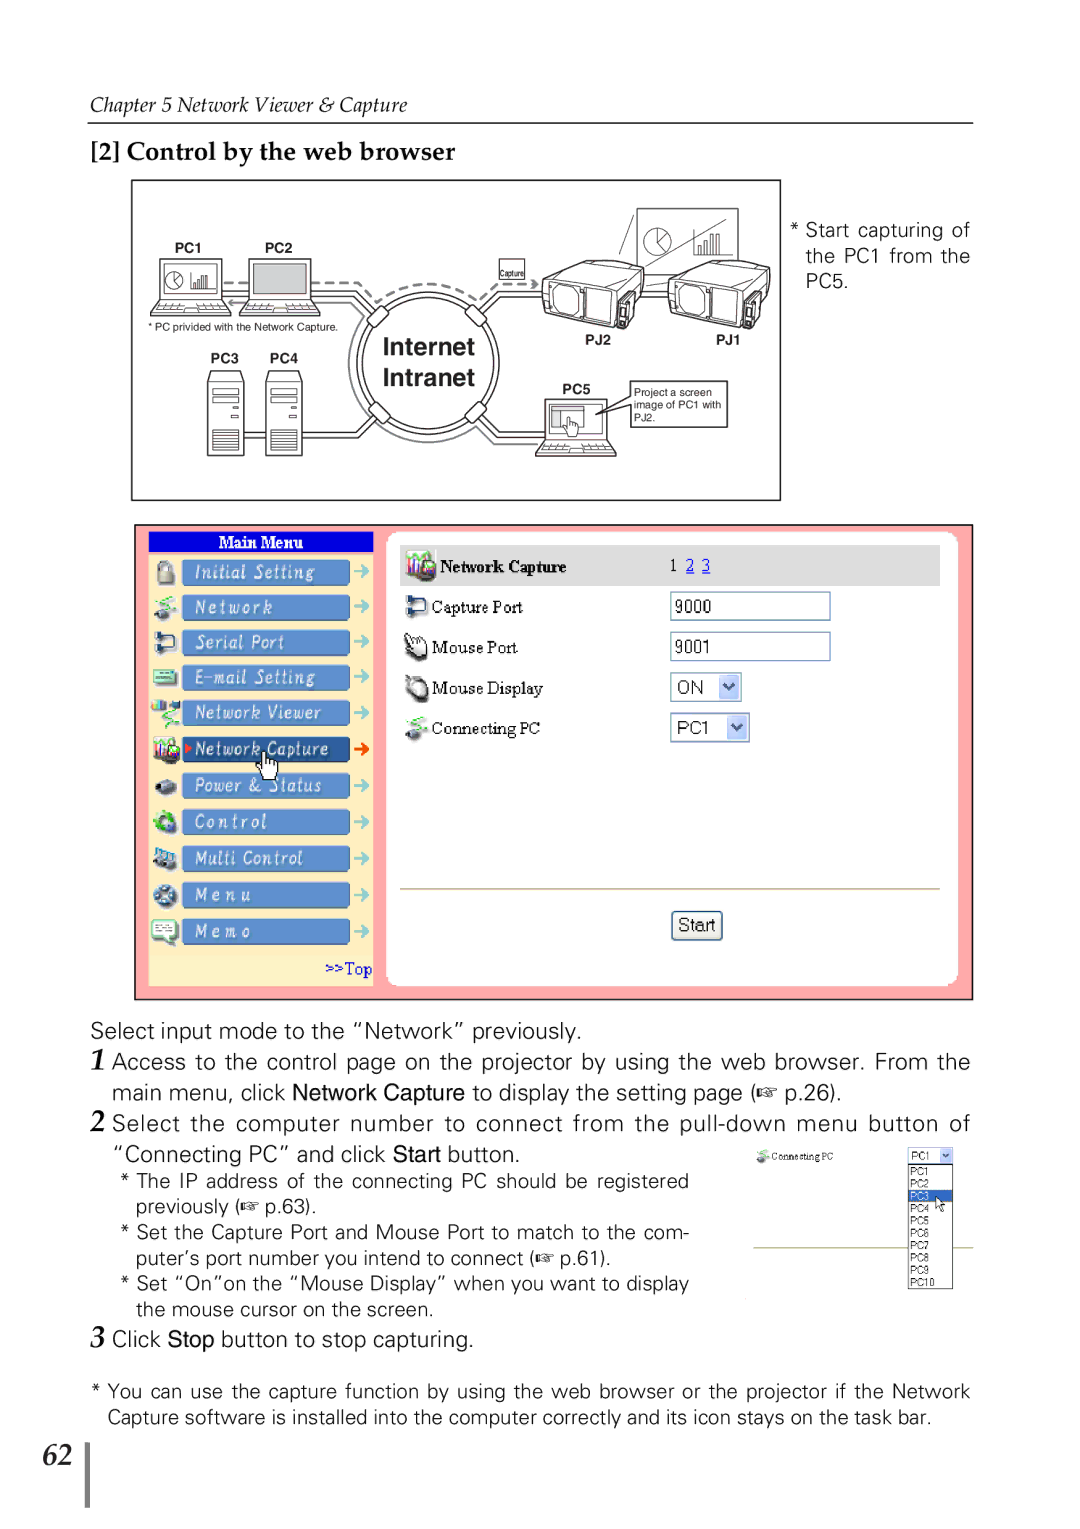
*Start capturing of the PC1 from the PC5.
Select input mode to the “Network” previously.
1 Access to the control page on the projector by using the web browser. From the main menu, click Network Capture to display the setting page (☞ p.26).
2 Select the computer number to connect from the
*The IP address of the connecting PC should be registered previously (☞ p.63).
*Set the Capture Port and Mouse Port to match to the com- puter’s port number you intend to connect (☞ p.61).
*Set “On”on the “Mouse Display” when you want to display the mouse cursor on the screen.
3 Click Stop button to stop capturing.
*You can use the capture function by using the web browser or the projector if the Network Capture software is installed into the computer correctly and its icon stays on the task bar.
62
