408e specifications
The SATO 408e is a high-performance thermal transfer printer that stands out in the world of barcode and label printing, particularly known for its reliability and versatility. Designed for various industrial applications, this printer is well-suited for environments that require durable and efficient printing solutions.One of the main features of the SATO 408e is its superior print quality. It utilizes advanced thermal transfer technology, allowing for crisp and clear printing at speeds of up to 10 inches per second. The printer is capable of producing sharp barcodes, text, and graphics, ensuring that labels meet high standards for readability and durability.
The SATO 408e supports a wide range of media types and sizes, accommodating labels from 0.63 inches to 4.1 inches in width. This flexibility makes it an ideal choice for industries such as manufacturing, logistics, healthcare, and retail, where diverse labeling needs may arise. Whether you need labels for shipping, inventory management, or patient identification, the SATO 408e can handle it all.
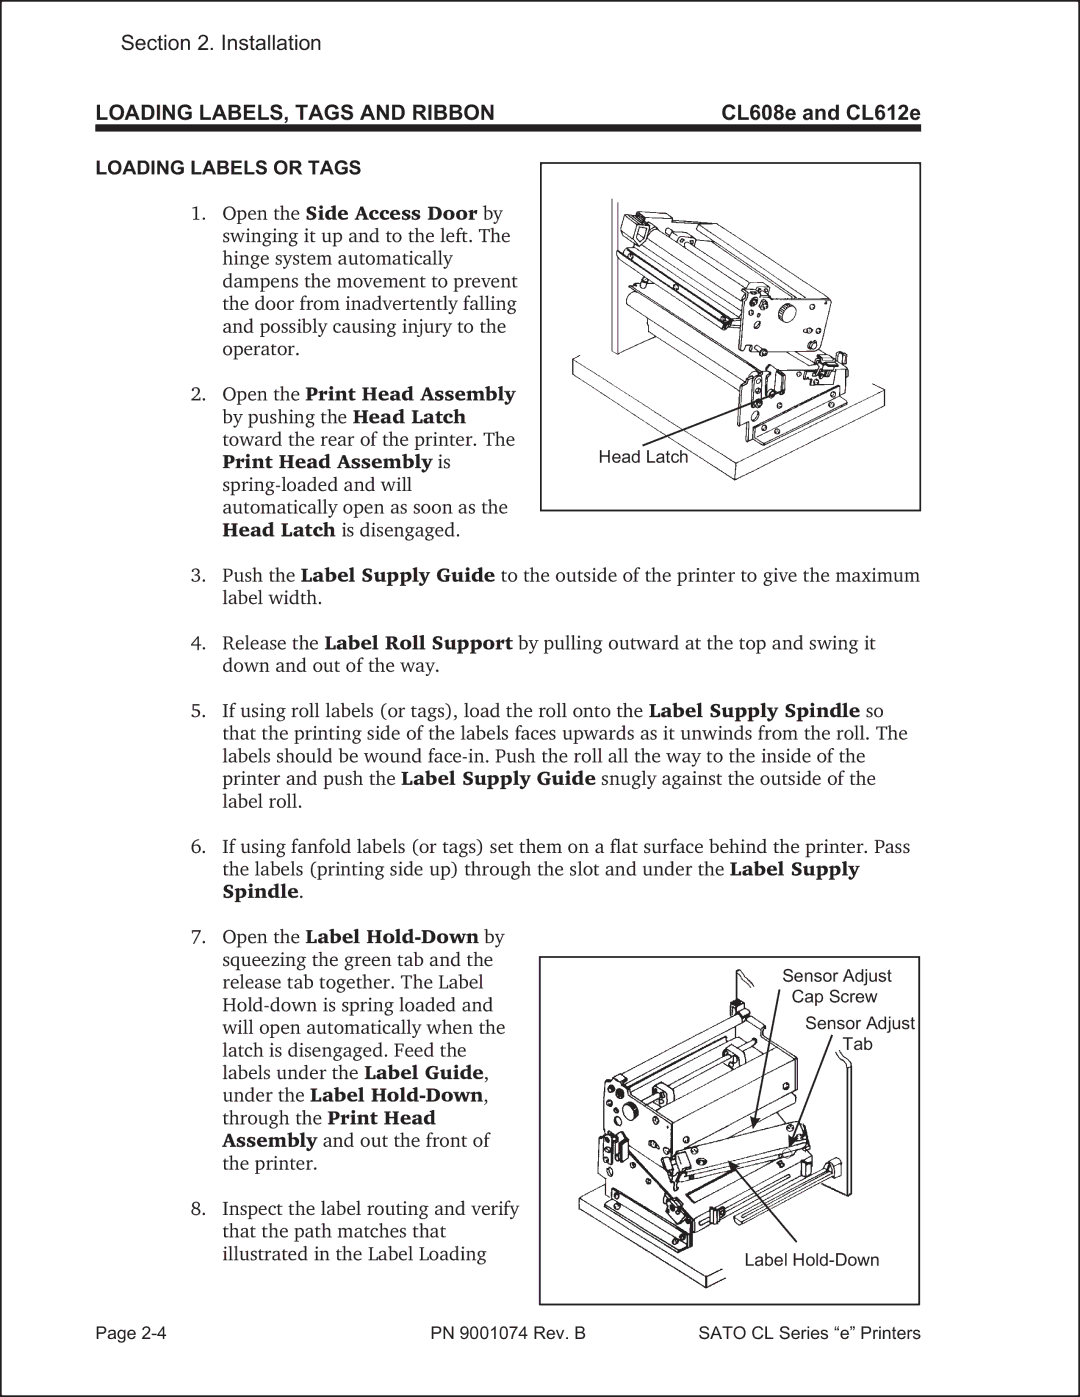
Another significant characteristic of the SATO 408e is its user-friendly interface. The printer features an intuitive LCD screen that simplifies navigation through the printer’s settings. Additionally, it includes easy-to-access components for media and ribbon loading, allowing for quick replacement and minimal downtime. This ergonomic design caters to various user levels, from novices to seasoned operators.
Connectivity options are also a strong point for the SATO 408e. It comes equipped with multiple connectivity interfaces, including USB, Ethernet, and serial ports, providing flexibility in how the printer can be integrated into existing systems. This seamless integration allows for enhanced workflow efficiency and adaptability to different business setups.
Furthermore, the SATO 408e incorporates advanced monitoring and maintenance features. It supports real-time monitoring of printer status and media usage, enabling proactive management and reducing the risk of interruptions during print runs.
In conclusion, the SATO 408e thermal transfer printer is characterized by its high print quality, versatility in media handling, user-friendly design, and robust connectivity options. It is a reliable solution for businesses that demand precision and efficiency in their labeling processes, making it a leading choice among industrial printers in the market today.

