INSTALLING BITS
•Place thedirectionof rotationcelector in center position.
See Figure 5. This will turnoff the power to your drill.
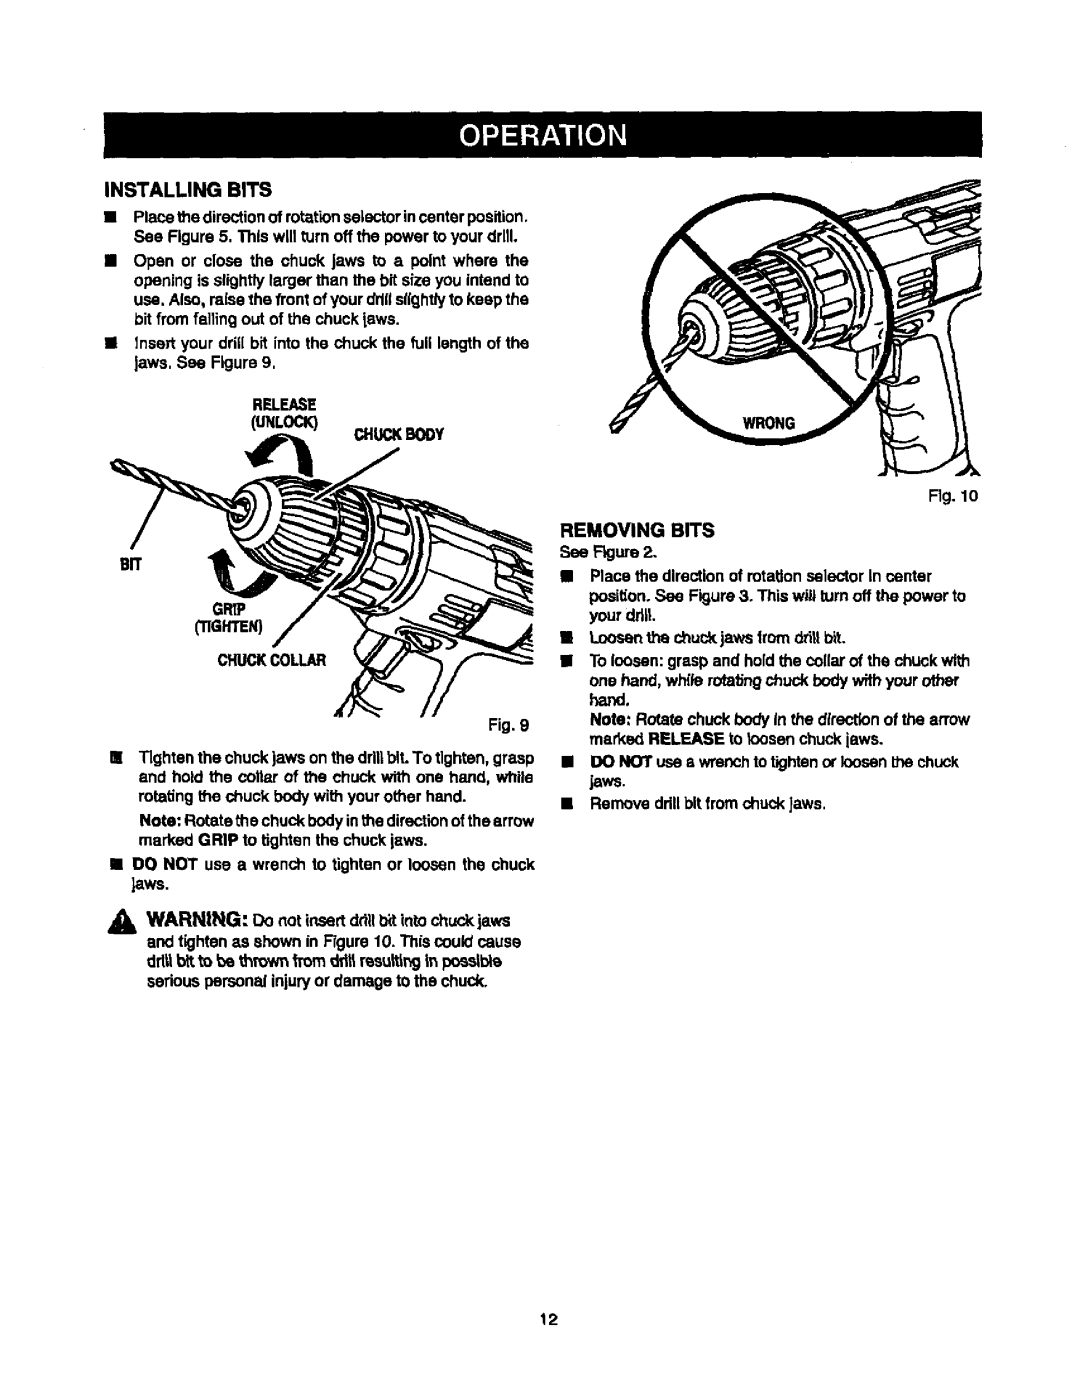
•Open or close the chuck jaws to a point where the opening is slightlylarger than the bit size you intend to use. Also, raise the frontof your drillslightlyto keep the bit from fallingout of the chuck jaws.
•lnsert your dntl bit into the chuck the full length of the
Jaws.See Figure 9.
RELEASE (UNLOCK)
GRIP (TIGHTEN)
CHUCKBODY
Fig. 10
REMOVING BITS
See Figure2.
• Place the directionof rotation selector In center |
posit_on.See Figure3. This will turn off the power to |
your ddlL |
• Loocenthe chuck.jawsfrom dfitlbit. |
CHUCKCOLLAR
Fig. 9
•Tighten the chuck )aws on the drillbit.To tighten,grasp and hold the collar of the chuck with one hand, while
rotatingthe chuck body with your other hand.
Note: Rotate the chuck bodyinthe directionof thearrow marked GRIP to tighten the chuck laws.
•DO NOT use a wrench to tighten or loosen the chuck
laWS.
AWARNING: Do not insertdrillbit into chuckjaws and tighten as shown in Rgure 10. This couldcause drtUt_t to be thrown _mm ddt_rasu_ng in passtbls serious personalinjuryor damage to the chuck.
• To loosen:grasp and holdthe cellar of the chuck wl_ |
one hand, whi_erotatingchuck bodywith your other |
hand. |
Note: Rotate chuck body in the directionof the arrow |
marked RELEASE to _oosanchuck jaws. |
• DO NOT use s wrenchto tightenor loosenthe chuck |
jews. |
• Remove ddllbit from chuck Jaws. |
12
