WARNING:Donot allow familiaritywith your drill- df',verto make you careless.Remember that a careless fraction of a secondis sufficientto _nffict
severe Injury.
CHARGING YOUR DRILL-DRIVER
The battery pack for this tool has been shippedIn e low charge condition to prevent passible problems. Therefore, you should charge It at least 6 hourspdor to use.
Kote: Batterieswill not reach furlcharge the first time they are charged. Atlowseveral cycles (drillingtoltowedby recharging)for them to tullycharge.
•Charge battery pack only with the charging assembly provided.
[] Make sure power supply Is normal house voltage, 120 Volts, 60 Hz, AC only.
•Connect charging assembly to power supply.
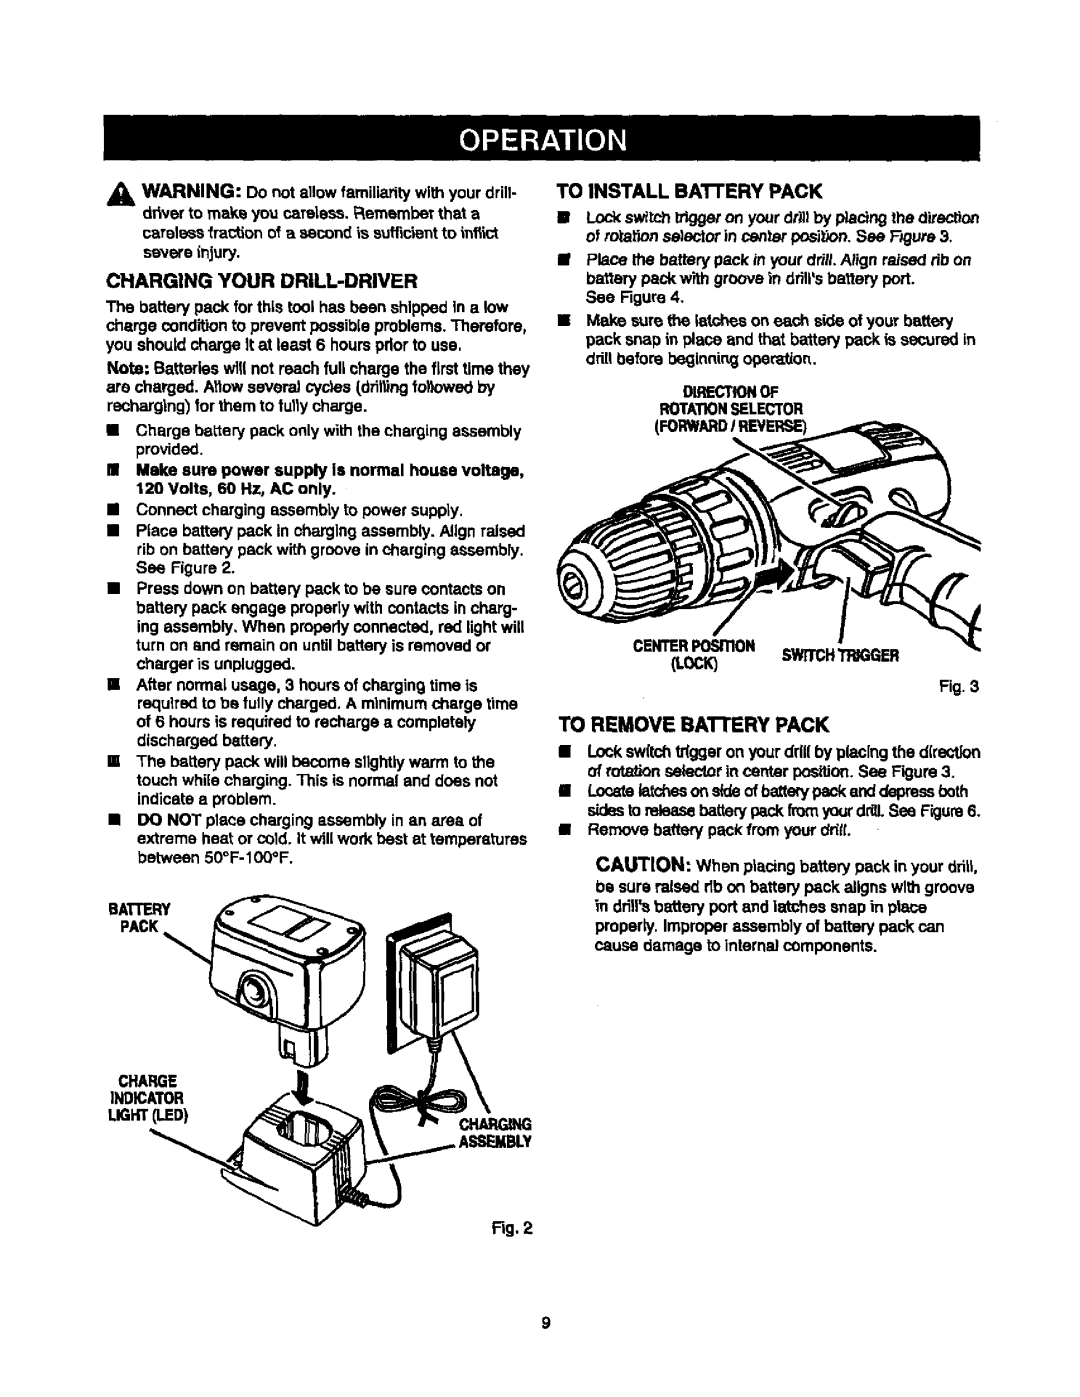
•Place battery pack In chargingassembly.Align raised rib on battery pack with groove in charging assembly.
See Figure 2.
•Press downon battery pack to be sure contacts on
battery pack engage properlywith contacts in charg- ing assembly, When pmpedy connected, red light will turn on and remain on untilbattery is removedor charger is unplugged.
•After normal usage, 3 hoursof chargingtime is required to be tully charged. A minimumcharge time of 6 hours is required to recharge a completely discharged battery.
•The battery pack will become slightlywarm to the touch while charging.This is normal and does not indicate a problem.
•DO NOT place charging assembly in an ares of extreme heat or cold. It willwork best at temperatures between
CHARGE
INDICATOR
LIGHT(teD)
,ASSEMBLY
F_g.2
TO INSTALL BAI"I'ERY PACK
•Lock switchIdggar on your drillby placingthe direction of ro_a'_onselectorin center position.Sea F')gure3.
•Place file battery pack in your drill.Align raised rib on battery pack with groove in drill'sbattery pert.
See Figure 4.
•MBJCesure the _tches on each side of your battery pack snap in place and that battery pack is secured in ddti before beginningoperation.
DIRECTIONOF
FLOTATIONSELECTOR
(i
CENTERPosmoN
(LOCiO swrrcH'reuG
Fig. 3
TO REMOVE BAT'rERY PACK
•Lock swit_ tr(ggaron your drill by placing the direction
of rotationselector in center pealtion. See Figure3.
IILooatelatchesonsldeofbatterypeckanddeprsesboth sidesto releasebatterypack [mmyourdrilLSee Figure6.
•Remove battery pack from your ddti.
CAUTION: When placingbattery pack in your dritl, be sure raised db on battery peck aligns with groove in ddll"Bbattery pert and latches snap in place properly.Improperassembly of battery pack can cause damage to internalcomponents.
9
