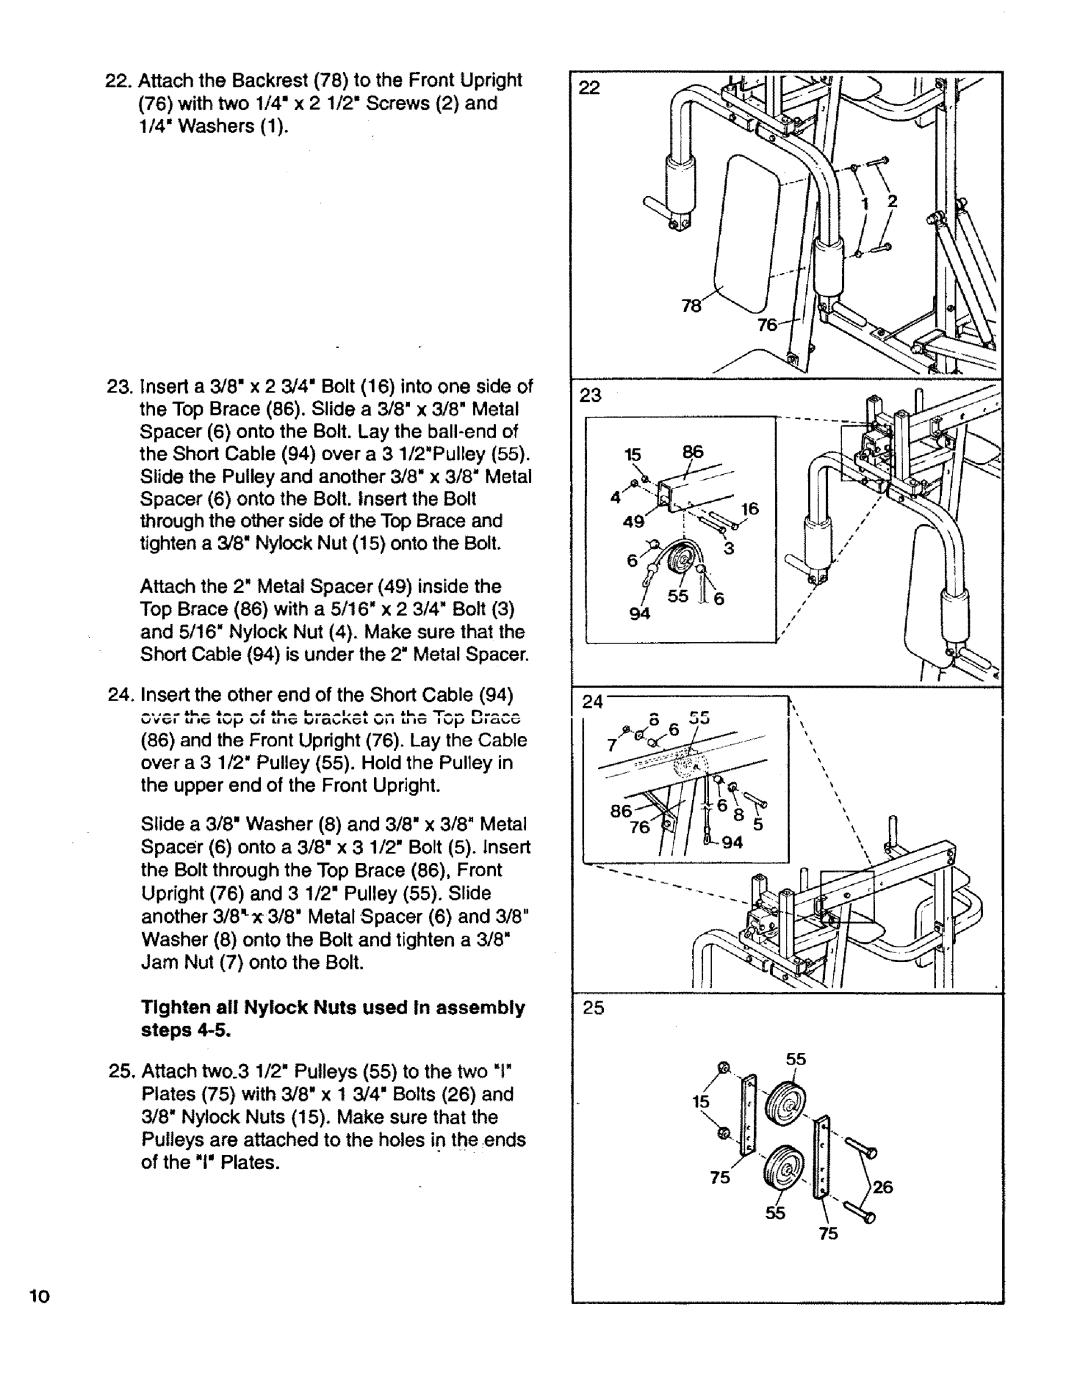
22.Attach the Backrest (78) to the Front Upright
(76)with two 1/4" x 2 1/2" Screws (2) and 1/4" Washers (1).
23.Insert a 3/8" x 2 3/4" Bolt (16) into one side of the Top Brace (86). Slide a 3/8" x 3/8" Metal Spacer (6) onto the Bolt. Lay the
Attach the 2" Metal Spacer (49) inside the Top Brace (86) with a 5/16" x 2 3/4" Bolt (3) and 5/16" Nylock Nut (4). Make sure that the Short Cable (94) is under the 2" Metal Spacer.
24.Insert the other end of the Short Cable (94)
(86)and the Front Upright (76). Lay the Cable over a 3 1/2" Pulley (55). Hold the Pulley in the upper end of the Front Upright.
Slide a 3/8" Washer (8) and 3/8" x 3/8" Metal Spacer (6) onto a 3/8" x 3 1/2" Bolt (5). Insert the Bolt through the Top Brace (86), Front Upright (76) and 3 1/2" Pulley (55). Slide another 3/8_x 3/8" Metal Spacer (6) and 3/8" Washer (8) onto the Bolt and tighten a 3/8" Jam Nut (7) onto the Bolt.
Tighten all Nylock Nuts used in assembly
steps 4-5.
25.Attach two.3 1/2" Pulleys (55) to the two "1' Plates (75) with 3/8" x 1 3/4" Bolts (26) and 3/8" Nylock Nuts (15). Make sure that the Pulleys are attached to the holes in the ends of the "1" Plates.
22
23
15 86
6 "_" 3
94
24r,,
0 | ,J,J | \ |
7_ | ........... | ,, |
| , | \ |
r
25
55
15
75
,26
55
75
10
