
831.159460 specifications
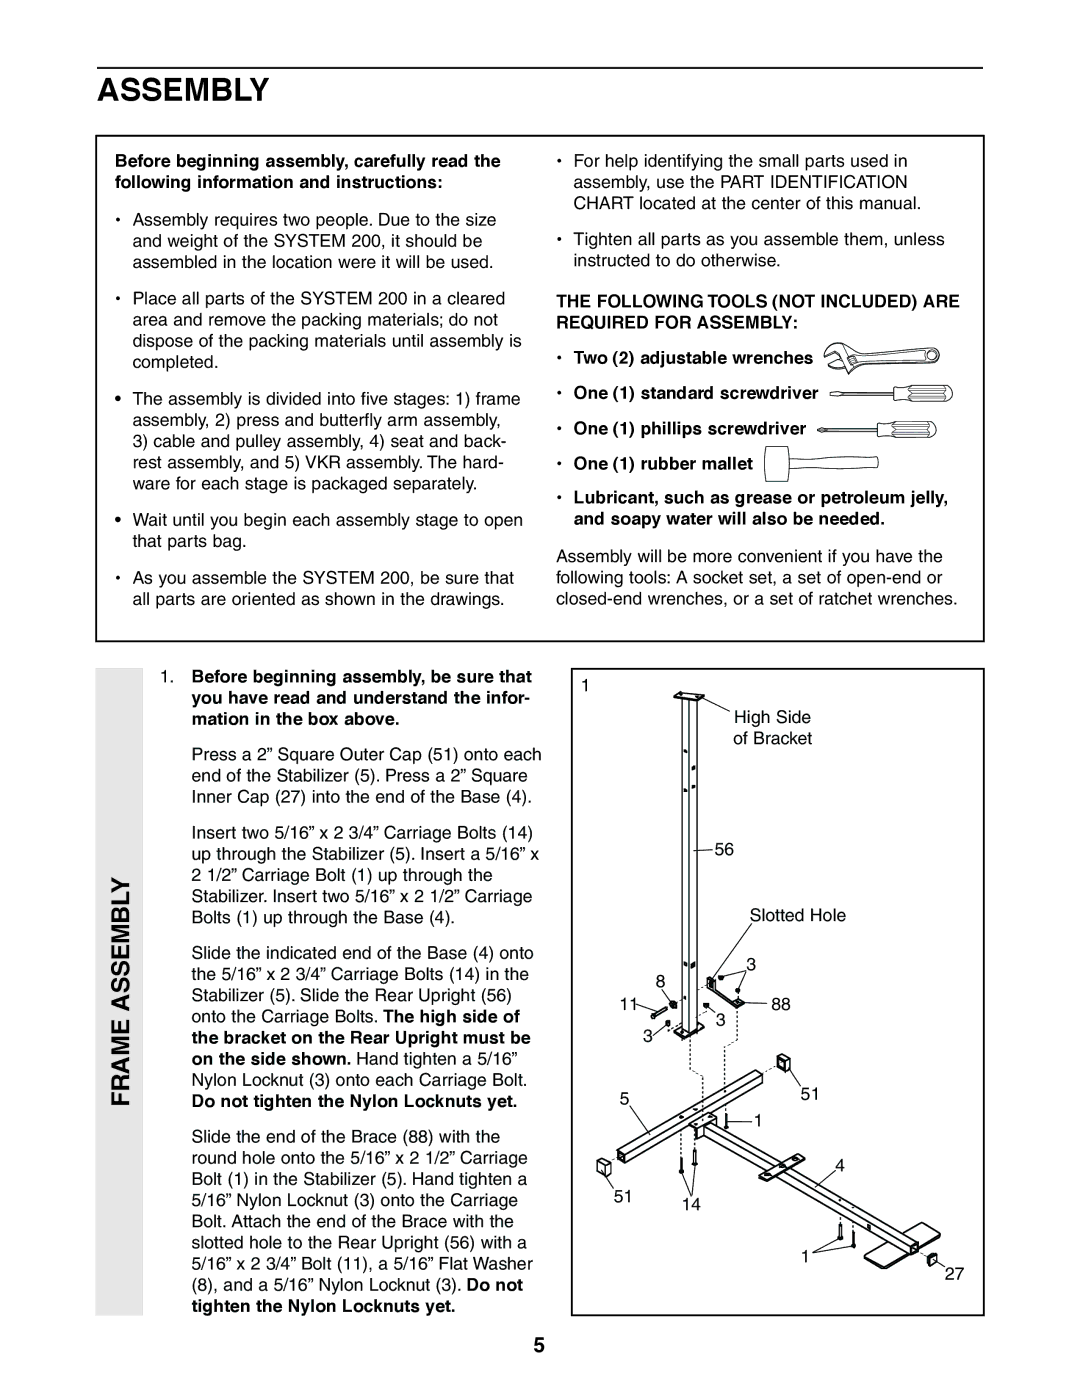
The Sears 831.159460 is a versatile and innovative exercise equipment model that offers users a convenient way to stay fit and healthy from the comfort of their home. This piece of exercise machinery is particularly designed to cater to a wide range of fitness levels, making it suitable for both beginners and more experienced athletes.One of the standout features of the Sears 831.159460 is its multifunctional capabilities. This equipment typically integrates multiple workout stations, allowing for various exercises such as bench presses, leg curls, and rows. Users can effectively target different muscle groups, which is crucial for a well-rounded workout routine. The all-in-one design minimizes space requirements, making it an ideal option for those with limited room for a home gym.
Another notable characteristic of the Sears 831.159460 is its robust construction. Made with high-quality materials, the equipment is designed to withstand rigorous use over an extended period. The frame is often reinforced for stability and durability, ensuring that it can handle heavy loads while providing safety during workouts.
Furthermore, the 831.159460 incorporates advanced technologies such as adjustable resistance levels. This feature enables users to tailor their resistance settings according to their strength and fitness goals, providing a personalized workout experience. Whether aiming for endurance training or muscle building, the adjustable features allow for gradual progression as users become more fit.
The equipment is also designed with user comfort in mind. Cushioned seats and ergonomic grips are standard, helping to reduce the risk of injury and discomfort during prolonged workouts. The intuitive design allows for easy setup and transitions between exercises, further enhancing the user experience.
In terms of maintenance, the Sears 831.159460 typically requires minimal upkeep, with most models designed to be easily cleaned and serviced. Regular checks and minor adjustments can ensure longevity and optimal performance.
In summary, the Sears 831.159460 stands out as a reliable and comprehensive fitness solution for at-home workouts. Its multifunctionality, durable construction, adjustable resistance, and user-centric design make it a solid choice for anyone looking to enhance their fitness journey while enjoying the convenience of home workouts. This exercise equipment model effectively embodies a blend of practicality and innovation, making it a noteworthy addition to any home gym setup.