2. Setting up
2. Setting up
Installing the paper rack
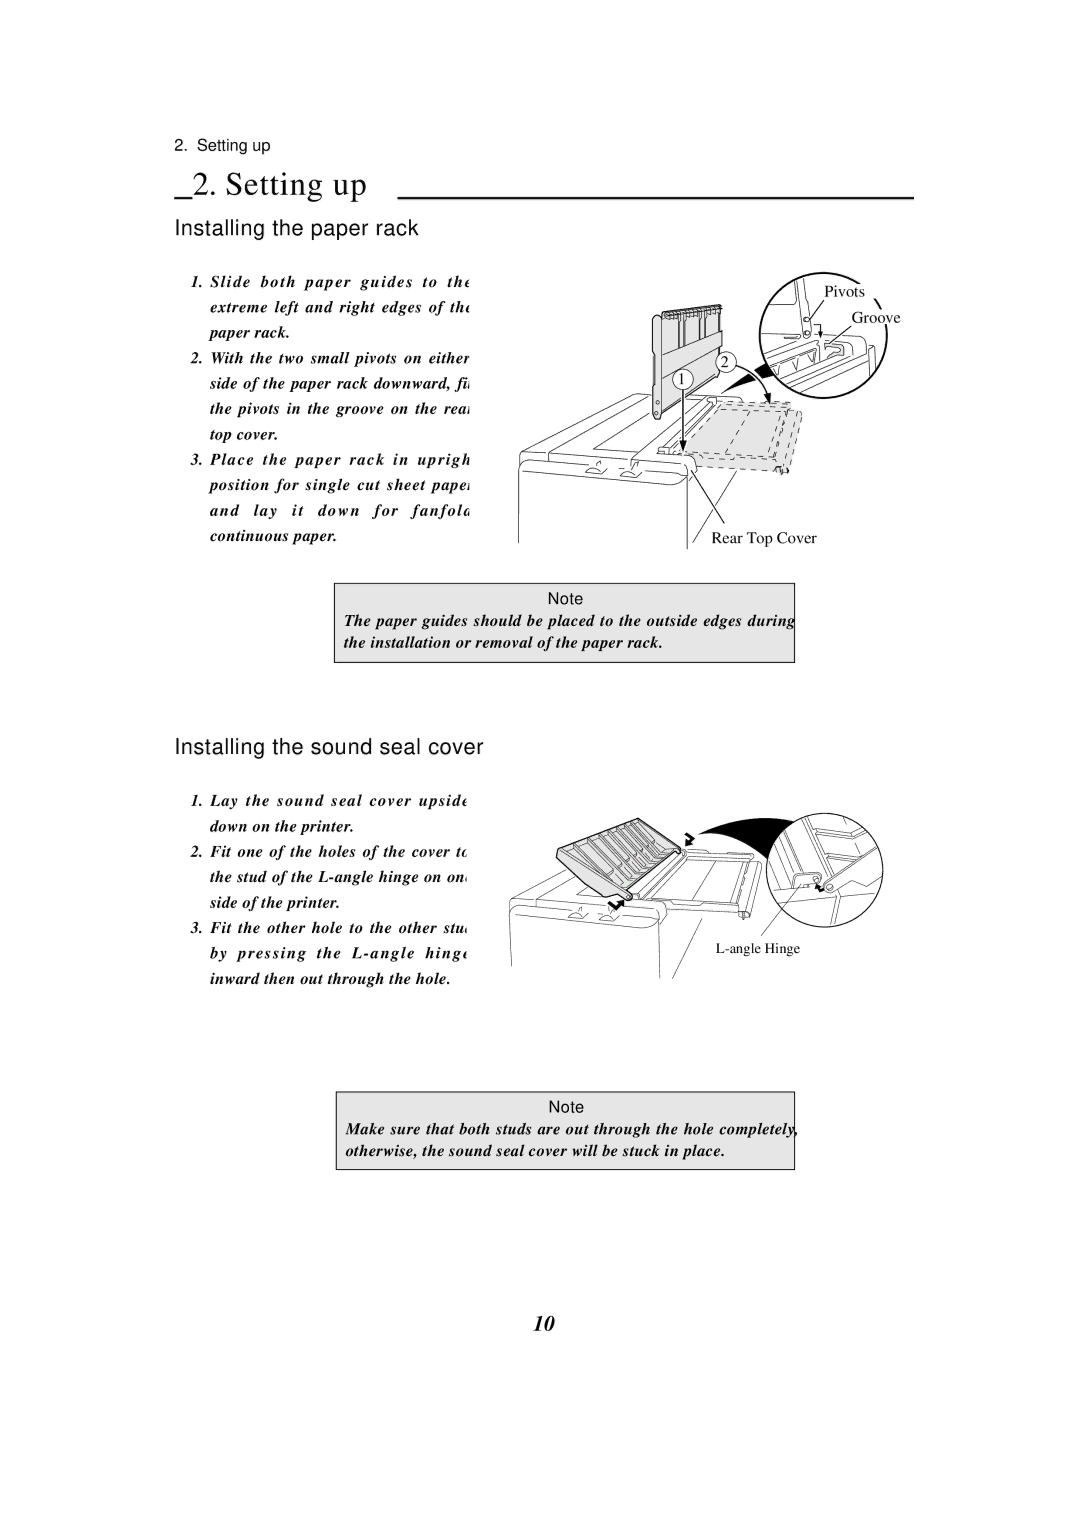
1.S l i d e b o t h p a p e r g u i d e s t o t h e extreme left and right edges of the paper rack.
2.With the two small pivots on either side of the paper rack downward, fit the pivots in the groove on the rear top cover.
3.P l a c e t h e p a p e r r a c k i n u p r i g h t position for single cut sheet paper a n d l a y i t d o w n f o r f a n f o l d continuous paper.
Pivots
Groove
2
1
Rear Top Cover
Note
The paper guides should be placed to the outside edges during the installation or removal of the paper rack.
Installing the sound seal cover
1.Lay the sound seal cover upside down on the printer.
2.Fit one of the holes of the cover to the stud of the
side of the printer.
3. Fit the other hole to the other stud
b y p r e s s i n g t h e L - a n g l e h i n g e | |
| |
inward then out through the hole. |
|
Note
Make sure that both studs are out through the hole completely, otherwise, the sound seal cover will be stuck in place.
10