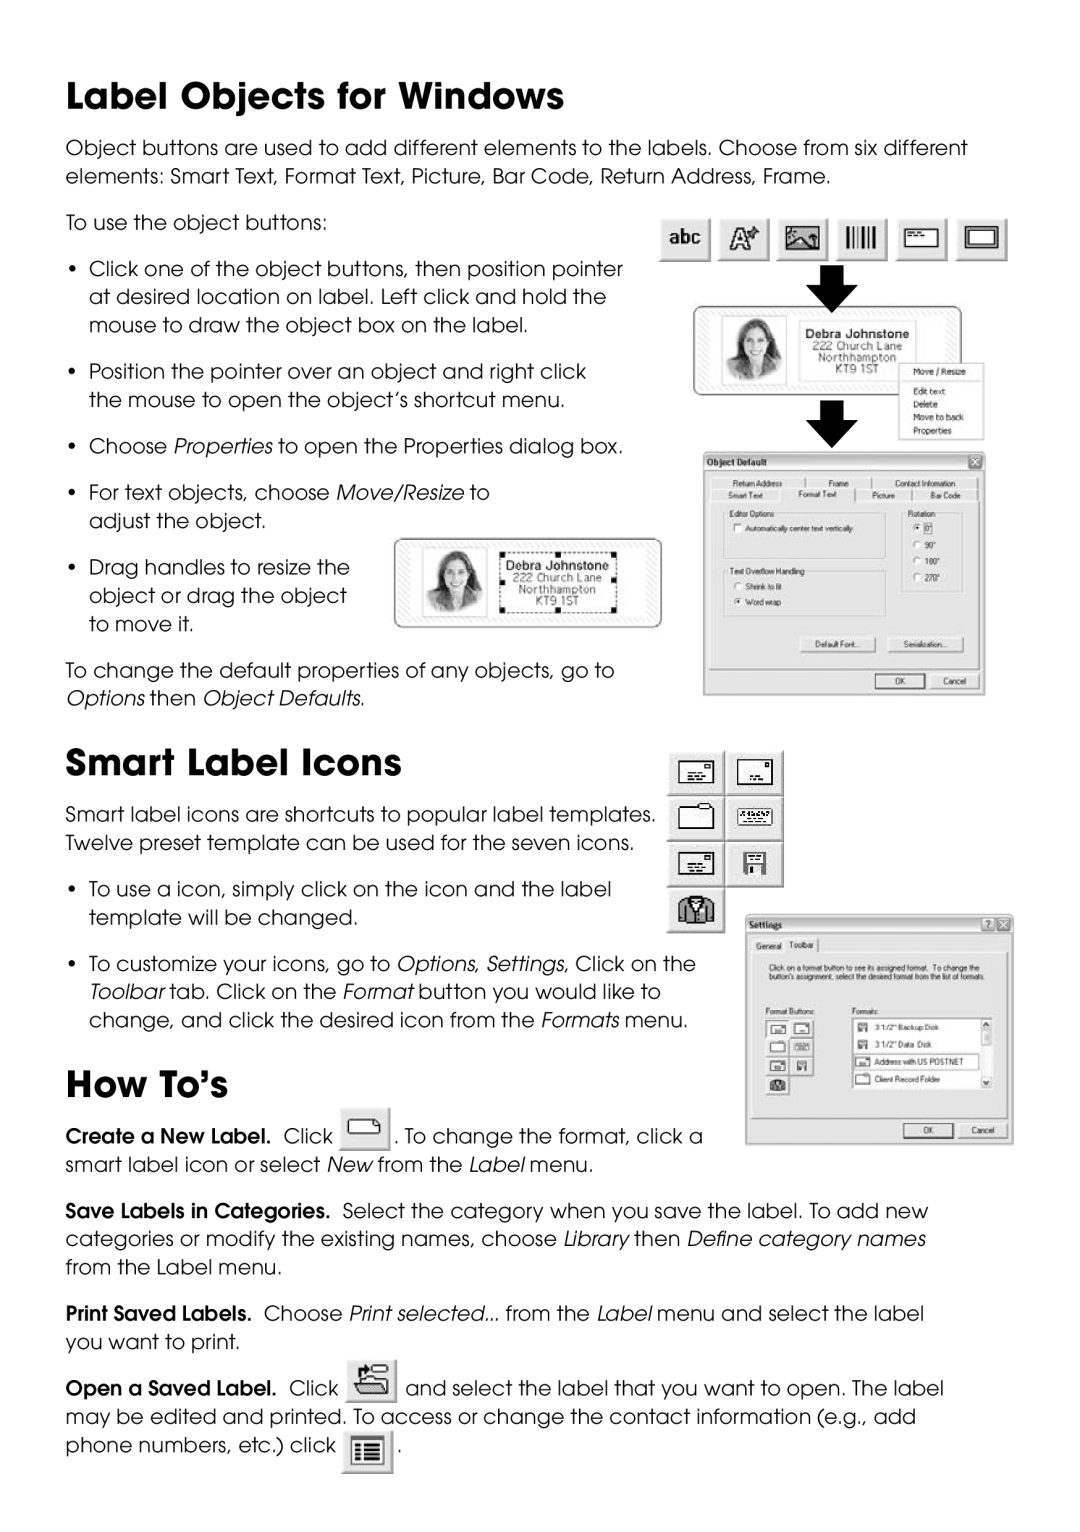
Label Objects for Windows
Object buttons are used to add different elements to the labels. Choose from six different elements: Smart Text, Format Text, Picture, Bar Code, Return Address, Frame.
To use the object buttons:
• Click one of the object buttons, then position pointer at desired location on label. Left click and hold the mouse to draw the object box on the label.
•Position the pointer over an object and right click the mouse to open the object’s shortcut menu.
• Choose Properties to open the Properties dialog box.
•For text objects, choose Move/Resize to adjust the object.
•Drag handles to resize the object or drag the object to move it.
To change the default properties of any objects, go to
Options then Object Defaults.
Smart Label Icons
Smart label icons are shortcuts to popular label templates.
Twelve preset template can be used for the seven icons.
•To use a icon, simply click on the icon and the label template will be changed.
•To customize your icons, go to Options, Settings, Click on the Toolbar tab. Click on the Format button you would like to change, and click the desired icon from the Formats menu.
How To’s
Create a New Label. Click ![]() . To change the format, click a smart label icon or select New from the Label menu.
. To change the format, click a smart label icon or select New from the Label menu.
Save Labels in Categories. Select the category when you save the label. To add new categories or modify the existing names, choose Library then Define category names from the Label menu.
Print Saved Labels. Choose Print selected... from the Label menu and select the label you want to print.
Open a Saved Label. Click ![]() and select the label that you want to open. The label may be edited and printed. To access or change the contact information (e.g., add
and select the label that you want to open. The label may be edited and printed. To access or change the contact information (e.g., add
phone numbers, etc.) click ![]() .
.