Preparing the SLP
1Install the software, then connect the printer to your PC or Mac.
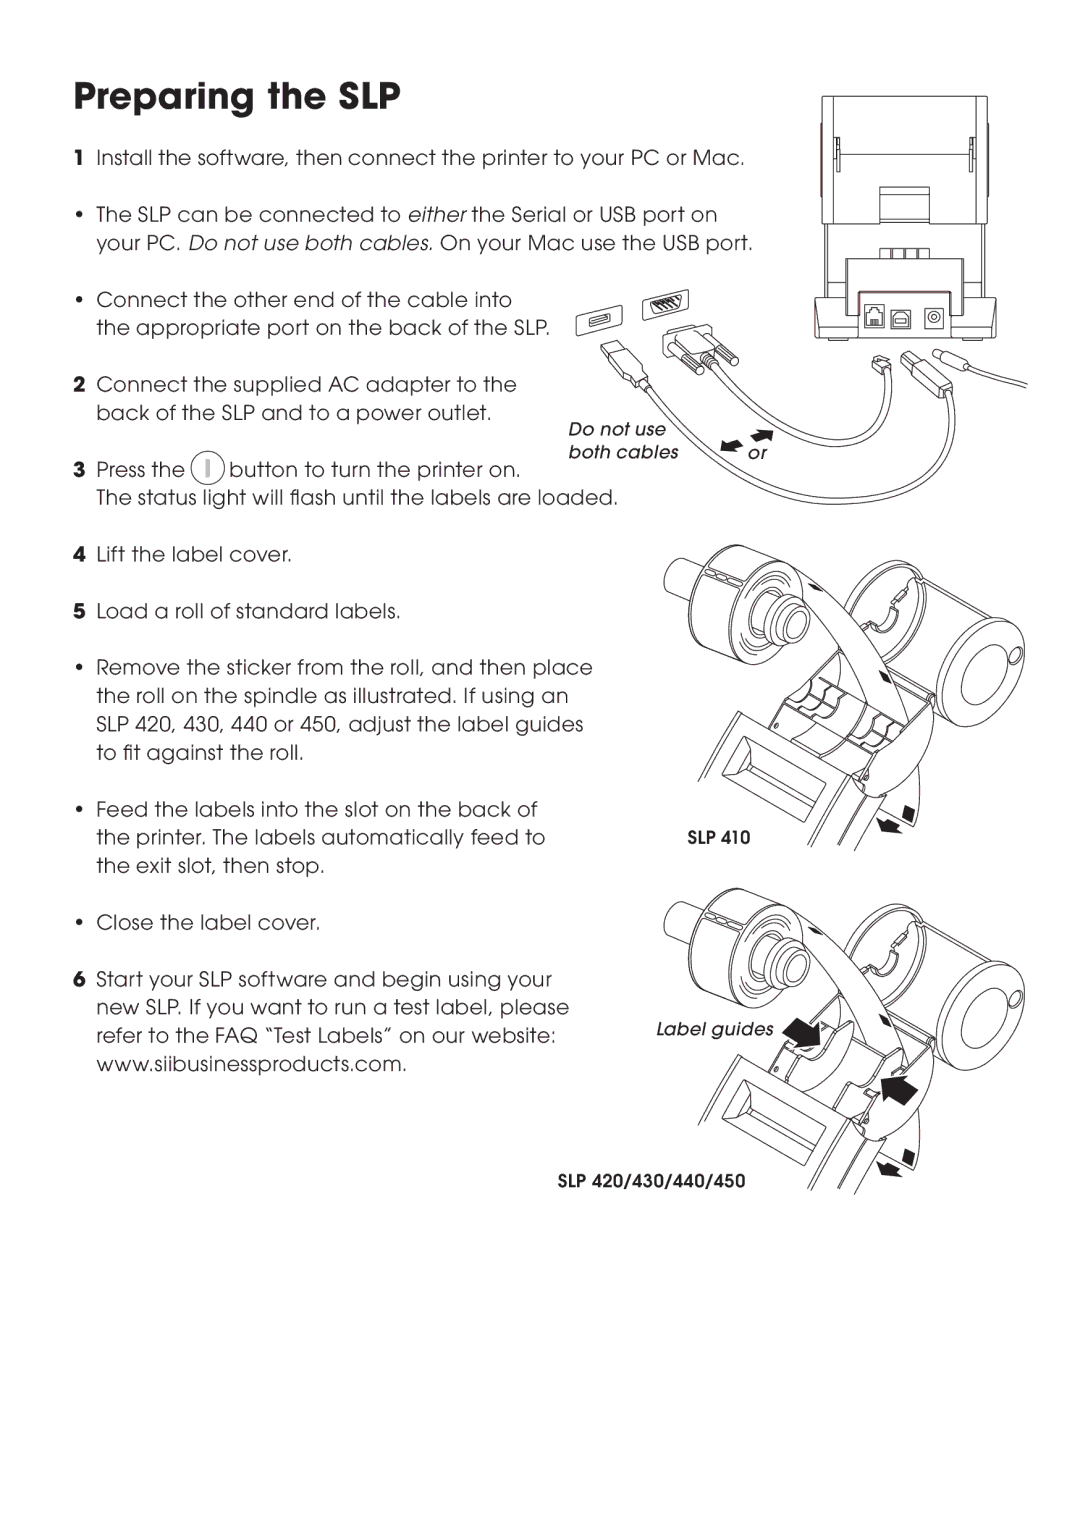
•The SLP can be connected to either the Serial or USB port on your PC. Do not use both cables. On your Mac use the USB port.
• Connect the other end of the cable into the appropriate port on the back of the SLP.
2Connect the supplied AC adapter to the back of the SLP and to a power outlet.
3Press the ![]() button to turn the printer on.
button to turn the printer on.
The status light will flash until the labels are loaded.
4Lift the label cover.
5Load a roll of standard labels.
•Remove the sticker from the roll, and then place the roll on the spindle as illustrated. If using an SLP 420, 430, 440 or 450, adjust the label guides to fit against the roll.
•Feed the labels into the slot on the back of the printer. The labels automatically feed to the exit slot, then stop.
•Close the label cover.
6Start your SLP software and begin using your new SLP. If you want to run a test label, please refer to the FAQ “Test Labels” on our website: www.siibusinessproducts.com.
![]() or
or
SLP 410
Label guides ![]()
SLP 420/430/440/450