!install_ar5316_5320.book 4 ページ 2003年12月2日 火曜日 午前9時42分

INSTALLING THE PRINTER DRIVER

In the following explanations it is assumed that the mouse is configured for right hand operation.

Note

If an error message appears, follow the instructions on the screen to solve the problem. After the problem is


solved, the installation procedure will continue. Depending on the problem, you may have to click the "Cancel"


button to exit the installer. In this case, reinstall the software from the beginning after solving the problem.


INSTALLATION IN WINDOWS XP (USB/PARALLEL CABLE)

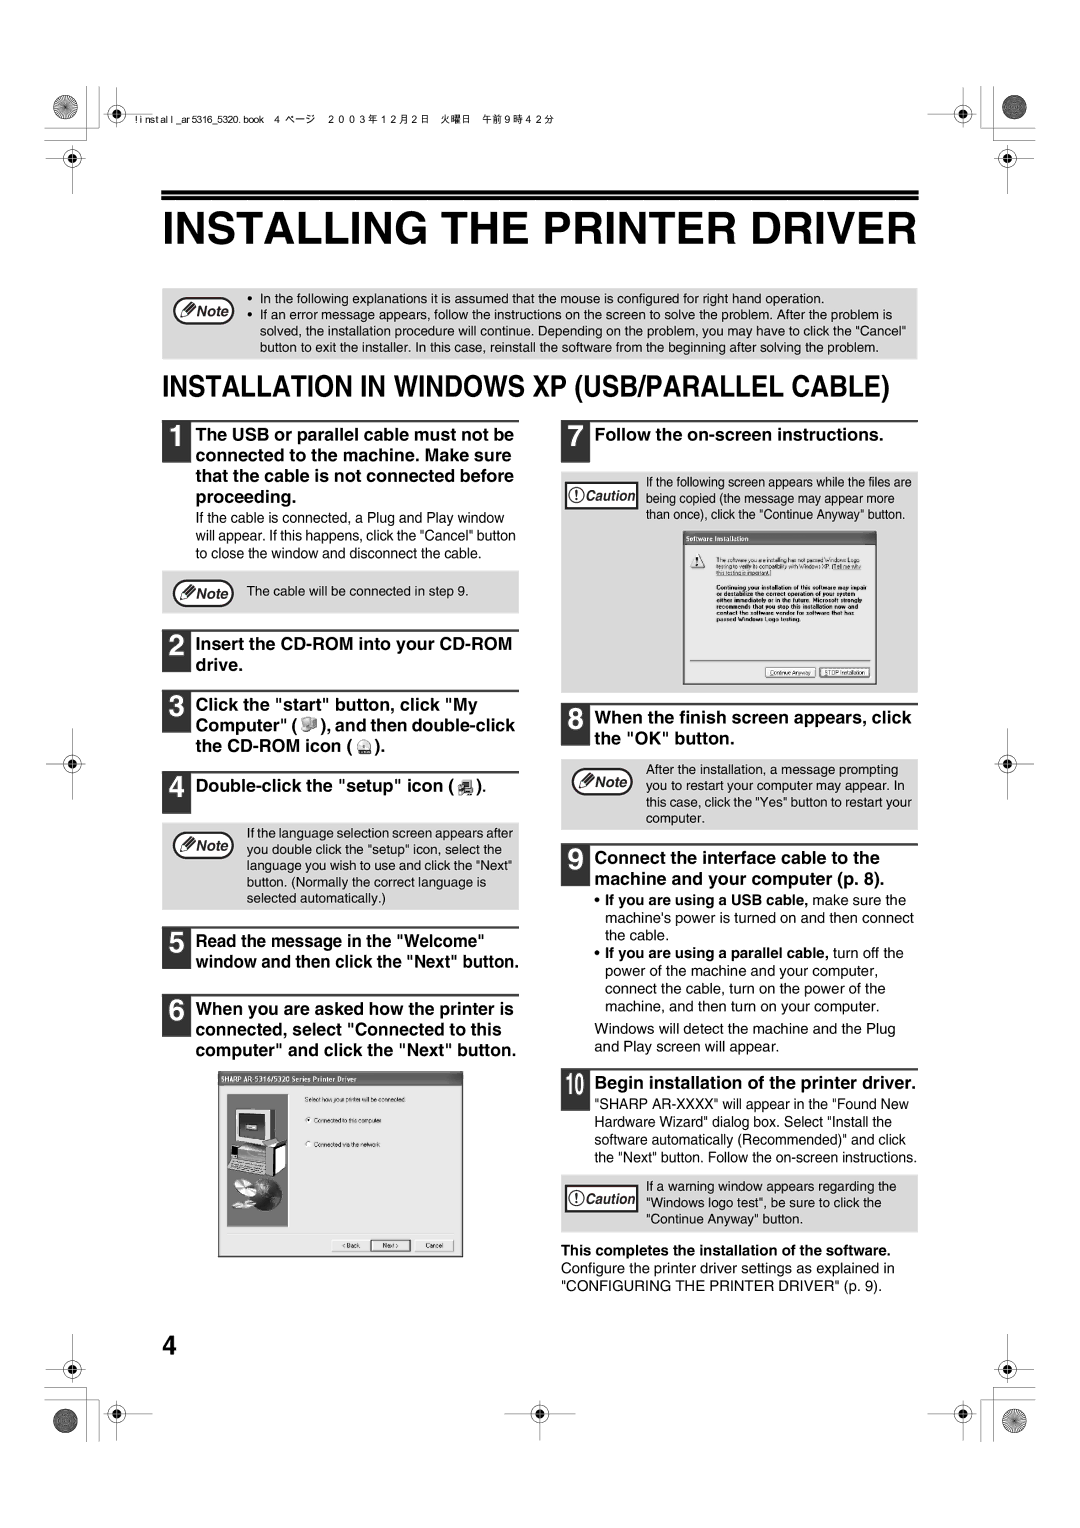
1 The USB or parallel cable must not be

7 Follow the on-screen instructions.

connected to the machine. Make sure


that the cable is not connected before

If the following screen appears while the files are

proceeding.

Caution being copied (the message may appear more

If the cable is connected, a Plug and Play window

than once), click the "Continue Anyway" button.

will appear. If this happens, click the "Cancel" button


to close the window and disconnect the cable.


Note The cable will be connected in step 9.

2 Insert the CD-ROM into your CD-ROM drive.

3 Click the "start" button, click "My Computer" ( ), and then double-click the CD-ROM icon ( ).

8 When the finish screen appears, click the "OK" button.

4 Double-click the "setup" icon ( ).

If the language selection screen appears after Note you double click the "setup" icon, select the

language you wish to use and click the "Next" button. (Normally the correct language is selected automatically.)

5 Read the message in the "Welcome" window and then click the "Next" button.

6 When you are asked how the printer is connected, select "Connected to this computer" and click the "Next" button.

After the installation, a message prompting Note you to restart your computer may appear. In

this case, click the "Yes" button to restart your computer.

9 Connect the interface cable to the machine and your computer (p. 8).

If you are using a USB cable, make sure the machine's power is turned on and then connect the cable.

If you are using a parallel cable, turn off the power of the machine and your computer, connect the cable, turn on the power of the machine, and then turn on your computer.

Windows will detect the machine and the Plug and Play screen will appear.

10 Begin installation of the printer driver.

"SHARP AR-XXXX" will appear in the "Found New Hardware Wizard" dialog box. Select "Install the software automatically (Recommended)" and click the "Next" button. Follow the on-screen instructions.

Caution

If a warning window appears regarding the

"Windows logo test", be sure to click the


"Continue Anyway" button.

This completes the installation of the software. Configure the printer driver settings as explained in "CONFIGURING THE PRINTER DRIVER" (p. 9).

4

Page 6
Image 6
Sharp AR-5316 X, AR-5320 X setup guide Installing the Printer Driver, Installation in Windows XP USB/PARALLEL Cable

AR-5316, AR-5316 X, AR-5320, AR-5320 X specifications

The Sharp AR-5316, AR-5320, AR-5320 X, and AR-5316 X are a series of multifunctional printers/copiers that combine efficiency, productivity, and advanced technology to meet the needs of modern offices. These models are designed to handle a variety of tasks including printing, copying, scanning, and faxing, making them ideal for small to medium-sized businesses.

One of the main features of these models is their speed. The AR-5316 is capable of producing up to 16 pages per minute, while the AR-5320 and AR-5320 X push that speed to an impressive 20 pages per minute. This efficient output reduces wait times and enhances productivity, ensuring that your office can keep up with demanding workloads.

In terms of print quality, the Sharp AR series stands out with a resolution of up to 600 x 600 dpi. This provides crisp and clear documents, essential for professional presentations and important paperwork. Furthermore, these models support various media sizes, accommodating everything from standard letter-size paper to larger formats, which gives users flexibility when printing.

Another significant feature is the user-friendly interface. The AR-5320 X and AR-5316 X include a color touchscreen display, allowing for intuitive navigation and easy operation. This makes it simple for any staff member to quickly access essential features without extensive training.

In addition to traditional printing and copying functions, these devices also come equipped with advanced scanning capabilities. The AR-5320 X, for example, offers duplex scanning, allowing users to scan both sides of a document in a single pass. This not only saves time but also enhances productivity by streamlining workflow.

Security is another major consideration in today's office environments. The Sharp AR series includes a range of security features, such as secure printing options and user authentication, ensuring that sensitive information remains protected from unauthorized access.

Energy efficiency is also a key characteristic of these models. They comply with Energy Star standards, helping businesses reduce their energy consumption and overall operating costs. With features like automatic power shut-off, these copiers are designed to be environmentally friendly while still delivering high performance.

Overall, the Sharp AR-5316, AR-5320, AR-5320 X, and AR-5316 X offer a robust set of features designed to enhance office efficiency and productivity. With their combination of speed, quality, and advanced functionality, these devices are well-suited for any office looking to streamline their document management processes.