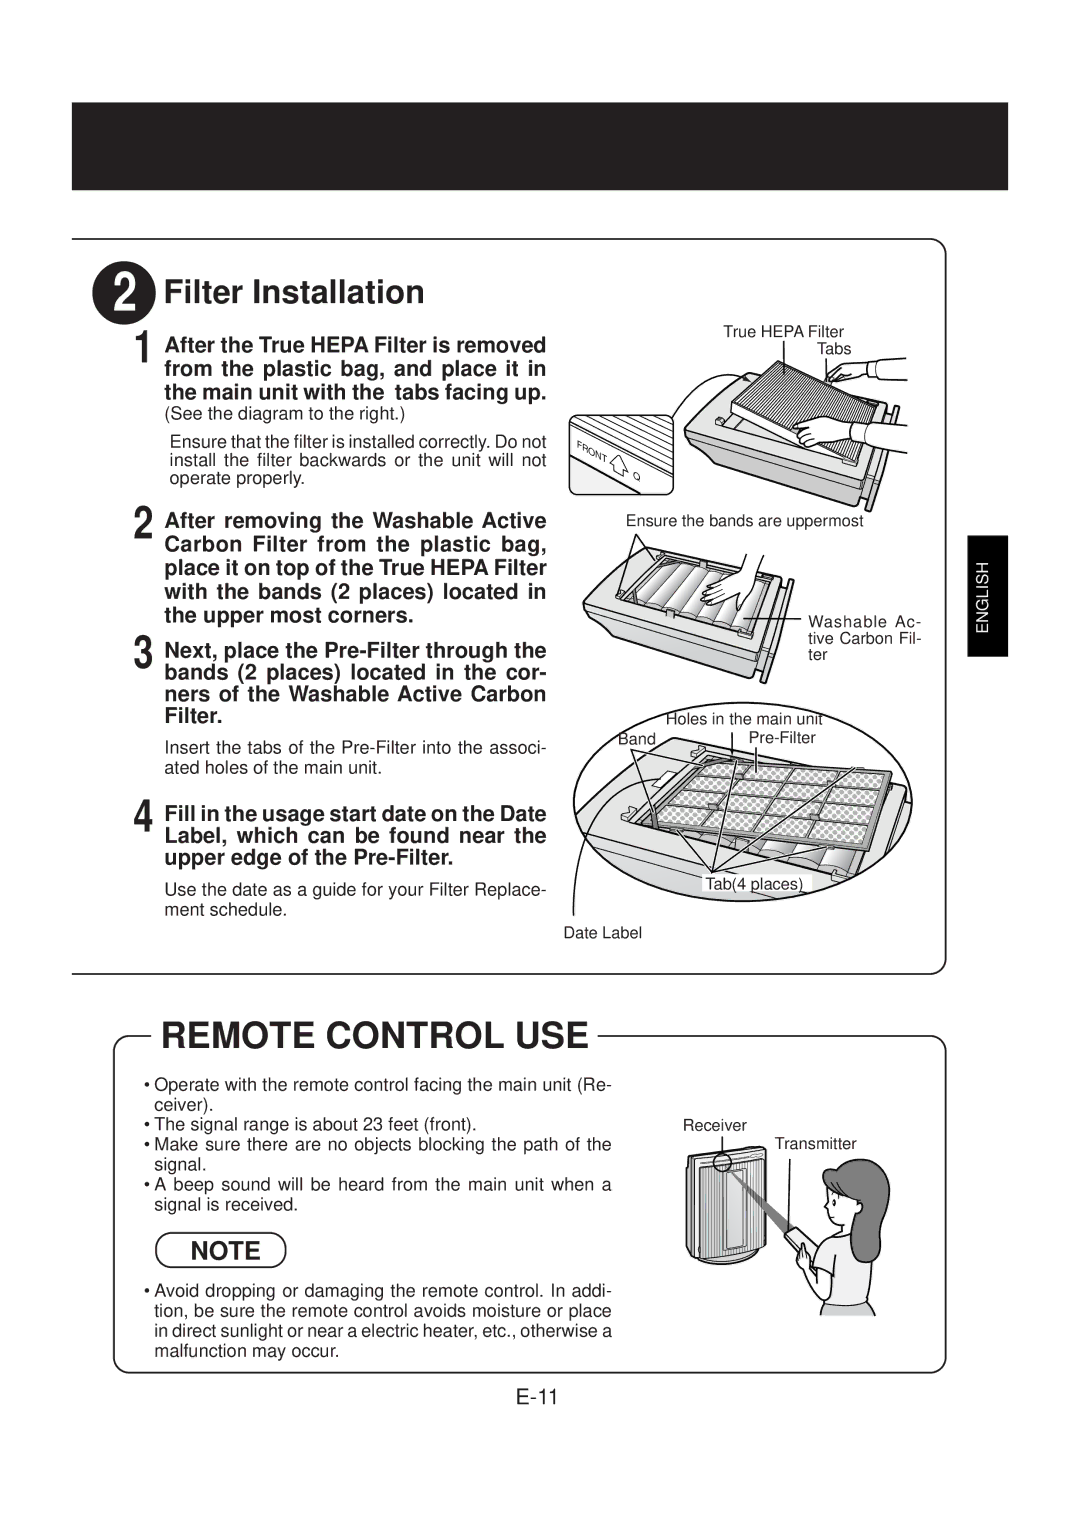
2 Filter Installation
1 After the True HEPA Filter is removed from the plastic bag, and place it in the main unit with the tabs facing up.
(See the diagram to the right.)
Ensure that the filter is installed correctly. Do not install the filter backwards or the unit will not operate properly.
2 After removing the Washable Active Carbon Filter from the plastic bag, place it on top of the True HEPA Filter with the bands (2 places) located in the upper most corners.
3 Next, place the
Insert the tabs of the
4 Fill in the usage start date on the Date Label, which can be found near the upper edge of the
Use the date as a guide for your Filter Replace- ment schedule.
True HEPA Filter
Tabs
FRONT まえ
Ensure the bands are uppermost
Washable Ac-
tive Carbon Fil- ter
Holes in the main unit
BandPre-Filter
Tab(4 places)
Date Label
ENGLISH
REMOTE CONTROL USE
•Operate with the remote control facing the main unit (Re- ceiver).
• The signal range is about 23 feet (front). | Receiver |
• Make sure there are no objects blocking the path of the | Transmitter |
signal. |
|
• A beep sound will be heard from the main unit when a |
|
signal is received. |
|
NOTE
• Avoid dropping or damaging the remote control. In addi- tion, be sure the remote control avoids moisture or place in direct sunlight or near a electric heater, etc., otherwise a malfunction may occur.