On-Screen Display Menu
•Some menu items may not be displayed depending on the selected input source.
_ | Picture |
| _ | Parental Control |
|
| AV Mode | Page 28 | Page 32 | ||
|
| Change Password | |||
| Brightness | Page 28 |
| Channel Block | Page 33 |
| Contrast | Page 28 |
| Button Block | Page 33 |
| Sharpness | Page 28 |
| Page 33 | |
| Expert settings | Page 28 |
| Input Block | Page 35 |
| Advanced settings | Page 28 |
| Reset All | Page 35 |
| PC | Page 29 |
|
|
|
| Reset Picture settings | Page 29 |
|
|
|
| No Signal Power Off | Page 29 |
|
|
|
@EqualizerSound | Page 29 |
|
|
| |
| Balance | Page 30 |
|
|
|
| Surround | Page 30 |
|
|
|
| Speaker | Page 30 |
|
|
|
| Analog TV Sound | Page 30 |
|
|
|
| Digital Audio Output | Page 30 |
|
|
|
| Default Audio Language | Page 30 |
|
|
|
| Current Audio Language | Page 30 |
|
|
|
_Setup |
|
|
|
| |
| Signal Type | Page 31 |
|
|
|
| Channel Scan | Page 31 |
|
|
|
| Channel Skip | Page 31 |
|
|
|
| Channel Edit | Page 31 |
|
|
|
| Input Skip | Page 31 |
|
|
|
| Input Labels | Page 31 |
|
|
|
| Closed Caption | Page 31 |
|
|
|
| Time Setup | Page 32 |
|
|
|
| System Information | Page 32 |
|
|
|
| Reset All | Page 32 |
|
|
|
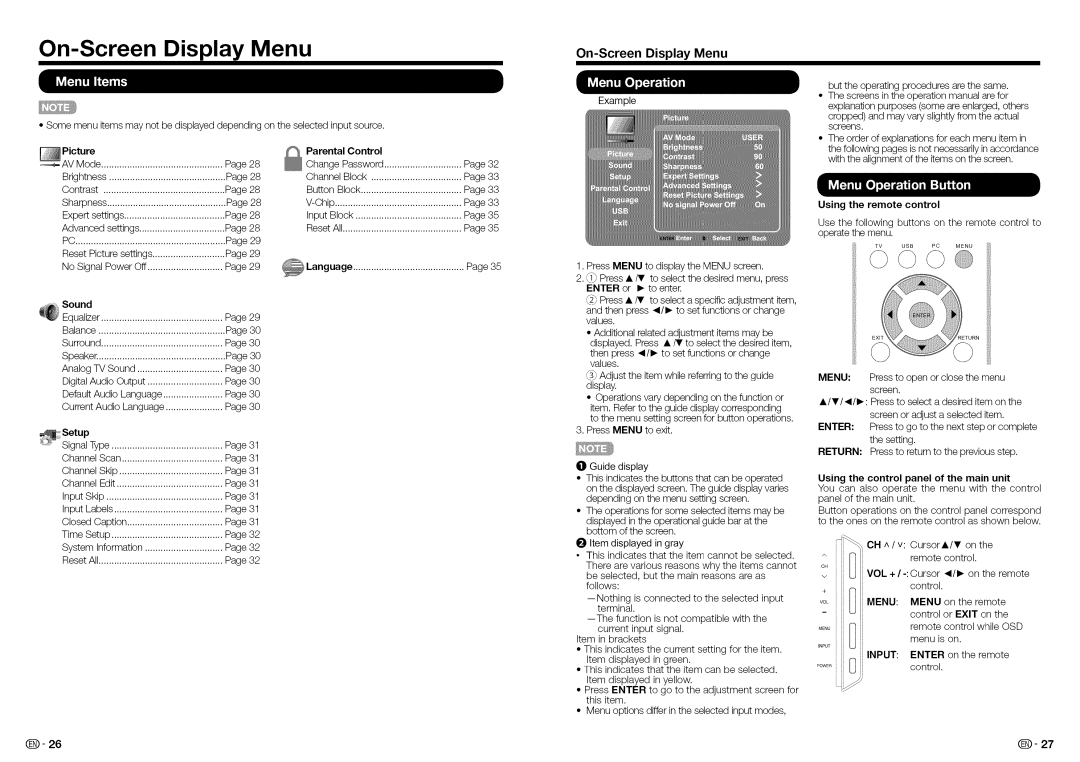
On-ScreenDisplay Menu
Example
1.Press MENU to display the MENU screen.
2._1_Press •/V to select the desired menu, press ENTER or I_ to enter.
_2_Press • iT to select a specific adjustment item,
and then press _1/1_to set functions or change values.
•Additional related adjustment items may be displayed. Press •/V to select the desired item,
then press _1/1_to set functions or change values.
_3_Adjust the item while referring to the guide display.
•Operations vary depending on the function or item. Refer to the guide display corresponding to the menu setting screen for button operations.
3.Press MENU to exit.
I01Guide display
•This indicates the buttons that can be operated
on the displayed screen. The guide display varies depending on the menu setting screen.
•The operations for some selected items may be
displayed in the operational guide bar at the bottom of the screen.
O Item displayed in gray
•This indicates that the item cannot be selected.
There are various reasons why the items cannot be selected, but the main reasons are as follows:
current input signal. Item in brackets
•This indicates the current setting for the item. Item displayed in green.
•This indicates that the item can be selected. Item displayed in yellow.
•Press ENTER to go to the adjustment screen for this item.
•Menu options differ in the selected input modes,
but the operating procedures are the same.
•The screens in the operation manual are for explanation purposes (some are enlarged, others
cropped) and may vary slightly from the actual screens.
•The order of explanations for each menu item in the following pages is not necessarily in accordance with the alignment of the items on the screen.
Using the remote control
Use the following buttons on the remote control to operate the menu.
MENU: Press to open or close the menu screen.
• /V/_l/l_: Press to select a desired item on the
screen or adjust a selected item.
ENTER: Press to go to the next step or complete the setting.
RETURN: Press to return to the previous step.
Using the control panel of the main unit
You can also operate the menu with the control panel of the main unit.
Button operations on the control panel correspond to the ones on the remote control as shown below.
| CH ^ / v: Cursor•/V on the | ||
|
| remote | control. |
c_ | VOL + / | _1/1_on the remote | |
| |||
|
| control. | |
VOL | MENU: | MENU | on the remote |
|
| control or EXIT on the | |
|
| remote | control while OSD |
MENU | I_ | menu | is on. |
INPUT |
|
|
|
| INPUT: ENTER on the remote | ||
'OWER | I'_ _1 | control. | |
Q- 26 | Q- 27 |