Preparation
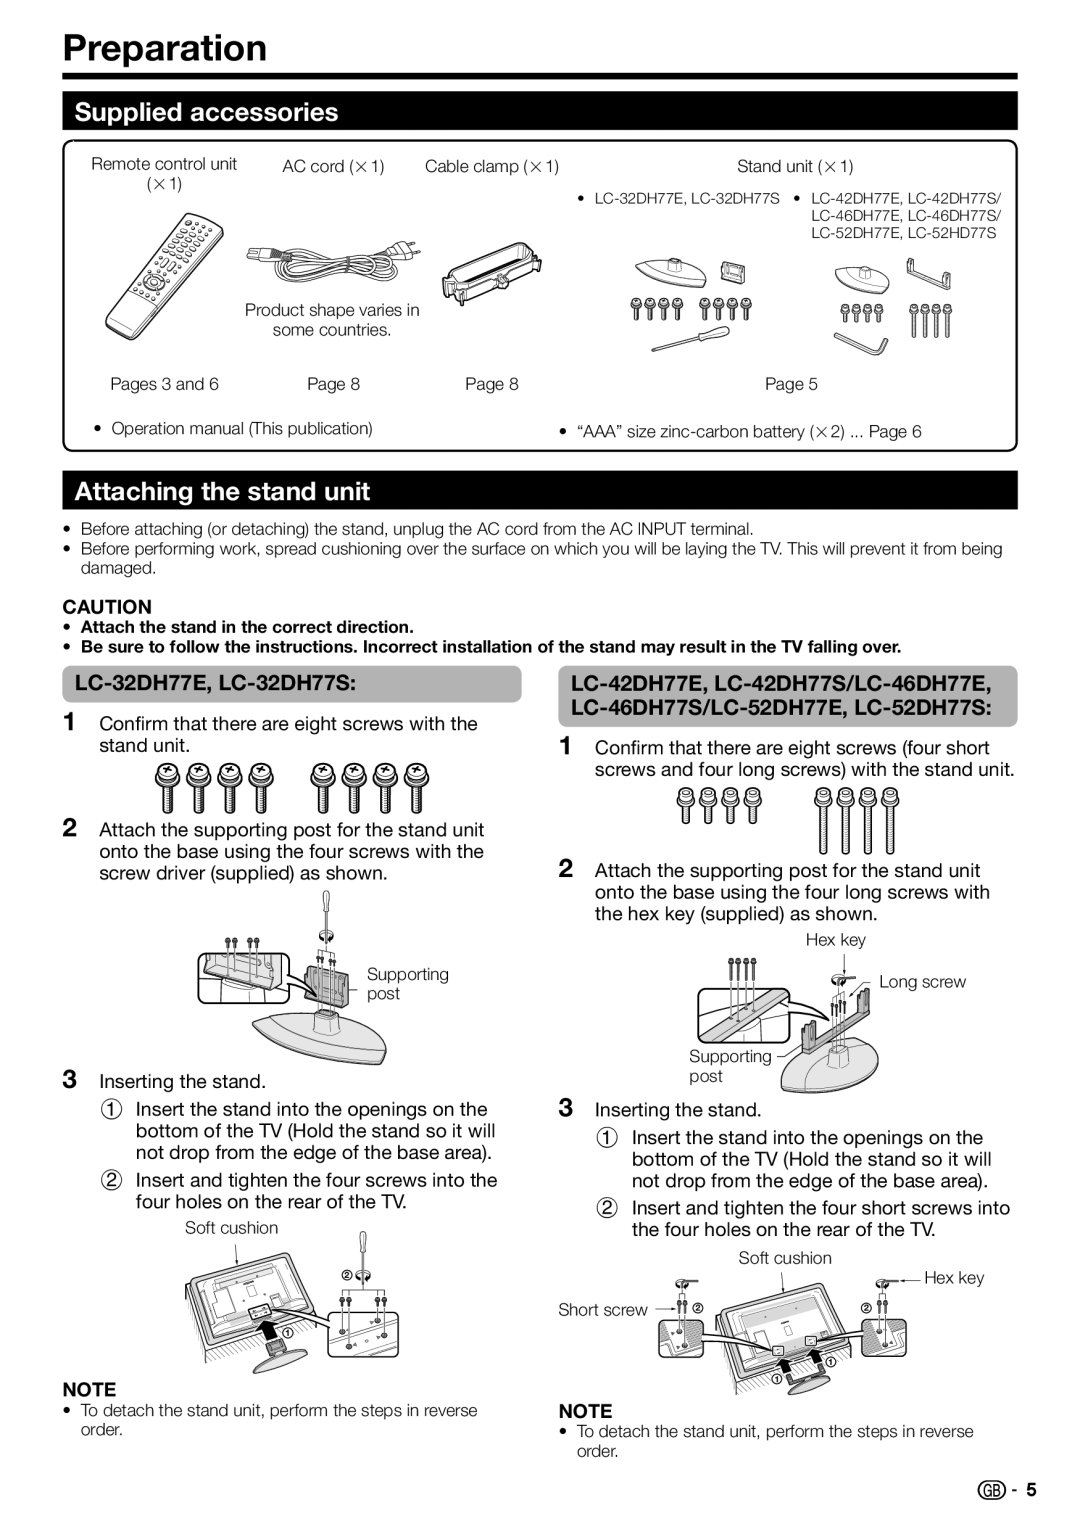
Supplied accessories
Remote control unit | AC cord (g1) |
(g1) |
|
Product shape varies in
some countries.
Pages 3 and 6 | Page 8 |
• Operation manual (This publication)
Cable clamp (g1) | Stand unit (g1) |
•
Page 8 | Page 5 |
• “AAA” size
Attaching the stand unit
•Before attaching (or detaching) the stand, unplug the AC cord from the AC INPUT terminal.
•Before performing work, spread cushioning over the surface on which you will be laying the TV. This will prevent it from being damaged.
CAUTION
•Attach the stand in the correct direction.
•Be sure to follow the instructions. Incorrect installation of the stand may result in the TV falling over.
LC-32DH77E, LC-32DH77S:
1Confirm that there are eight screws with the stand unit.
2Attach the supporting post for the stand unit onto the base using the four screws with the screw driver (supplied) as shown.
Supporting post
3Inserting the stand.
1Insert the stand into the openings on the bottom of the TV (Hold the stand so it will not drop from the edge of the base area).
2Insert and tighten the four screws into the four holes on the rear of the TV.
Soft cushion
2
1
NOTE
•To detach the stand unit, perform the steps in reverse order.
1Confirm that there are eight screws (four short screws and four long screws) with the stand unit.
2Attach the supporting post for the stand unit onto the base using the four long screws with the hex key (supplied) as shown.
Hex key
Long screw
Supporting ![]() post
post
3Inserting the stand.
1Insert the stand into the openings on the bottom of the TV (Hold the stand so it will not drop from the edge of the base area).
2Insert and tighten the four short screws into the four holes on the rear of the TV.
Soft cushion
![]() Hex key
Hex key
Short screw | 2 | 2 |
![]() 1
1
1
NOTE
•To detach the stand unit, perform the steps in reverse order.
![]()
![]() 5
5