Other useful features
How to operate USB-recording
You can enjoy DTV/SAT recording or playback by connecting a commercially available USB HDD to the TV.
CAUTION
•Do not unplug the AC cord during
•When the AC cord is unplugged:
− The
•
•Only this TV can playback the programme recorded on the USB HDD connected to this TV. The programmes cannot playback on other TV or PC.
•When a CAM PIN code is required for recording a programme, it is necessary to enter the CAM PIN code in advance (Page 12).
SHARP corporation bears no responsibility regarding compensation for content when recording cannot does not take place, loss of recorded data or other direct or indirect damages related to these matters. Please be forewarned.
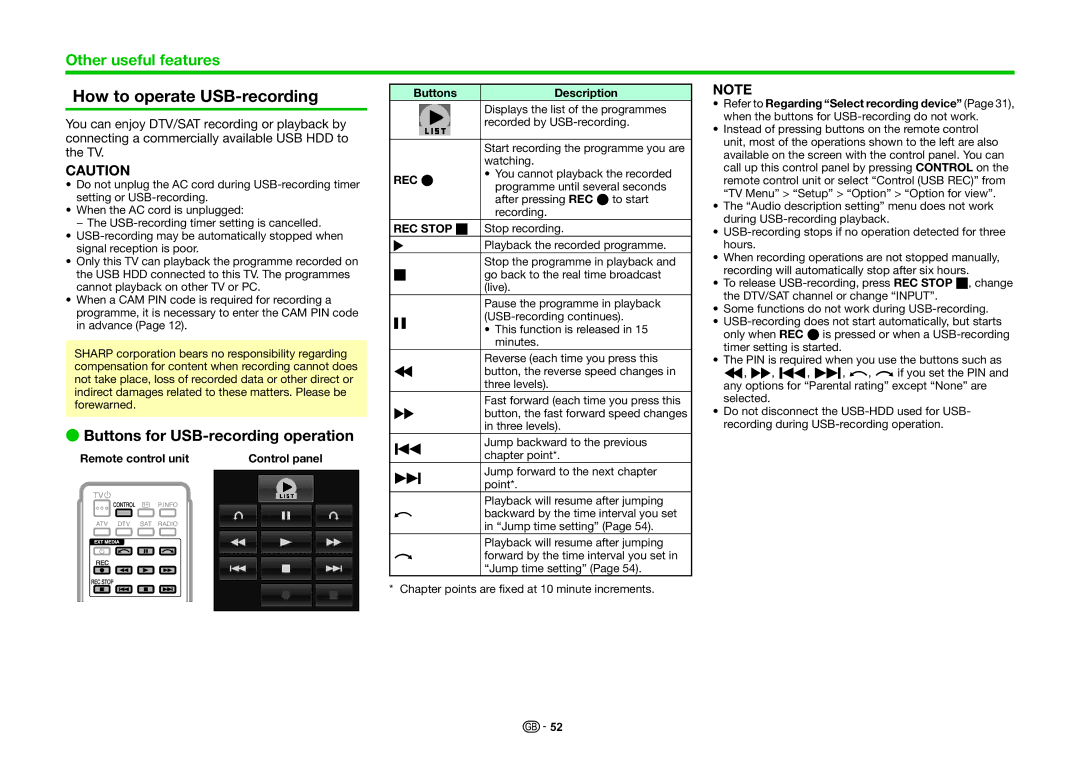
EButtons for USB-recording operation
Remote control unit | Control panel | ||||||
|
|
|
|
|
|
|
|
|
|
|
|
|
|
|
|
|
|
|
|
|
|
|
|
|
|
|
|
|
|
|
|
|
|
|
|
|
|
|
|
|
|
|
|
|
|
|
|
Buttons | Description | |
| Displays the list of the programmes | |
| recorded by | |
|
| |
| Start recording the programme you are | |
| watching. | |
REC E | • You cannot playback the recorded | |
programme until several seconds | ||
| ||
| after pressing REC E to start | |
| recording. | |
REC STOP H | Stop recording. | |
I | Playback the recorded programme. | |
| Stop the programme in playback and | |
H | go back to the real time broadcast | |
| (live). | |
| Pause the programme in playback | |
F | ||
• This function is released in 15 | ||
| ||
| minutes. | |
| Reverse (each time you press this | |
S | button, the reverse speed changes in | |
| three levels). | |
| Fast forward (each time you press this | |
J | button, the fast forward speed changes | |
| in three levels). |
KJump backward to the previous chapter point*.
LJump forward to the next chapter point*.
| Playback will resume after jumping |
a | backward by the time interval you set |
| in “Jump time setting” (Page 54). |
| Playback will resume after jumping |
b | forward by the time interval you set in |
| “Jump time setting” (Page 54). |
* Chapter points are fixed at 10 minute increments.
NOTE
•Refer to Regarding “Select recording device” (Page 31), when the buttons for
•Instead of pressing buttons on the remote control unit, most of the operations shown to the left are also available on the screen with the control panel. You can call up this control panel by pressing CONTROL on the remote control unit or select “Control (USB REC)” from “TV Menu” > “Setup” > “Option” > “Option for view”.
•The “Audio description setting” menu does not work during
•
•When recording operations are not stopped manually, recording will automatically stop after six hours.
•To release
•Some functions do not work during
•
•The PIN is required when you use the buttons such as S, J, K, L, a, bif you set the PIN and any options for “Parental rating” except “None” are selected.
•Do not disconnect the
![]()
![]() 52
52