Connecting the monitor and turning the monitor on and off
Connecting the monitor to a computer (PC etc.)
When connecting, ensure that both the monitor and computer are switched off.
Note:
-Do not overly bend the cable or add extension cords as this could lead to malfunction.
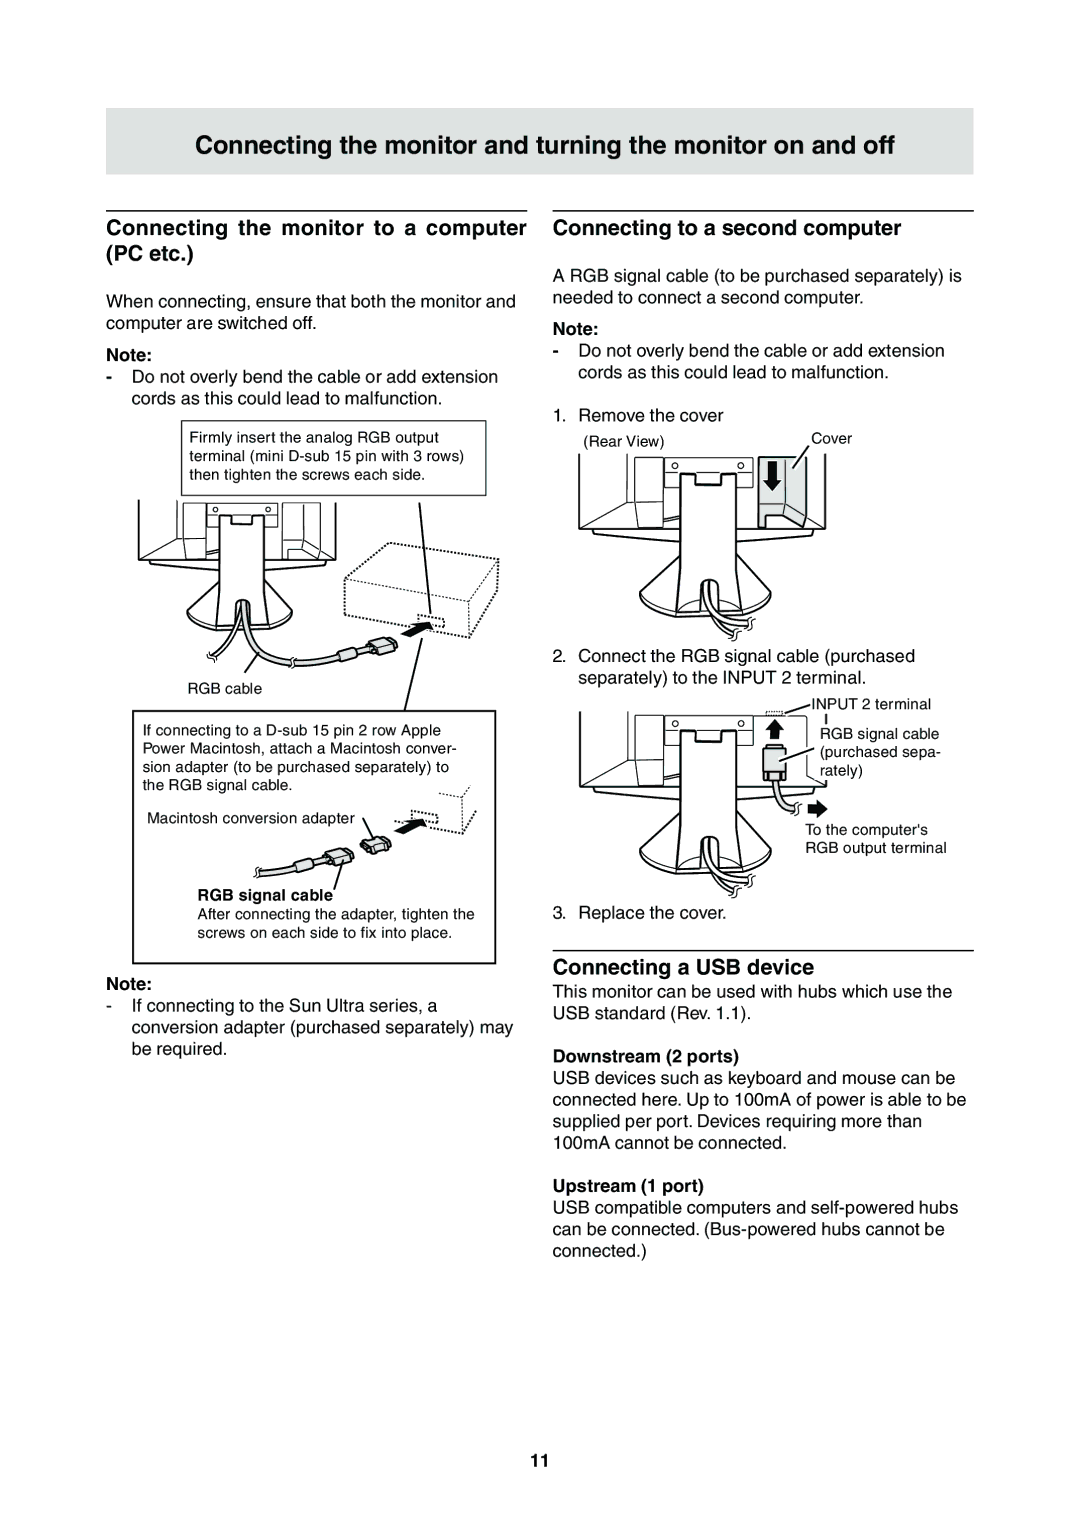
Firmly insert the analog RGB output terminal (mini
RGB cable
If connecting to a
Macintosh conversion adapter
RGB signal cable
After connecting the adapter, tighten the screws on each side to fix into place.
Connecting to a second computer
A RGB signal cable (to be purchased separately) is needed to connect a second computer.
Note:
-Do not overly bend the cable or add extension cords as this could lead to malfunction.
1. Remove the cover
|
|
|
|
|
| Cover | ||
(Rear View) |
|
|
|
|
| |||
|
|
|
|
|
|
|
|
|
|
|
|
|
|
|
|
|
|
|
|
|
|
|
|
|
|
|
|
|
|
|
|
|
|
|
|
2.Connect the RGB signal cable (purchased separately) to the INPUT 2 terminal.
INPUT 2 terminal
RGB signal cable (purchased sepa- rately)
To the computer's
RGB output terminal
3. Replace the cover.
Note:
-If connecting to the Sun Ultra series, a conversion adapter (purchased separately) may be required.
Connecting a USB device
This monitor can be used with hubs which use the USB standard (Rev. 1.1).
Downstream (2 ports)
USB devices such as keyboard and mouse can be connected here. Up to 100mA of power is able to be supplied per port. Devices requiring more than 100mA cannot be connected.
Upstream (1 port)
USB compatible computers and
11