BASE SCREEN OF FAX MODE
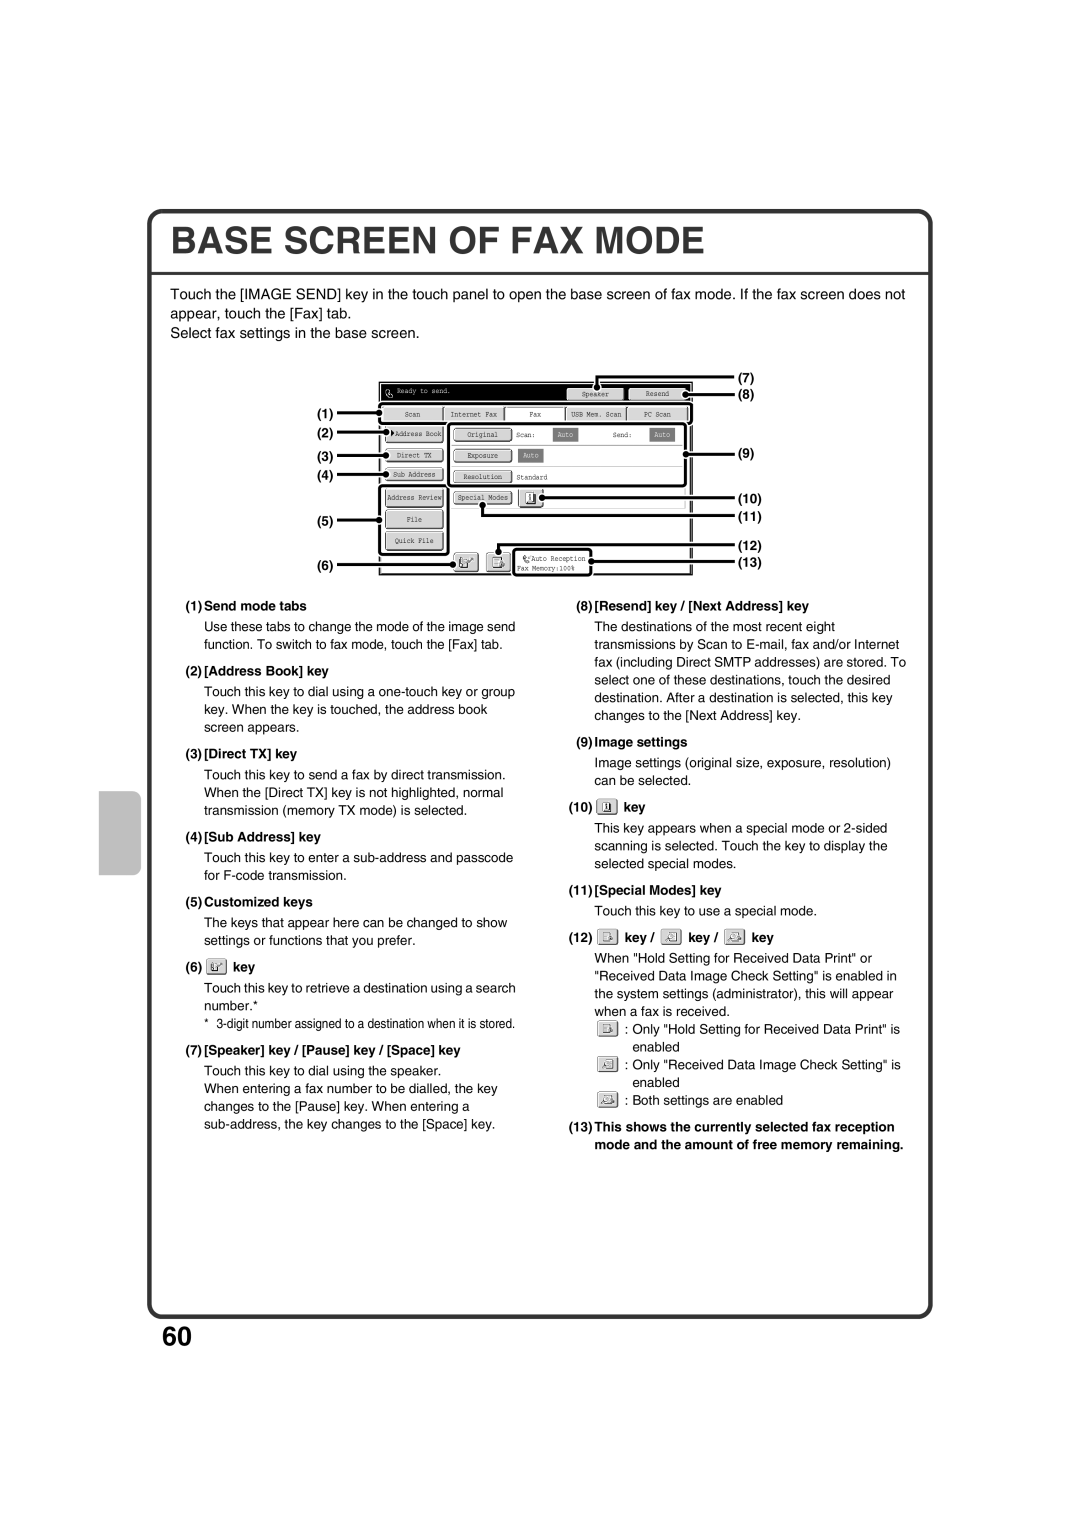
Touch the [IMAGE SEND] key in the touch panel to open the base screen of fax mode. If the fax screen does not appear, touch the [Fax] tab.
Select fax settings in the base screen.
|
|
| (7) |
Ready to send. | Speaker | Resend | (8) |
|
(1) |
|
| Scan |
| Internet Fax |
|
|
| Fax |
| USB Mem. Scan |
| PC Scan |
| ||||||
|
|
|
|
|
|
|
|
| ||||||||||||
(2) |
|
| Address Book |
|
|
|
|
|
|
|
|
|
|
|
|
|
|
|
| |
|
|
| Original |
| Scan: |
| Auto |
| Send: |
|
| Auto |
| |||||||
(3) | Direct TX | Exposure | Auto | (9) |
(4) | Sub Address | Resolution | Standard |
|
|
| |||
| Address Review | Special Modes |
| (10) |
(5) | File |
|
| (11) |
|
|
|
| |
| Quick File |
|
| (12) |
|
|
|
| |
(6) |
|
| Auto Reception | (13) |
|
| Fax Memory:100% |
(1)Send mode tabs
Use these tabs to change the mode of the image send function. To switch to fax mode, touch the [Fax] tab.
(2)[Address Book] key
Touch this key to dial using a
(3)[Direct TX] key
Touch this key to send a fax by direct transmission. When the [Direct TX] key is not highlighted, normal transmission (memory TX mode) is selected.
(4)[Sub Address] key
Touch this key to enter a
(5)Customized keys
The keys that appear here can be changed to show settings or functions that you prefer.
(6) key
key
Touch this key to retrieve a destination using a search number.*
*
(7)[Speaker] key / [Pause] key / [Space] key Touch this key to dial using the speaker.
When entering a fax number to be dialled, the key changes to the [Pause] key. When entering a
(8)[Resend] key / [Next Address] key The destinations of the most recent eight transmissions by Scan to
(9)Image settings
Image settings (original size, exposure, resolution) can be selected.
(10)![]() key
key
This key appears when a special mode or
(11)[Special Modes] key
Touch this key to use a special mode.
(12) key /
key /  key /
key /  key
key
When "Hold Setting for Received Data Print" or "Received Data Image Check Setting" is enabled in the system settings (administrator), this will appear when a fax is received.
![]() : Only "Hold Setting for Received Data Print" is enabled
: Only "Hold Setting for Received Data Print" is enabled
![]() : Only "Received Data Image Check Setting" is enabled
: Only "Received Data Image Check Setting" is enabled
![]() : Both settings are enabled
: Both settings are enabled
(13)This shows the currently selected fax reception mode and the amount of free memory remaining.
60