LOADING PAPER IN A TRAY
Names of the trays
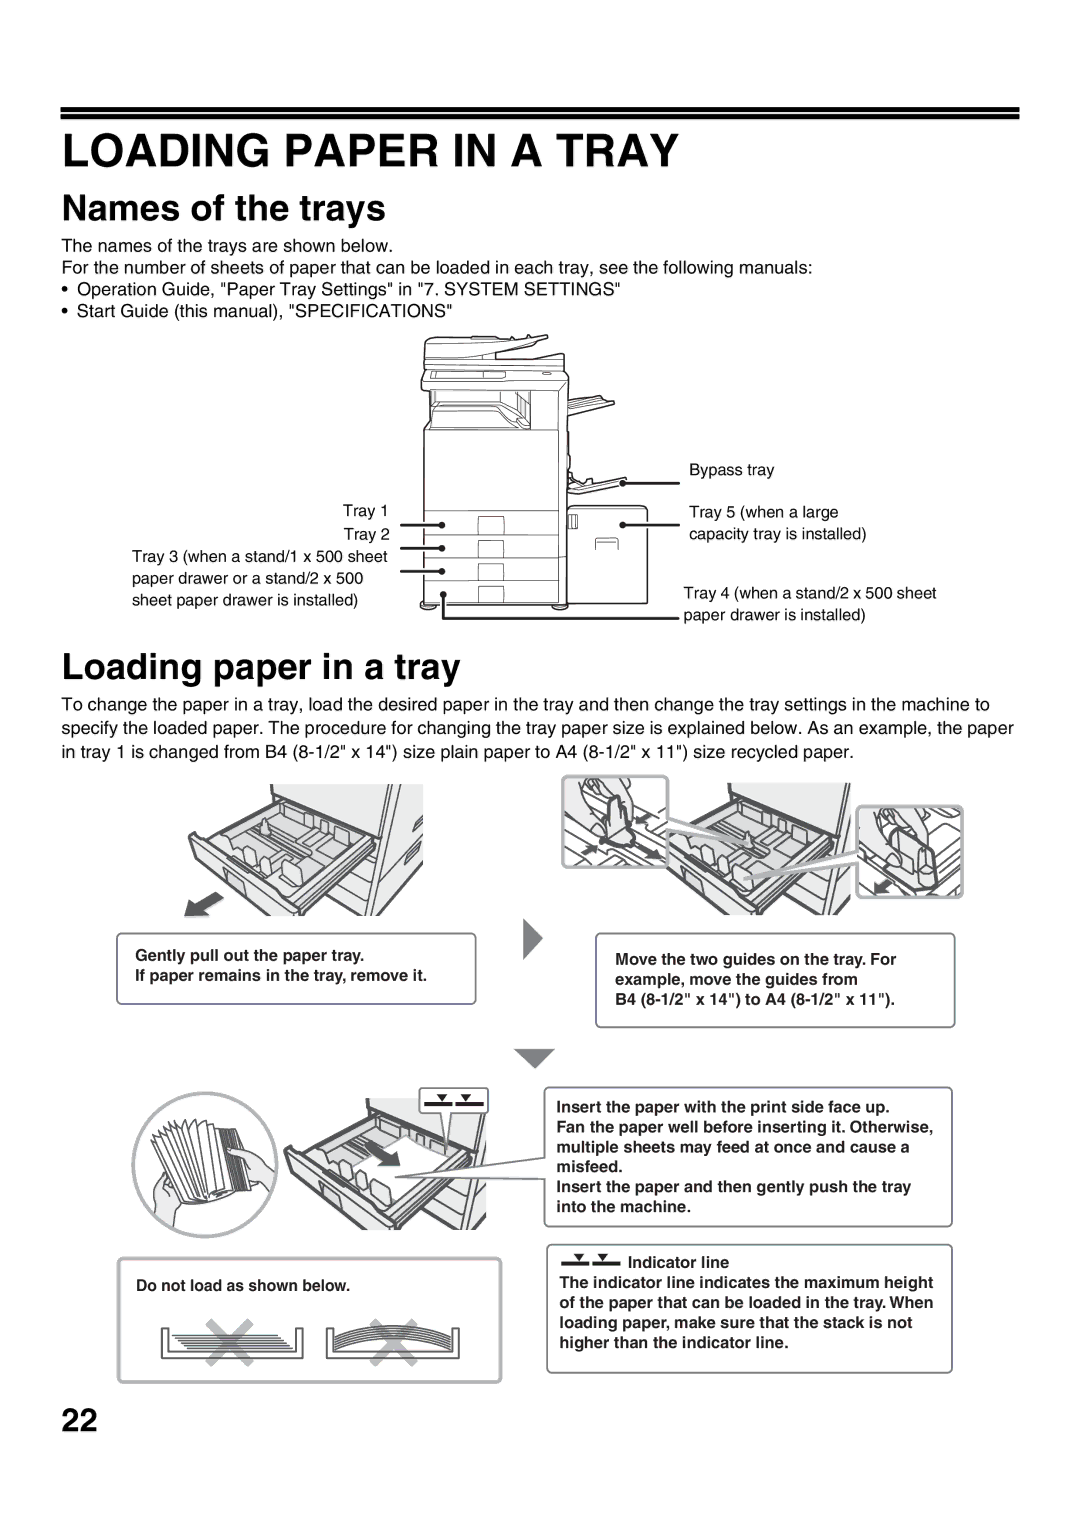
The names of the trays are shown below.
For the number of sheets of paper that can be loaded in each tray, see the following manuals:
•Operation Guide, "Paper Tray Settings" in "7. SYSTEM SETTINGS"
•Start Guide (this manual), "SPECIFICATIONS"
Tray 1
Tray 2 Tray 3 (when a stand/1 x 500 sheet paper drawer or a stand/2 x 500 sheet paper drawer is installed)
Bypass tray
Tray 5 (when a large capacity tray is installed)
Tray 4 (when a stand/2 x 500 sheet paper drawer is installed)
Loading paper in a tray
To change the paper in a tray, load the desired paper in the tray and then change the tray settings in the machine to specify the loaded paper. The procedure for changing the tray paper size is explained below. As an example, the paper in tray 1 is changed from B4
Gently pull out the paper tray.
If paper remains in the tray, remove it.
Do not load as shown below.
Move the two guides on the tray. For example, move the guides from
B4
Insert the paper with the print side face up.
Fan the paper well before inserting it. Otherwise, multiple sheets may feed at once and cause a misfeed.
Insert the paper and then gently push the tray into the machine.
![]()
![]() Indicator line
Indicator line
The indicator line indicates the maximum height of the paper that can be loaded in the tray. When loading paper, make sure that the stack is not higher than the indicator line.
22
