Setting up the Screen
![]() CAUTION
CAUTION
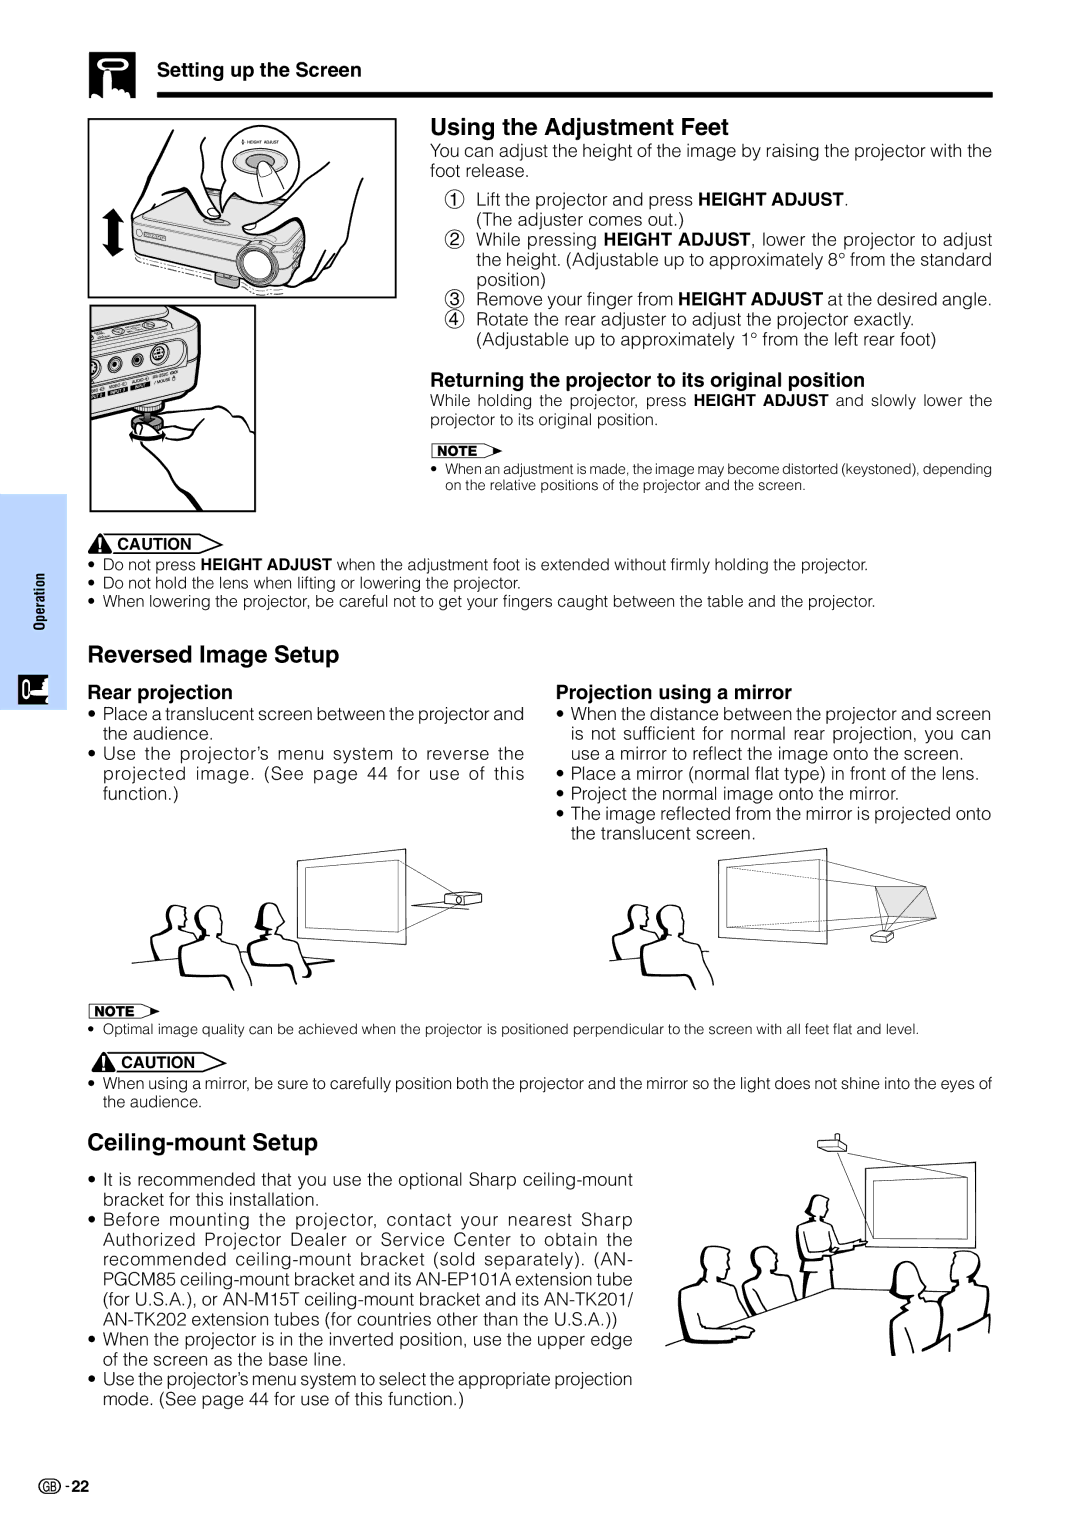
Using the Adjustment Feet
You can adjust the height of the image by raising the projector with the foot release.
1Lift the projector and press HEIGHT ADJUST.
(The adjuster comes out.)
2While pressing HEIGHT ADJUST, lower the projector to adjust the height. (Adjustable up to approximately 8° from the standard
position)
3Remove your finger from HEIGHT ADJUST at the desired angle.
4 Rotate the rear adjuster to adjust the projector exactly. (Adjustable up to approximately 1° from the left rear foot)
Returning the projector to its original position
While holding the projector, press HEIGHT ADJUST and slowly lower the projector to its original position.
•When an adjustment is made, the image may become distorted (keystoned), depending on the relative positions of the projector and the screen.
Operation
•Do not press HEIGHT ADJUST when the adjustment foot is extended without firmly holding the projector.
•Do not hold the lens when lifting or lowering the projector.
•When lowering the projector, be careful not to get your fingers caught between the table and the projector.
Reversed Image Setup
Rear projection
•Place a translucent screen between the projector and the audience.
•Use the projector’s menu system to reverse the projected image. (See page 44 for use of this function.)
Projection using a mirror
•When the distance between the projector and screen is not sufficient for normal rear projection, you can use a mirror to reflect the image onto the screen.
•Place a mirror (normal flat type) in front of the lens.
•Project the normal image onto the mirror.
•The image reflected from the mirror is projected onto the translucent screen.
•Optimal image quality can be achieved when the projector is positioned perpendicular to the screen with all feet flat and level.
![]() CAUTION
CAUTION
•When using a mirror, be sure to carefully position both the projector and the mirror so the light does not shine into the eyes of the audience.
Ceiling-mount Setup
•It is recommended that you use the optional Sharp
•Before mounting the projector, contact your nearest Sharp
Authorized Projector Dealer or Service Center to obtain the recommended
•When the projector is in the inverted position, use the upper edge of the screen as the base line.
•Use the projector’s menu system to select the appropriate projection mode. (See page 44 for use of this function.)
![]()
![]() 22
22