R-1214 specifications
The Sharp R-1214 is a compact and highly efficient microwave oven that combines advanced technology with user-friendly features, designed to enhance your cooking experience in the kitchen. This model is especially appealing for those with limited counter space, as it offers powerful cooking capabilities while maintaining a sleek and space-saving design.One of the standout features of the Sharp R-1214 is its inverter technology. Unlike traditional microwave ovens, which use a fixed power source that cycles on and off, the inverter system provides a continuous supply of power, allowing for even and precise cooking. This means that delicate foods like seafood or melting chocolate can be cooked without overheating or uneven results. The inverter technology not only improves cooking performance but also preserves the nutritional quality and flavor of the food.
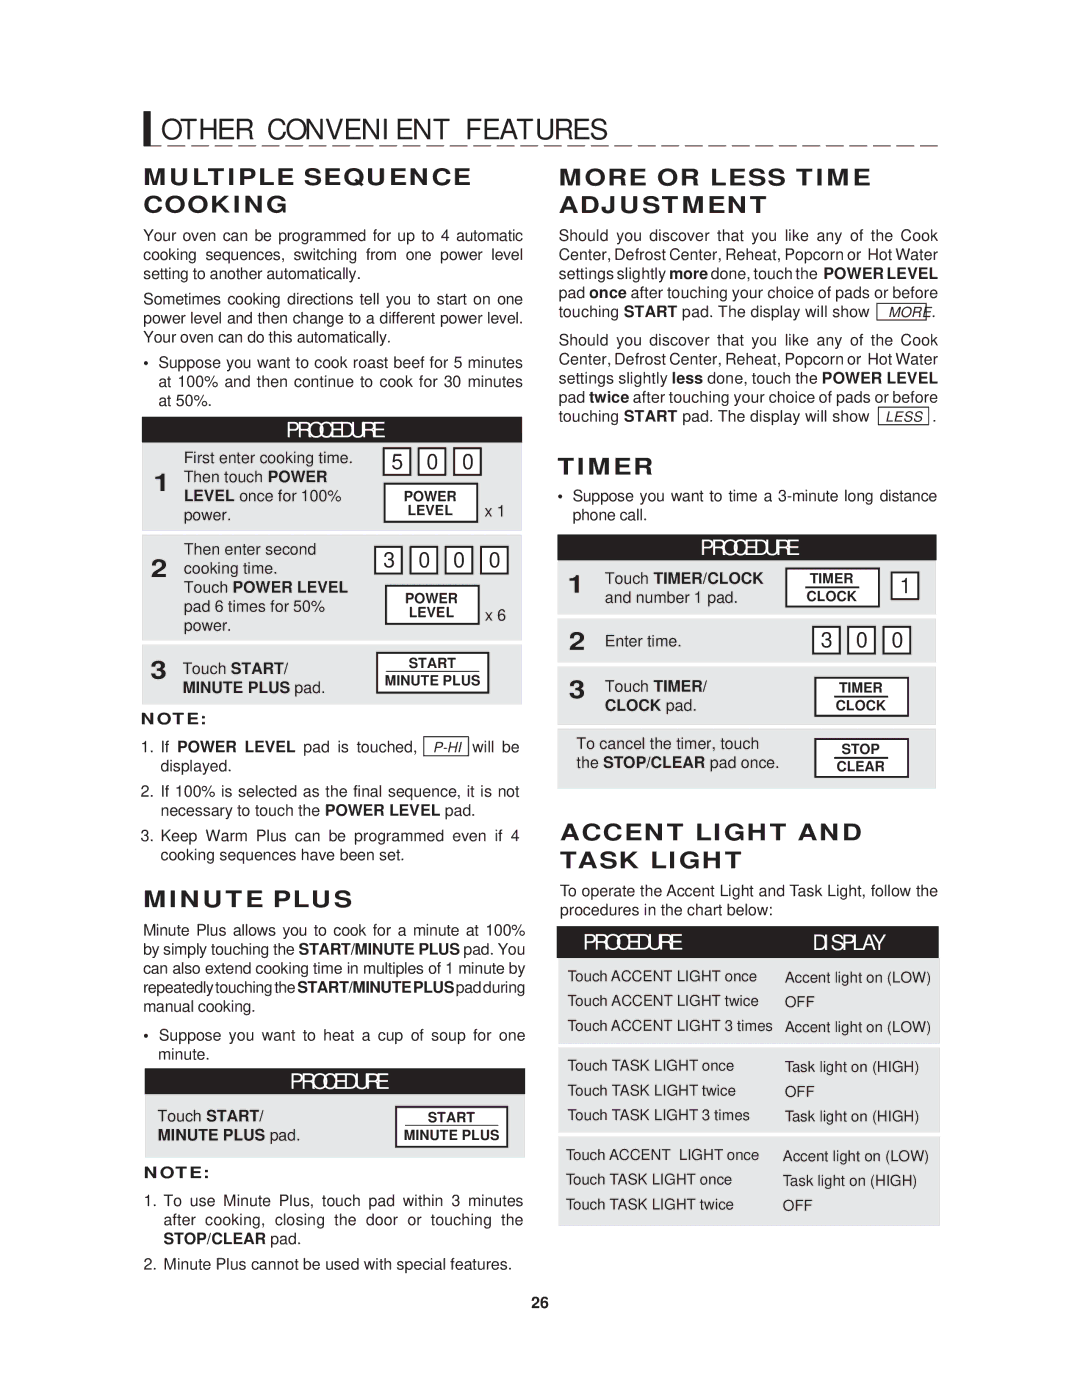
The R-1214 also comes equipped with a range of pre-programmed settings that cater to various cooking needs. These include functions for reheating, defrosting, and cooking specific dishes, ensuring that users can achieve optimal results without the need for guesswork. With just the touch of a button, you can reheat leftovers, defrost frozen meat, or prepare popcorn in a matter of minutes.
Another notable characteristic is its spacious interior, which can accommodate a significant volume of food. The turntable design ensures that food is evenly heated by allowing it to rotate during the cooking process. The microwave’s exterior is designed with a modern aesthetic, blending seamlessly into any kitchen environment.
The user-friendly control panel features an intuitive layout that makes it easy to navigate through the variety of cooking options. The digital display provides clear visibility of cooking times and settings, enhancing user convenience.
Furthermore, safety features such as a child lock and a quick start function further enhance the usability of the Sharp R-1214, making it a reliable choice for families.
In summary, the Sharp R-1214 microwave oven stands out for its innovative inverter technology, ample cooking features, stylish design, and user-friendly functionalities. Whether you're reheating a meal, defrosting ingredients, or cooking a new recipe, this microwave offers a versatile solution that meets the demands of modern cooking.