Basic Operations
Playback
Playback | To Stop Playback |
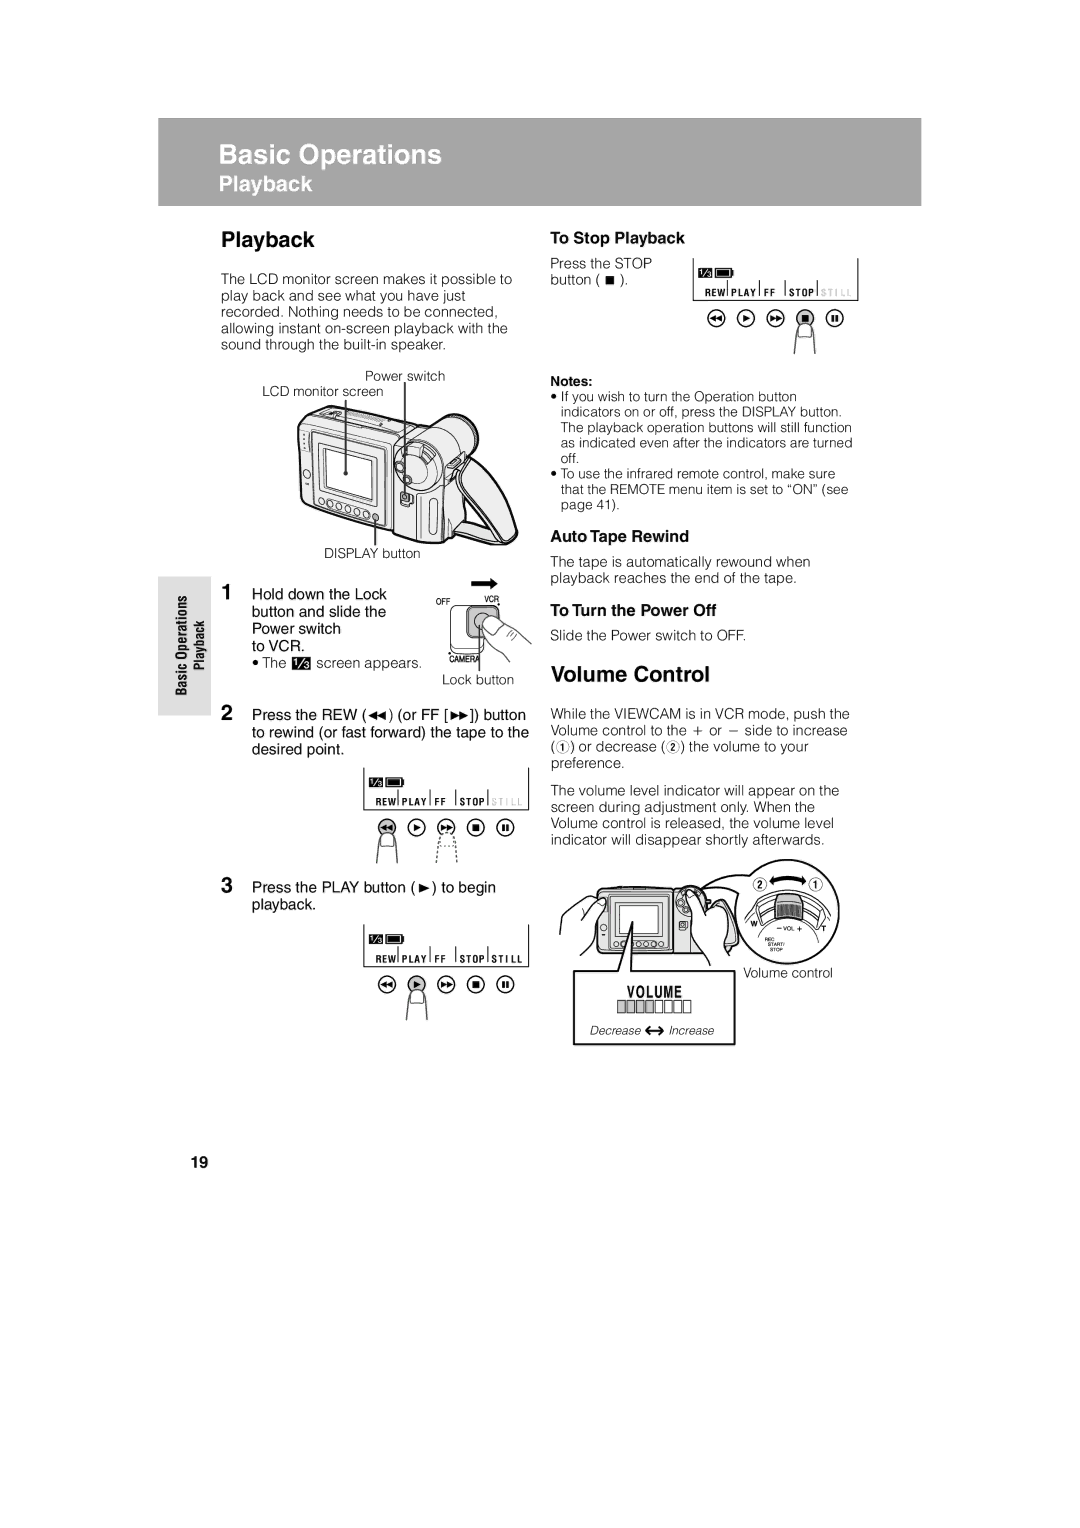
The LCD monitor screen makes it possible to | Press the STOP |
button (A). | |
play back and see what you have just |
|
recorded. Nothing needs to be connected, |
|
allowing instant |
|
sound through the |
|
REW P L A Y F F S T OP S T I L L
Power switch
LCD monitor screen
DISPLAY button
OperationsBasic | Playback | 1 Hold down the Lock | ||
button and slide the | ||||
|
| |||
|
| Power switch | ||
|
| to VCR. |
| |
|
| • The | screen appears. | |
Lock button
2 Press the REW (C) (or FF [B]) button to rewind (or fast forward) the tape to the desired point.
REW P L A Y F F S T OP S T I L L
Notes:
•If you wish to turn the Operation button indicators on or off, press the DISPLAY button. The playback operation buttons will still function as indicated even after the indicators are turned off.
•To use the infrared remote control, make sure that the REMOTE menu item is set to “ON” (see page 41).
Auto Tape Rewind
The tape is automatically rewound when playback reaches the end of the tape.
To Turn the Power Off
Slide the Power switch to OFF.
Volume Control
While the VIEWCAM is in VCR mode, push the Volume control to the + or − side to increase (Q) or decrease (W) the volume to your preference.
The volume level indicator will appear on the screen during adjustment only. When the Volume control is released, the volume level indicator will disappear shortly afterwards.
3 Press the PLAY button (D) to begin playback.
REW P L A Y F F S T OP S T I L L
Volume control
Decrease ![]() Increase
Increase
19
