REMOVING AND REINSTALLING THE MAIN PARTS
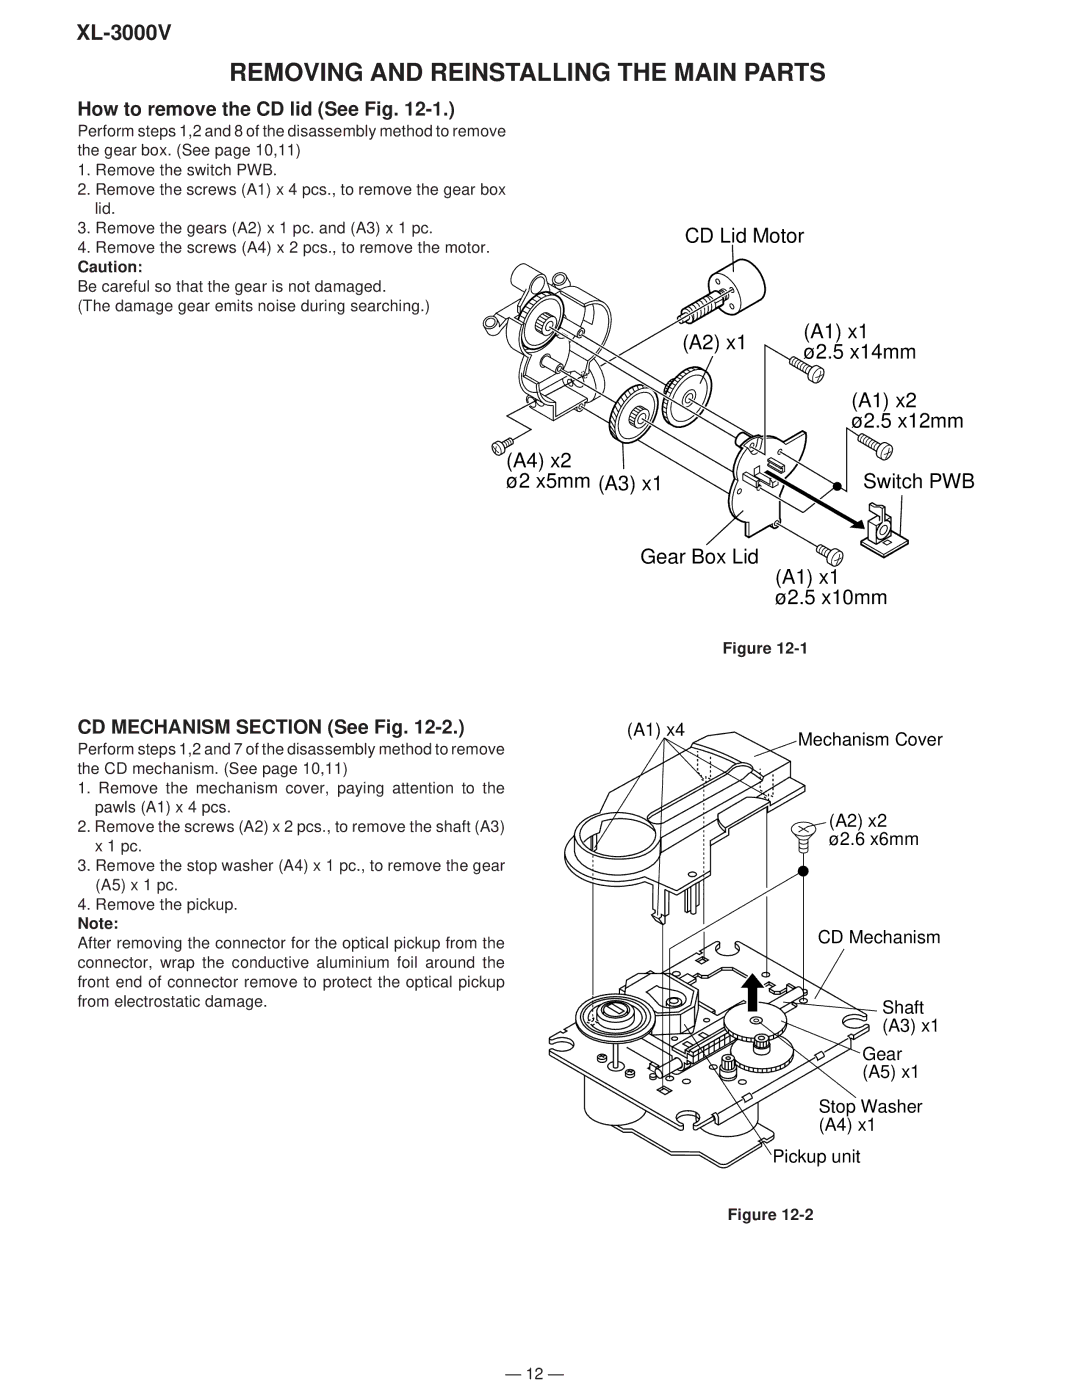
How to remove the CD lid (See Fig. 12-1.)
Perform steps 1,2 and 8 of the disassembly method to remove the gear box. (See page 10,11)
1.Remove the switch PWB.
2.Remove the screws (A1) x 4 pcs., to remove the gear box lid.
3.Remove the gears (A2) x 1 pc. and (A3) x 1 pc.
4.Remove the screws (A4) x 2 pcs., to remove the motor.
Caution:
Be careful so that the gear is not damaged.
(The damage gear emits noise during searching.)
(A4) x2 ø2 x5mm
CD Lid Motor
(A2) x1 | (A1) x1 | |
ø2.5 x14mm | ||
|
(A1) x2 ø2.5 x12mm
(A3) x1 | Switch PWB |
Gear Box Lid ![]() (A1) x1
(A1) x1
ø2.5 x10mm
Figure
CD MECHANISM SECTION (See Fig. | (A1) x4 | Mechanism Cover |
Perform steps 1,2 and 7 of the disassembly method to remove |
| |
|
|
the CD mechanism. (See page 10,11)
1.Remove the mechanism cover, paying attention to the pawls (A1) x 4 pcs.
2. Remove the screws (A2) x 2 pcs., to remove the shaft (A3) | (A2) x2 | |
x 1 pc. | ø2.6 x6mm | |
| ||
3. Remove the stop washer (A4) x 1 pc., to remove the gear |
| |
(A5) x 1 pc. |
| |
4. Remove the pickup. |
| |
Note: | CD Mechanism | |
After removing the connector for the optical pickup from the | ||
| ||
connector, wrap the conductive aluminium foil around the |
| |
front end of connector remove to protect the optical pickup |
| |
from electrostatic damage. | Shaft | |
| ||
| (A3) x1 |
Gear (A5) x1
Stop Washer (A4) x1
Pickup unit
Figure
– 12 –