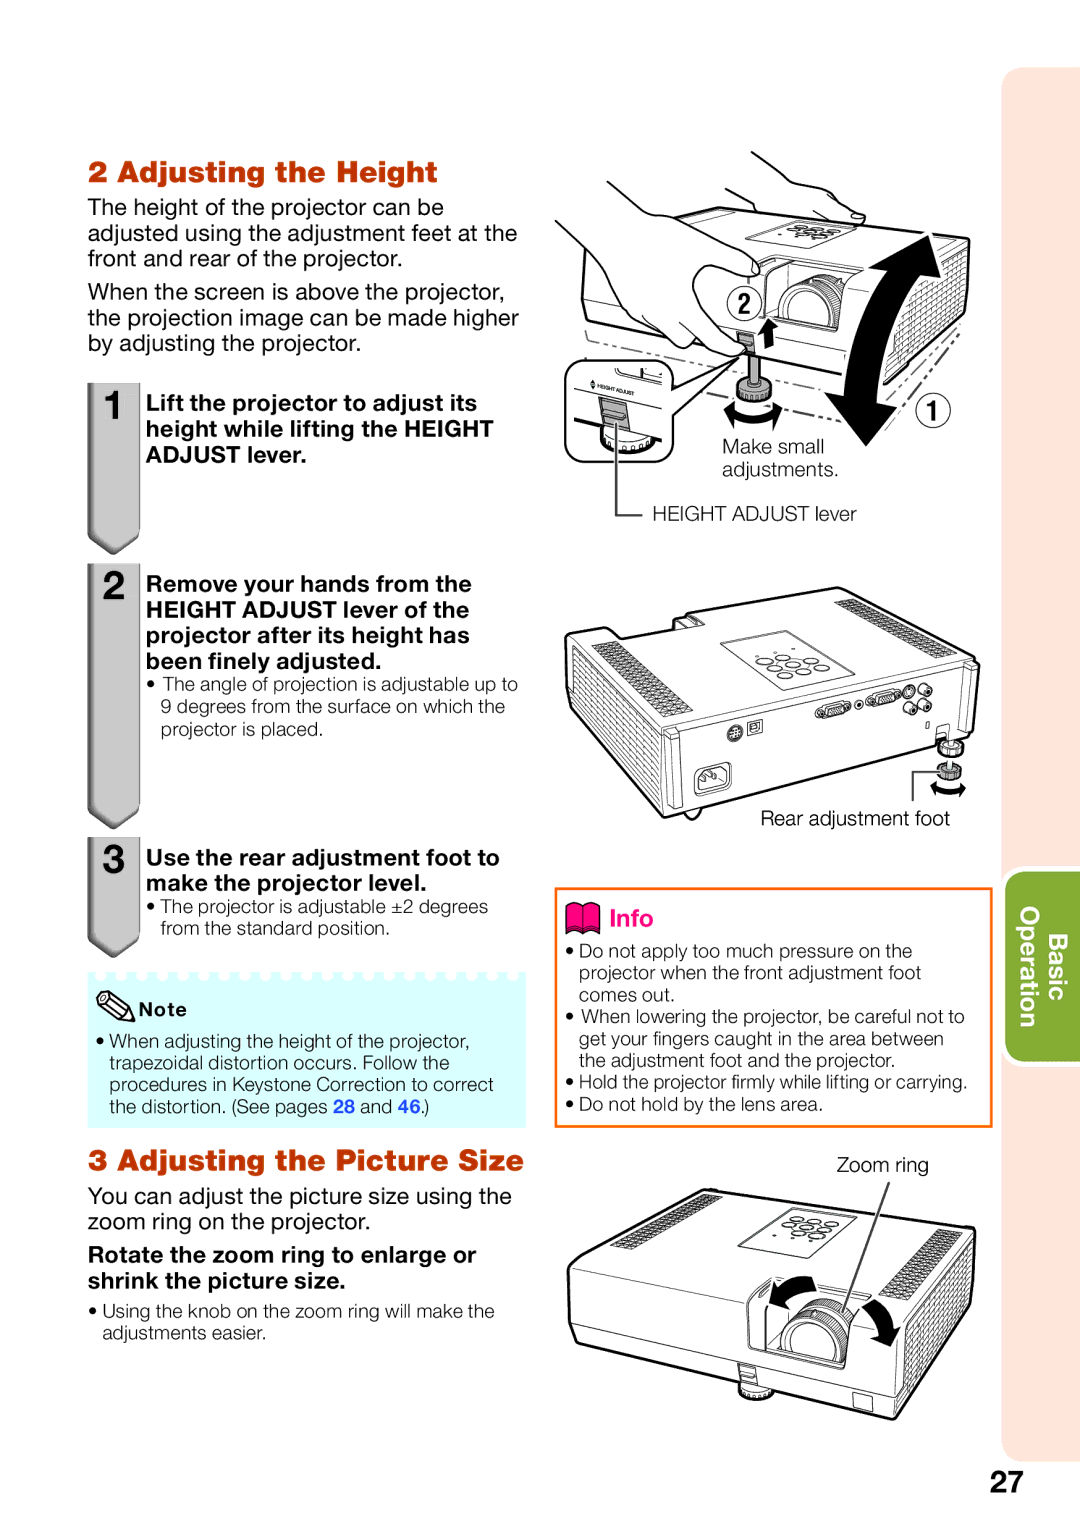
2 Adjusting the Height
The height of the projector can be adjusted using the adjustment feet at the front and rear of the projector.
When the screen is above the projector, the projection image can be made higher by adjusting the projector.
1![]()
![]() Lift the projector to adjust its height while lifting the HEIGHT ADJUST lever.
Lift the projector to adjust its height while lifting the HEIGHT ADJUST lever.
Make small adjustments.
HEIGHT ADJUST lever
2![]()
![]() Remove your hands from the HEIGHT ADJUST lever of the projector after its height has been finely adjusted.
Remove your hands from the HEIGHT ADJUST lever of the projector after its height has been finely adjusted.
•The angle of projection is adjustable up to 9 degrees from the surface on which the projector is placed.
3 Use the rear adjustment foot to make the projector level.
•The projector is adjustable ±2 degrees ![]() from the standard position.
from the standard position.
![]() Note
Note
•When adjusting the height of the projector, trapezoidal distortion occurs. Follow the procedures in Keystone Correction to correct the distortion. (See pages 28 and 46.)
Rear adjustment foot
 Info
Info
•Do not apply too much pressure on the projector when the front adjustment foot comes out.
•When lowering the projector, be careful not to get your fi ngers caught in the area between the adjustment foot and the projector.
•Hold the projector fi rmly while lifting or carrying.
•Do not hold by the lens area.
Basic Operation
3 Adjusting the Picture Size | Zoom ring |
You can adjust the picture size using the zoom ring on the projector.
Rotate the zoom ring to enlarge or shrink the picture size.
• Using the knob on the zoom ring will make the adjustments easier.
27