Servicing in Maintenance Base |
How to replace a prism
Procedure | To replace a prism, proceed as follows (for the tools to use, refer to page 43 |
| “Screws Overview”): |
|
|
Step | Action |
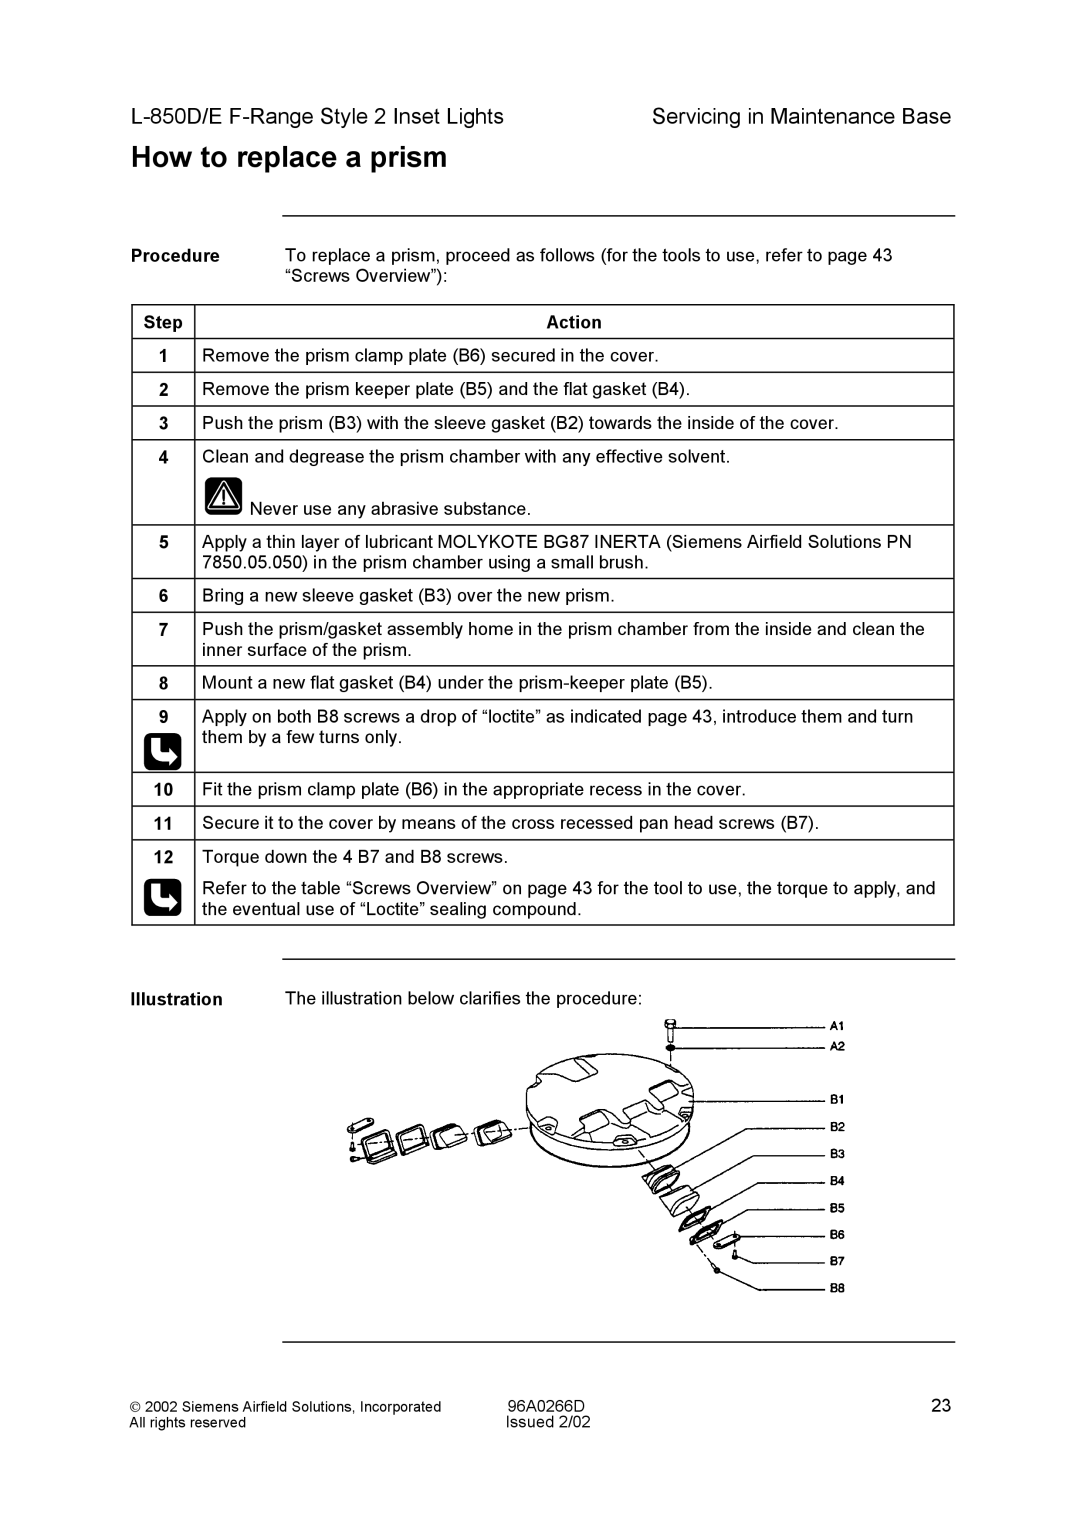
1Remove the prism clamp plate (B6) secured in the cover.
2Remove the prism keeper plate (B5) and the flat gasket (B4).
3Push the prism (B3) with the sleeve gasket (B2) towards the inside of the cover.
4Clean and degrease the prism chamber with any effective solvent.
![]() Never use any abrasive substance.
Never use any abrasive substance.
5Apply a thin layer of lubricant MOLYKOTE BG87 INERTA (Siemens Airfield Solutions PN 7850.05.050) in the prism chamber using a small brush.
6Bring a new sleeve gasket (B3) over the new prism.
7Push the prism/gasket assembly home in the prism chamber from the inside and clean the inner surface of the prism.
8Mount a new flat gasket (B4) under the
9Apply on both B8 screws a drop of “loctite” as indicated page 43, introduce them and turn
them by a few turns only.
10Fit the prism clamp plate (B6) in the appropriate recess in the cover.
11Secure it to the cover by means of the cross recessed pan head screws (B7).
12Torque down the 4 B7 and B8 screws.
Refer to the table “Screws Overview” on page 43 for the tool to use, the torque to apply, and the eventual use of “Loctite” sealing compound.
Illustration | The illustration below clarifies the procedure: |
2002 Siemens Airfield Solutions, Incorporated | 96A0266D | 23 |
All rights reserved | Issued 2/02 |
|