Basic Saw Operations
Sliding Base/Fence Extension
!Extend and use sliding base/fence when WARNING making severe bevel, severe miter or
compound cuts to provide sufficient (minimum 6”) spacing from hand to saw blade.
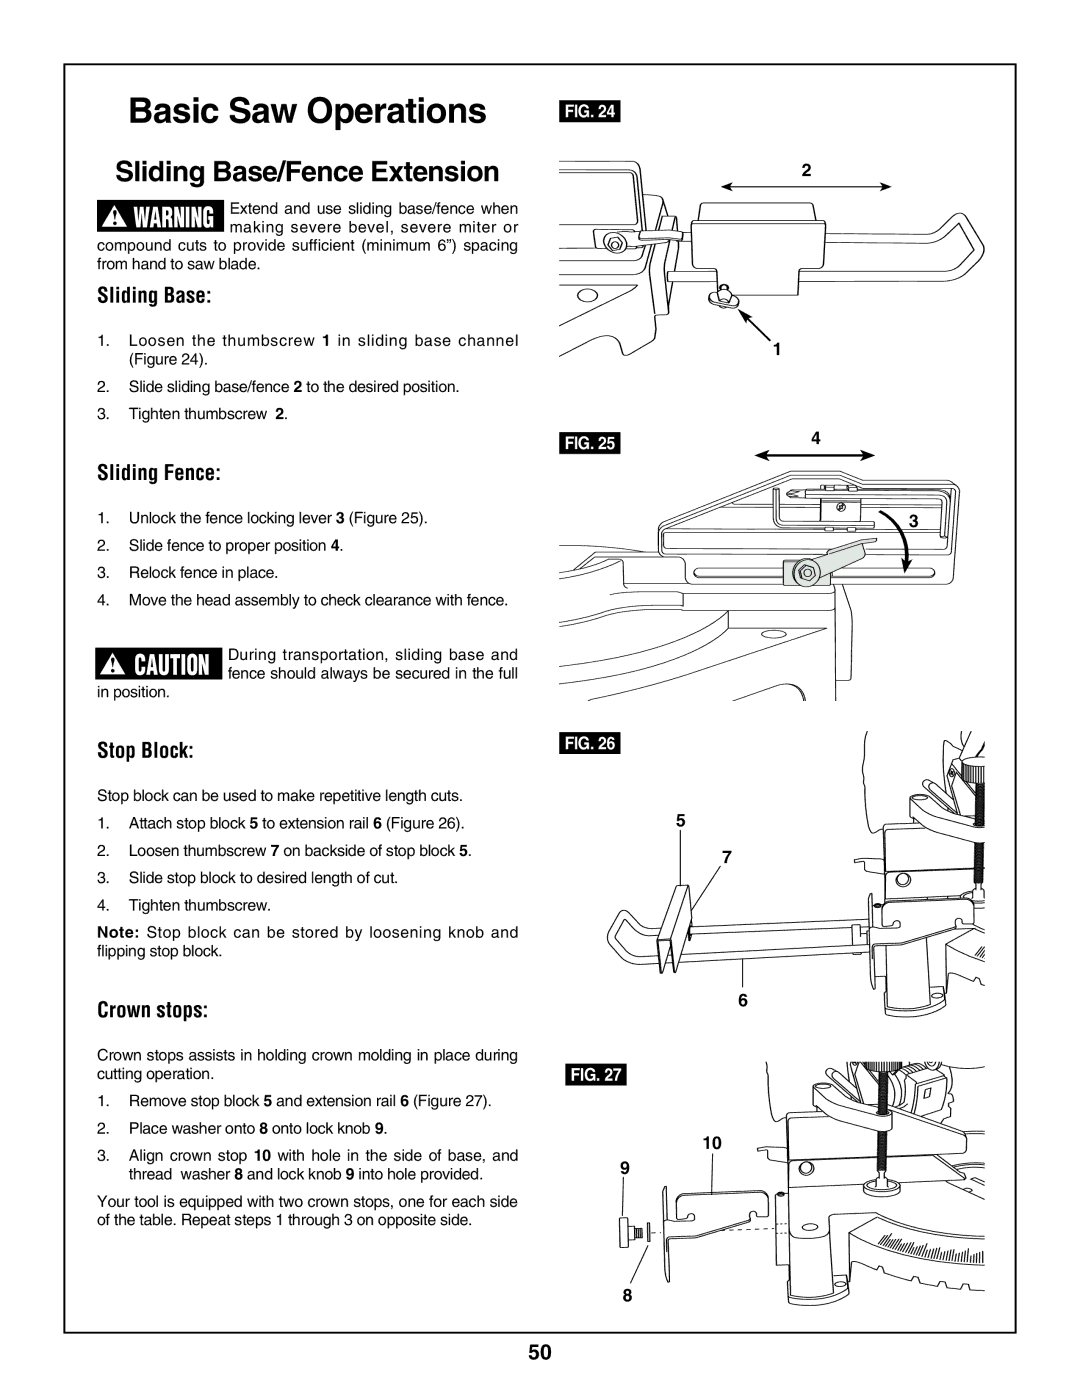
Sliding Base:
1.Loosen the thumbscrew 1 in sliding base channel (Figure 24).
2.Slide sliding base/fence 2 to the desired position.
3.Tighten thumbscrew 2.
Sliding Fence:
1.Unlock the fence locking lever 3 (Figure 25).
2.Slide fence to proper position 4.
3.Relock fence in place.
4.Move the head assembly to check clearance with fence.
!During transportation, sliding base and CAUTION fence should always be secured in the full
in position.
Stop Block:
Stop block can be used to make repetitive length cuts.
1.Attach stop block 5 to extension rail 6 (Figure 26).
2.Loosen thumbscrew 7 on backside of stop block 5.
3.Slide stop block to desired length of cut.
4.Tighten thumbscrew.
Note: Stop block can be stored by loosening knob and flipping stop block.
Crown stops:
Crown stops assists in holding crown molding in place during cutting operation.
1.Remove stop block 5 and extension rail 6 (Figure 27).
2.Place washer onto 8 onto lock knob 9.
3.Align crown stop 10 with hole in the side of base, and thread washer 8 and lock knob 9 into hole provided.
Your tool is equipped with two crown stops, one for each side of the table. Repeat steps 1 through 3 on opposite side.
FIG. 24
2
1
FIG. 25 |
| 4 |
3
FIG. 26
5
7
6
FIG. 27
10
9
8
50