10 | Sentry |
2.Intermittent Pilot System (IID).
FOR BOILERS EQUIPPED WITH HONEYWELL GAS VALVE VR8204 OR VR8304 (see figures 13 and 14).
SAFETY INFORMATION
FOR YOUR SAFETY READ BEFORE OPERATING
WARNING: If you do not follow these instructions exactly, a fire or explosion may result causing property damage, personal injury or loss of life.
A.This appliance is equipped with an ignition device which automatically lights the pilot. DO NOT try to light the pilot by hand.
B.BEFORE OPERATING smell all around the appliance area for gas. Be sure to smell next to the floor because some gas is heavier than air and will settle on the floor.
WHAT TO DO IF YOU SMELL GAS
•DO NOT try to light any appliance.
•DO NOT touch any electric switch; DO NOT use any phone in your building.
•Immediately call your gas supplier from a neighbor's phone. Follow the gas supplier's instructions.
•If you cannot reach your gas supplier, call the fire department.
C.Use only your hand to push in or turn the gas control knob. NEVER use tools. If the knob will not push in or turn by hand, DON'T try to repair it, call a qualified service techni- cian. Force or attempted repair may result in a fire or explosion.
D.DO NOT use this appliance if any part has been underwa- ter. Immediately call a qualified service technician to inspect the appliance and to replace any part of the control system and any gas control which has been underwater.
Operating Instructions
1.STOP! Read the safety information above.
2.Set the thermostat to lowest setting.
3.Turn off all electric power to the appliance.
4.This appliance is equipped with an ignition device which automatically lights the pilot. DO NOT try to light the pilot by hand.
5.Remove control access panel.
6. Turn gas control knob clockwise | till knob stops then |
continue to "OFF". DO NOT force. |
|
7.Wait five (5) minutes (longer for propane) to clear out any gas, then smell for gas, including near the floor. If you then
smell gas, STOP! Follow "B" in the safety information above on this page. If you don't smell gas, go to next step.
8. Turn gas control knob counterclockwise to "ON".
9. Replace control access panel.
10.Turn on all electric power to the appliance.
11.Set thermostat to desired setting.
12.If the appliance will not operate, follow the instructions "To Turn Off Gas To Appliance" and call your service techni- cian or gas supplier.
To Turn Off Gas To Appliance
1.Set the thermostat to lowest setting.
2.Turn off all electric power to the appliance if service is to be performed.
3.Remove control access panel.
4. | Turn gas control knob clockwise | till knob stops, |
| then continue to "OFF". DO NOT force. | |
5. | Replace control access panel. |
|
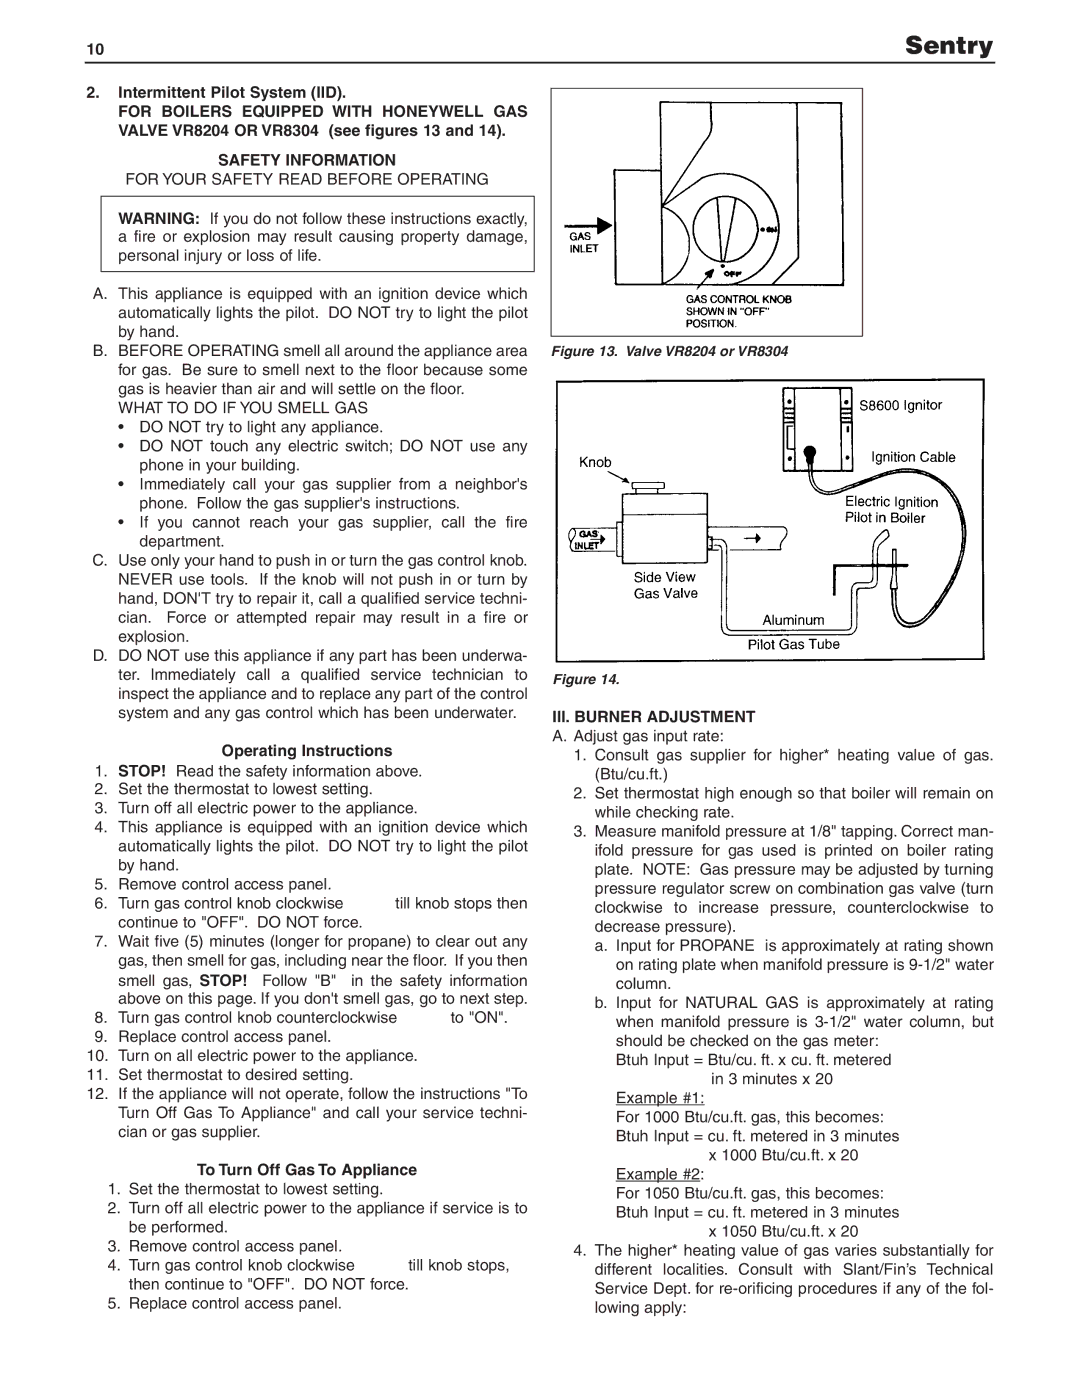
Figure 13. Valve VR8204 or VR8304
Figure 14.
III.BURNER ADJUSTMENT A. Adjust gas input rate:
1.Consult gas supplier for higher* heating value of gas. (Btu/cu.ft.)
2.Set thermostat high enough so that boiler will remain on while checking rate.
3.Measure manifold pressure at 1/8" tapping. Correct man- ifold pressure for gas used is printed on boiler rating plate. NOTE: Gas pressure may be adjusted by turning pressure regulator screw on combination gas valve (turn clockwise to increase pressure, counterclockwise to decrease pressure).
a.Input for PROPANE is approximately at rating shown on rating plate when manifold pressure is
b.Input for NATURAL GAS is approximately at rating when manifold pressure is
Btuh Input = Btu/cu. ft. x cu. ft. metered in 3 minutes x 20
Example #1:
For 1000 Btu/cu.ft. gas, this becomes: Btuh Input = cu. ft. metered in 3 minutes
x 1000 Btu/cu.ft. x 20
Example #2:
For 1050 Btu/cu.ft. gas, this becomes: Btuh Input = cu. ft. metered in 3 minutes
x 1050 Btu/cu.ft. x 20
4.The higher* heating value of gas varies substantially for different localities. Consult with Slant/Fin’s Technical Service Dept. for