Manuals
/
Smeg
/
Kitchen Appliance
/
Range
Smeg
PTS723-3
manual
Instructions for the Installer
Models:
PTS723-3
1
4
16
16
Download
16 pages
50.78 Kb
1
2
3
4
5
6
7
8
Install
Adjusting for bottled gas
Cleaning and maintenance
Precautions for Safety and Use
Using the hob
Page 4
Image 4
Page 3
Page 5
Page 4
Image 4
Page 3
Page 5
Contents
Table of Contents
1. Precautions for safety and use 2. Fitting the appliance in the top
7. Using the hob
8. Cleaning and maintenance
Precautions for Safety and Use
1. Precautions for safety and use
NEVER DISCONNECT THE PLUG BY PULLING ON THE POWER SUPPLY LEAD
NEVER ATTEMPT TO REPAIR THE APPLIANCE YOURSELF
2. Fitting the appliance in the top
Instructions for the Installer
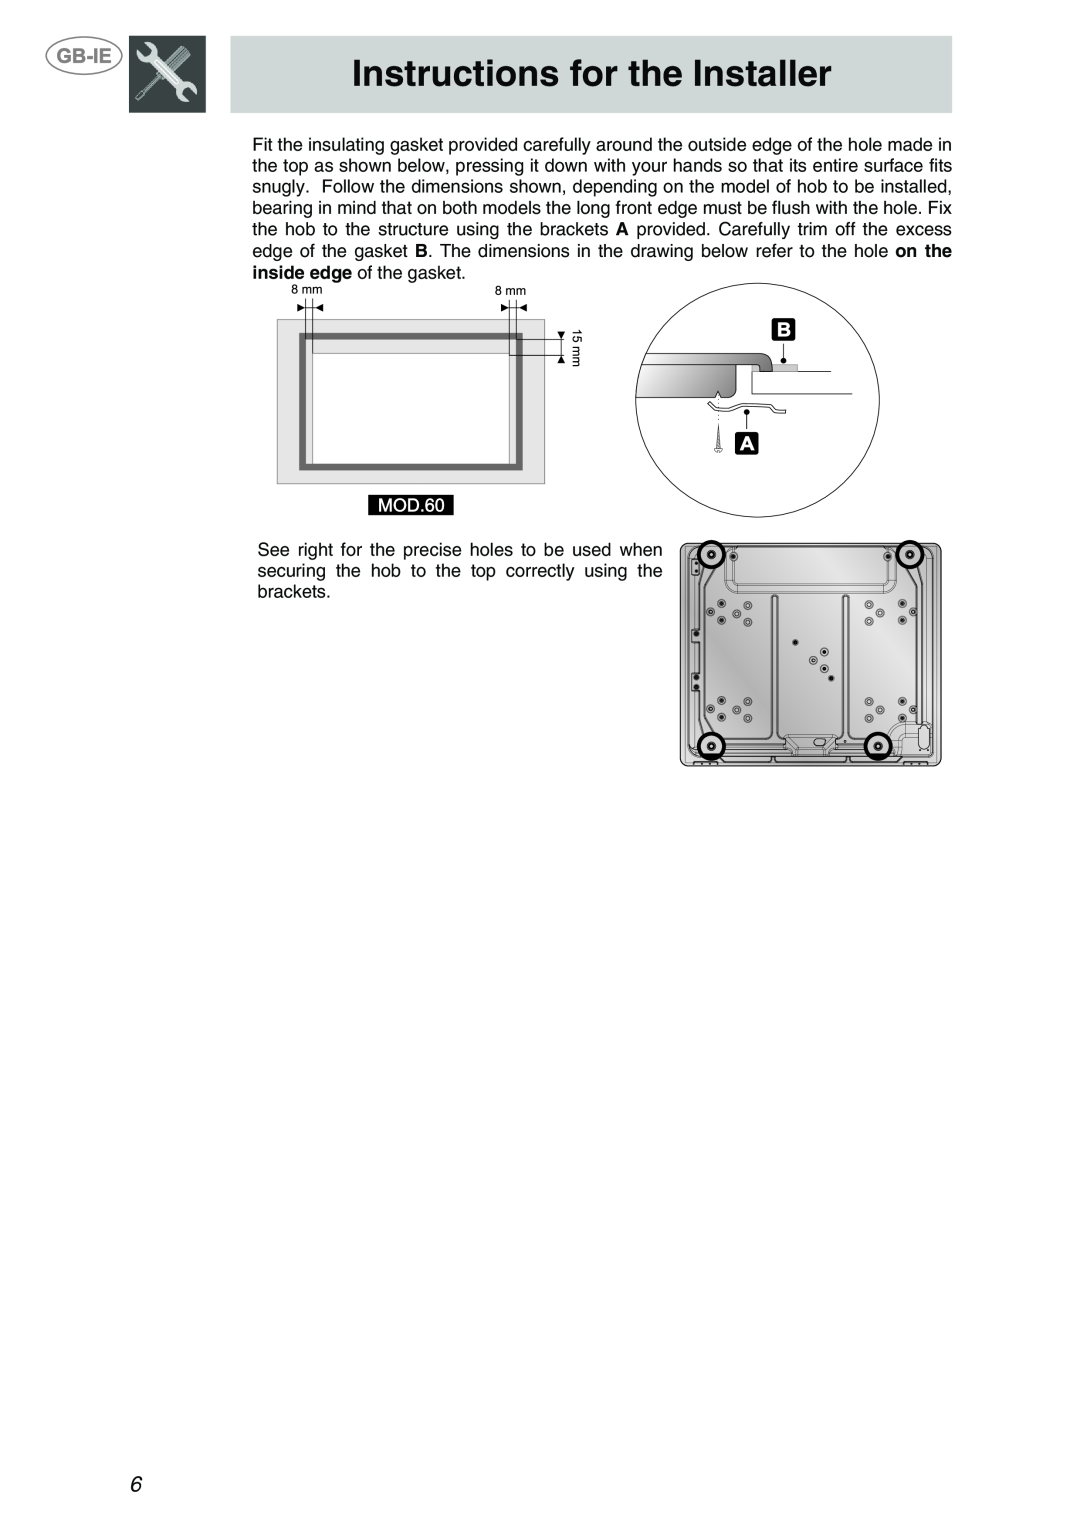
2.1 Fixing to the supporting structure
Fit the insulating gasket provided carefully around the outside edge of the hole made in the top as shown below, pressing it down with your hands so that its entire surface fits snugly. Follow the dimensions shown, depending on the model of hob to be installed, bearing in mind that on both models the long front edge must be flush with the hole. Fix the hob to the structure using the brackets A provided. Carefully trim off the excess edge of the gasket B. The dimensions in the drawing below refer to the hole on the inside edge of the gasket
3. Electrical connection
4. Gas connection
4.2 Room ventilation
4.1 Bottled gas connection
4.3 Combustion gas discharge
5. Adapting to different types of gas
5.1 Removing the hob skin
5.2 Adjusting for bottled gas
5.3 Adjusting for town gas
5.4 Adjusting for natural gas
Nominal BurnerheatBottled gas - G30/G31 30/37 mbar capacity kW
5.5 Adjusting the primary air flow
5.7 Adjusting the minimum setting for natural gas and town gas
5.8 Adjusting the minimum for bottled gas
5.6 Reassembling the hob skin
5.10 Greasing the gas taps
5.9 Hob burner layout
Burner type
6. Description of controls
Instructions for the User
6.1 The front panel
7. Using the hob
7.1 Lighting burners with safety device
7.3 Practical hints for using the burners
7.2 Positioning the griddle plate
8.1 Cleaning stainless steel
8. Cleaning and maintenance
8.2 Cleaning the components
Page
914773119/ B
Top
Page
Image
Contents